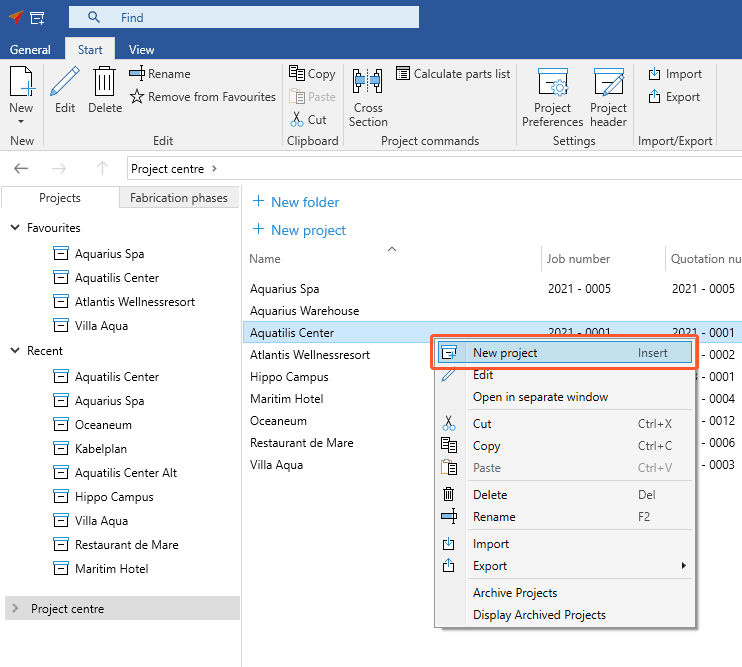
- Open the project centre.
- Right-click to open the context menu and click "New project":
- In the following window "Create New Project" you can edit the project header. Enter the project name and project data:
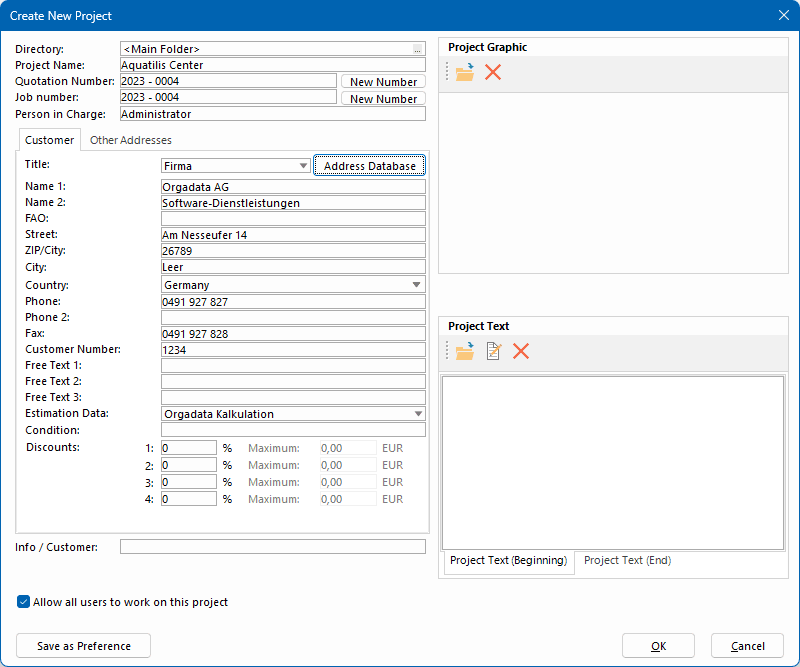
- Quotation and job numbers are optional.
- You can enter them manually.
- They can be generated automatically by clicking on "New Number".
- The text field "Person in Charge" is filled in automatically and refers to the logged-in user.
- You can enter the customer address manually or insert it from the "Address Database".
- The free texts 1 – 3 are displayed in the header of various printouts.
- Under "Condition" you can enter customer-specific terms of delivery and payment. The data you enter here will be displayed on the printouts. You can also include the following placeholders in the text:
- DATE: Determines the current date
- TOTAL: Total price
The placeholders "DATE" and "TOTAL" must be capitalised completely.
Example:
Enter the following formula in the field "Conditions":
Payable by {DATE+10} with 3% discount {TOTAL*0.03} = {TOTAL*0.97}
The following text will be displayed on printouts:
Payable until 18.02.2011 with 3% discount 9,01 EUR = 291,41 EUR
- Below the conditions, you can enter discounts that will be displayed in quotations, order confirmations and invoices, if the user authorisation "Input of offer discount at project address" is activated. Depending on the customer, you can define the discounts and conditions in the address database.
Attention!
These values are not included in the estimation!
- Deactivate the option "Allow all users to work on this project" in order to restrict the access to the user who created the project.
- On the right-hand side you can enter project graphics and project texts.
- Click "OK". After that, the project preferences open automatically.
Project header
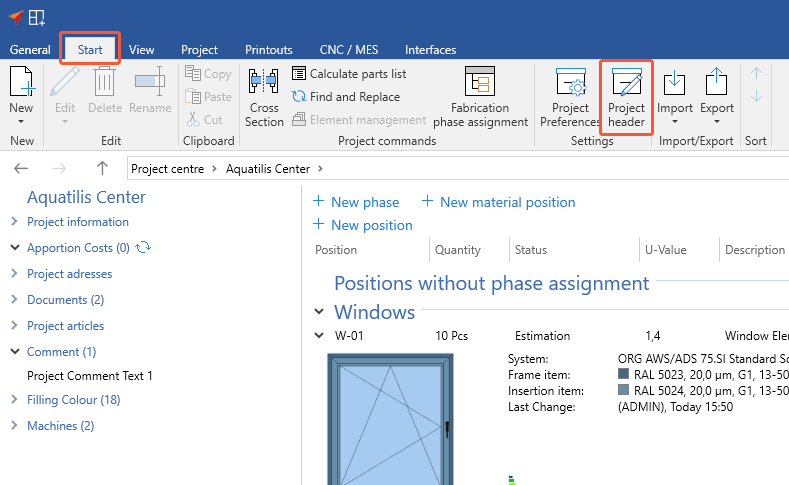
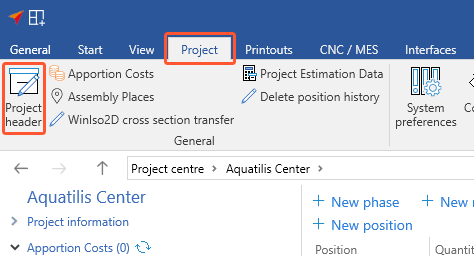
After you have created a project, you can open the project header in the project environment in two ways:
- Click on the "Start" tab and select "Project header":
- Click on the "Project" tab and select "Project header":


 Deutsch
 English (UK)
 Français
 Italiano
 Nederlands
 Čeština
 Ελληνικά