Add roller shutter
- Open a position.
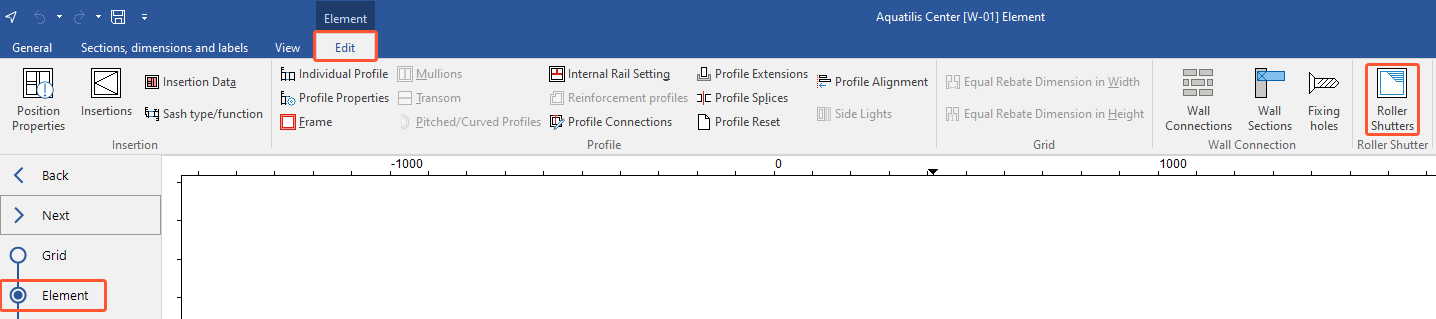
- In the "Element" section, on the "Edit" tab, click "Roller shutters":
- In the next window, you can adjust the settings for the roller shutters:
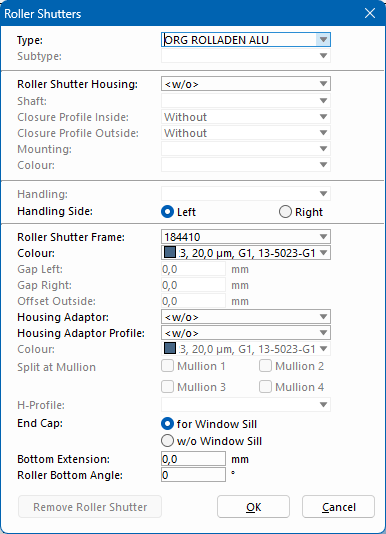
- Under "Type", select the roller shutter supplier and type.
- Select the roller shutter housing.
- Depending on the selection of the roller shutter housing, select the
- Shaft
- Closure profile inside
- Closure profile outside
- Mounting
- Colour
- Select the type of handling.
- Select the handling side.
- Select the roller shutter frame.
- Select the colour of the roller shutter frame.
- Enter values for the gap left and right.
- Enter an offset outside.
- Select a housing adaptor.
- Select a housing adaptor profile.
- Select the colour for the housing adaptor and the housing adaptor profile.
- Select the mullion for spitting the housing adaptor.
- Select an H-profile.
- For the end cap, choose between the options "for window sill" and "without window sill".
- Enter a value for the bottom extension.
- Enter a roller bottom angle.
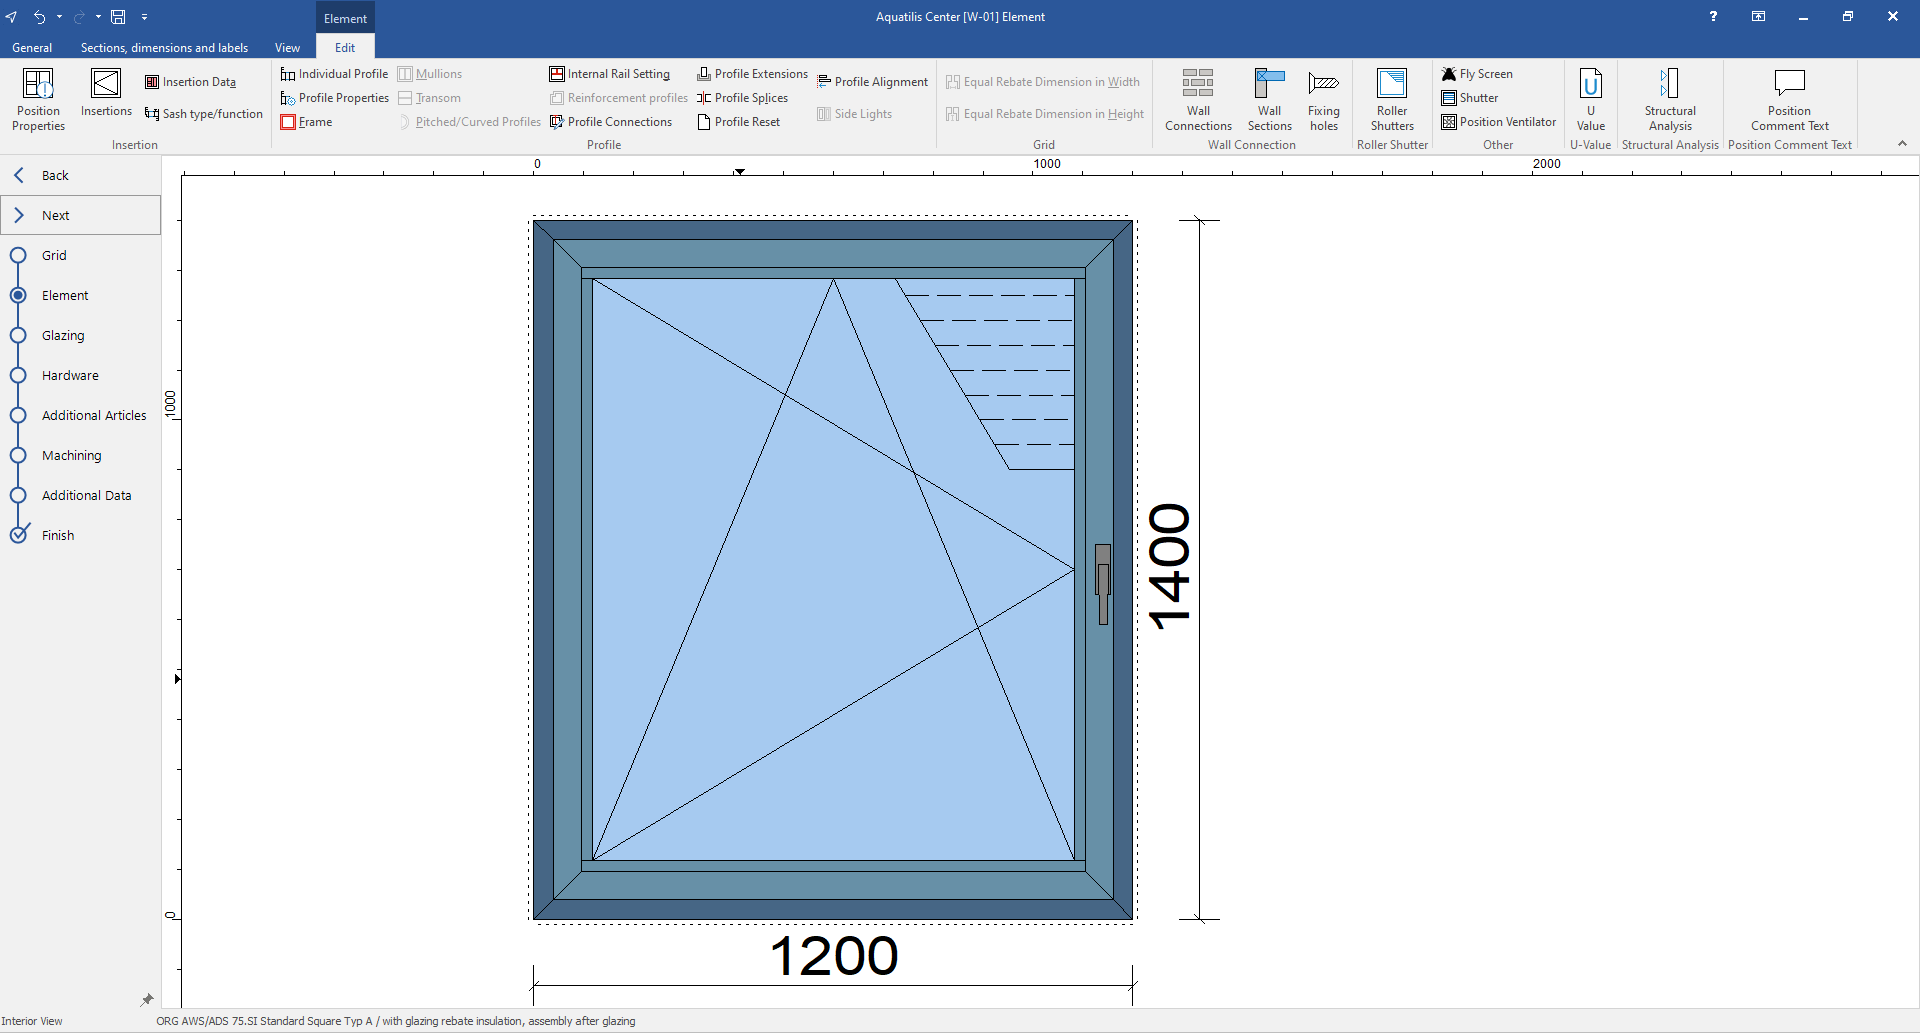
- Click "OK". In the interior view of the position drawing, the roller shutter is displayed in the upper right corner:
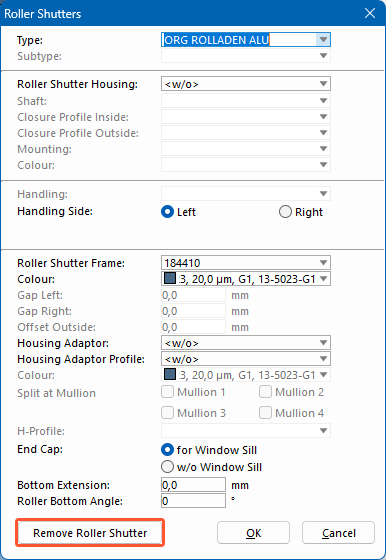
Remove roller shutter
- In the "Element" section, on the "Edit" tab, click "Roller shutters".
- In the next window, click "Remove roller shutter":
Was this article helpful to you?
Yes
No


 Deutsch
 English (UK)
 Français
 Italiano