- Select the "Project" tab and click "Profiles":
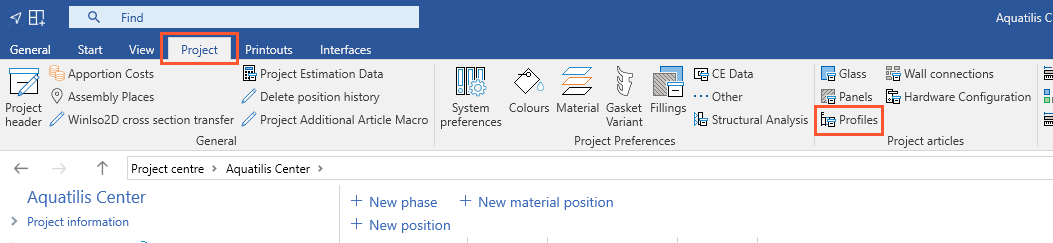
- A new window opens.
Add project profiles
Enter project profiles to estimate special profiles.
- In the upper area, enter the basic data for the profile.
- Click "Add":
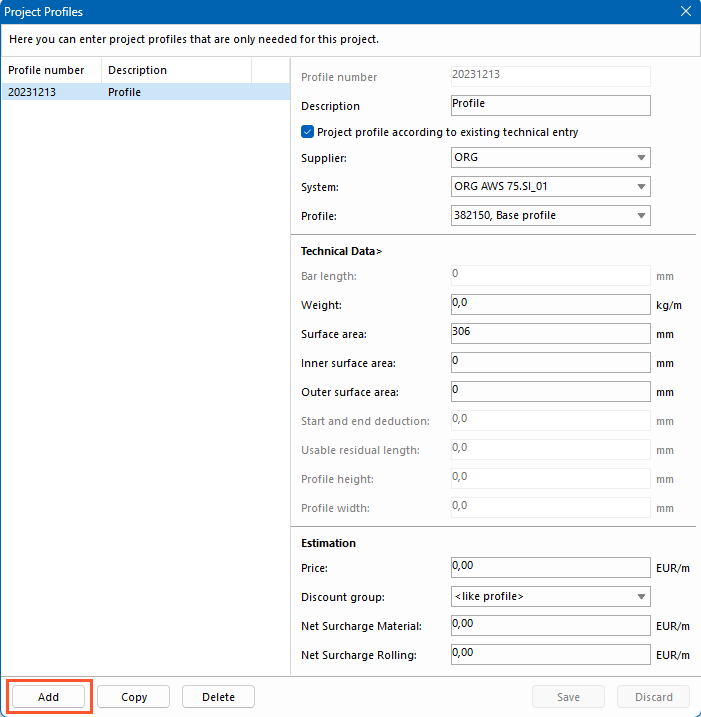
- Enter your own profile number (e.g. a number / name that is based on the original profile).
- Enter a description.
- Select the option "Project profile according to existing technical entry" to transfer the technical data of the underlying profile. This includes:
- Bar length
- Start and end deduction
- Usable residual lengths
- Profile height
- Profile width
If you deselect this function, enter the data manually.
- Select a supplier.
- Select a system.
- Select the original profile.
Technical data
- Enter the bar length.
- Enter the weight.
- Enter a value for the surface area.
- Enter a value for the inner surface area.
- Enter a value for the outer surface area.
- Enter a value for the start and end deduction.
- Enter a value for usable residual lengths.
- Enter a value for the profile height.
- Enter a value for the profile width.
Estimation
- Enter a price.
- Select a discount group.
- Enter a net surcharge for material.
- Enter a net surcharge for rolling.
Copy project profiles
- Click "Copy".
- Enter a new profile number.
- Change the following data as needed.
Delete project profiles
- Click "Delete".
- Confirm the message "Delete entry?" with "Yes".
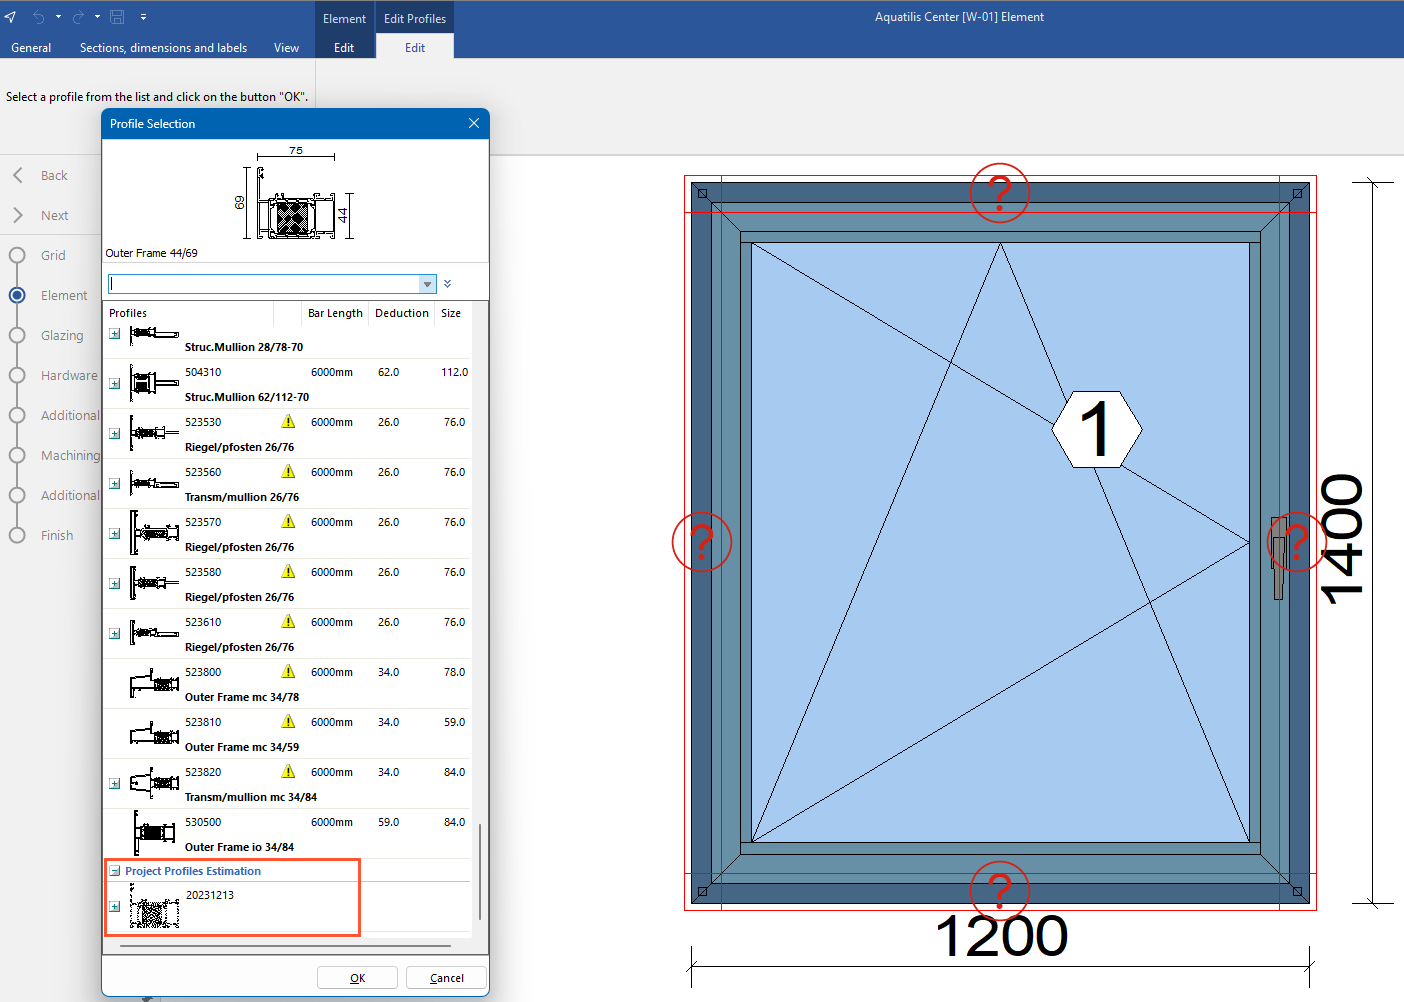
Use project profiles
- In the input of element, the project profiles are available in the profile selection under "Project profiles estimation":


 Deutsch
 English (UK)
 Français
 Italiano
 Čeština
 Ελληνικά