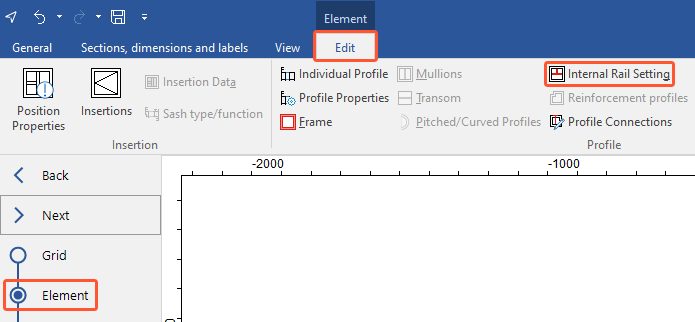
- Open the position.
- In the "Element" section, on the "Edit" tab, click "Internal rail setting":
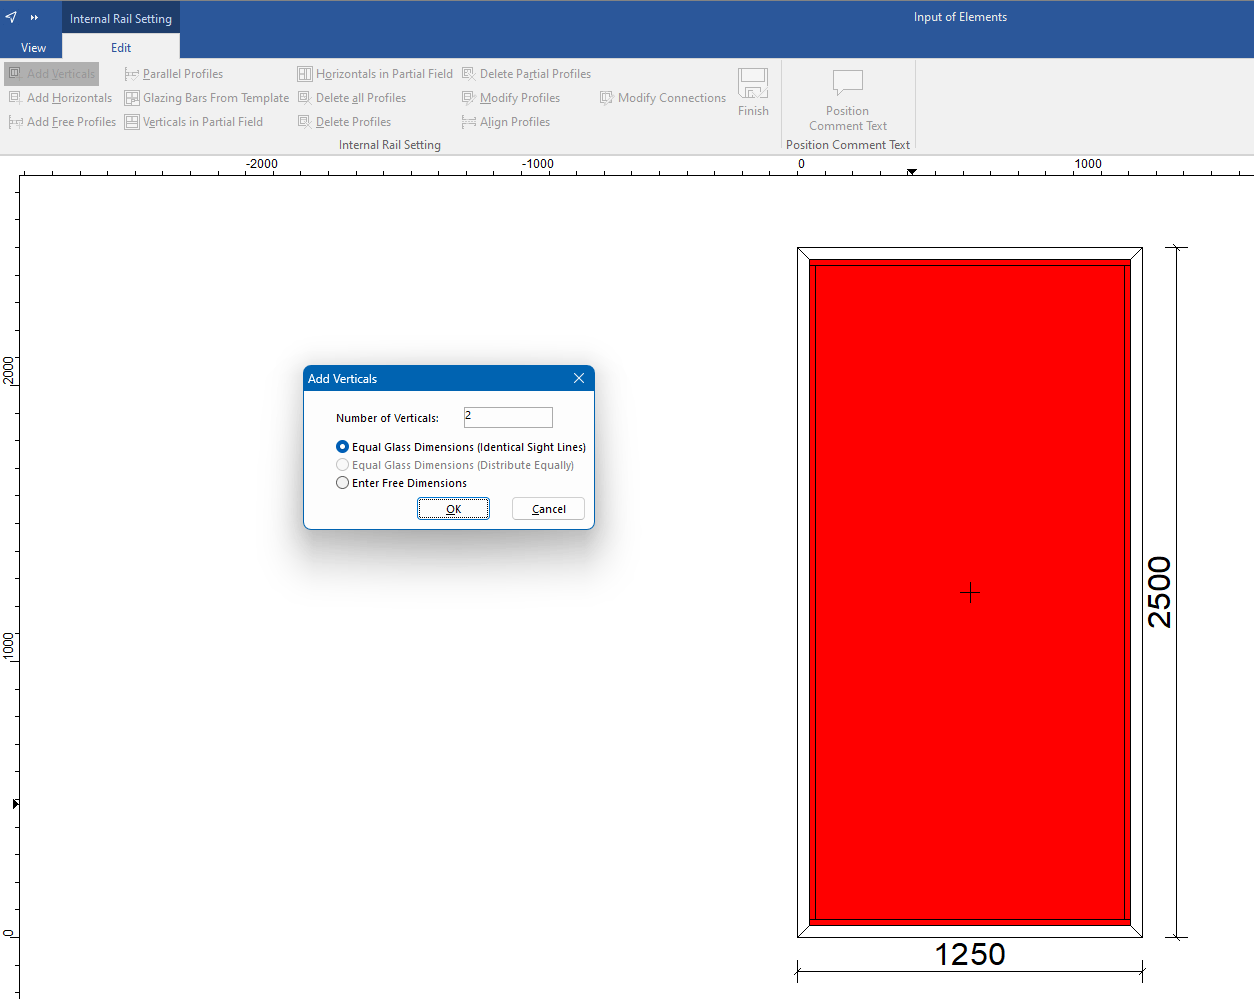
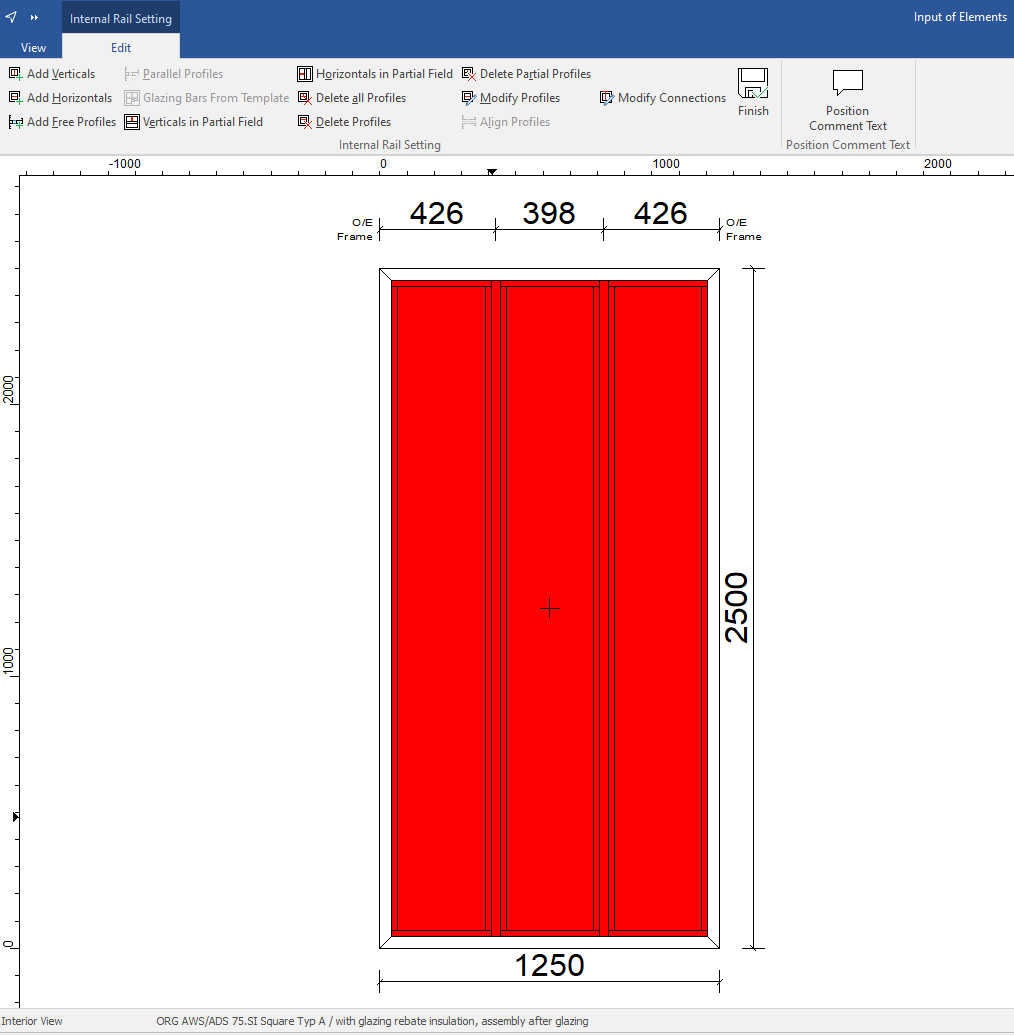
- The window for internal rails opens. Open the "Edit" tab to use the commands for internal rails:

- On the ribbon, click "Finish" to quit the internal rail setting:

View
- Open the "View" tab to select or deselect options for the position drawing:

Add verticals
- Select a field.
- On the "Edit" tab, click "Add verticals".
- Enter the number of verticals and select the dimensional basis:
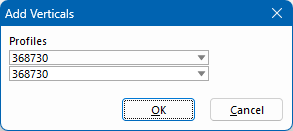
- After selecting equal glass dimensions, select the profile for the vertical and click "OK":
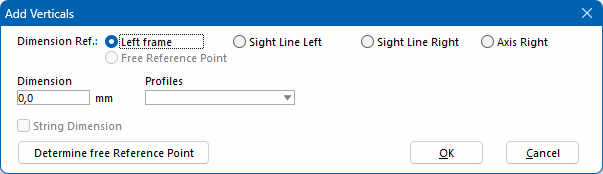
- After selecting free dimensions, select the dimension reference, the profile and enter the dimension. Click "Determine free reference point" to set the reference point in the position drawing:
- The verticals are integrated into the position drawing:
Add horizontals
- Select a field.
- On the "Edit" tab, click "Add horizontals".
- Enter the number of horizontals and determine the dimensional basis.
- After selecting equal glass dimensions, select the profile for the horizontal and click "OK".
- After selecting free dimensions, select the dimension reference, the profile and enter the dimension. Click "Determine free reference point" to set the reference point in the position drawing.
- The horizontals are integrated into the position drawing.
Add free profiles
- Select a field.
- On the "Edit" tab, click "Add free profiles".
- Click on the profile or a corner to set the start point of the internal rail:
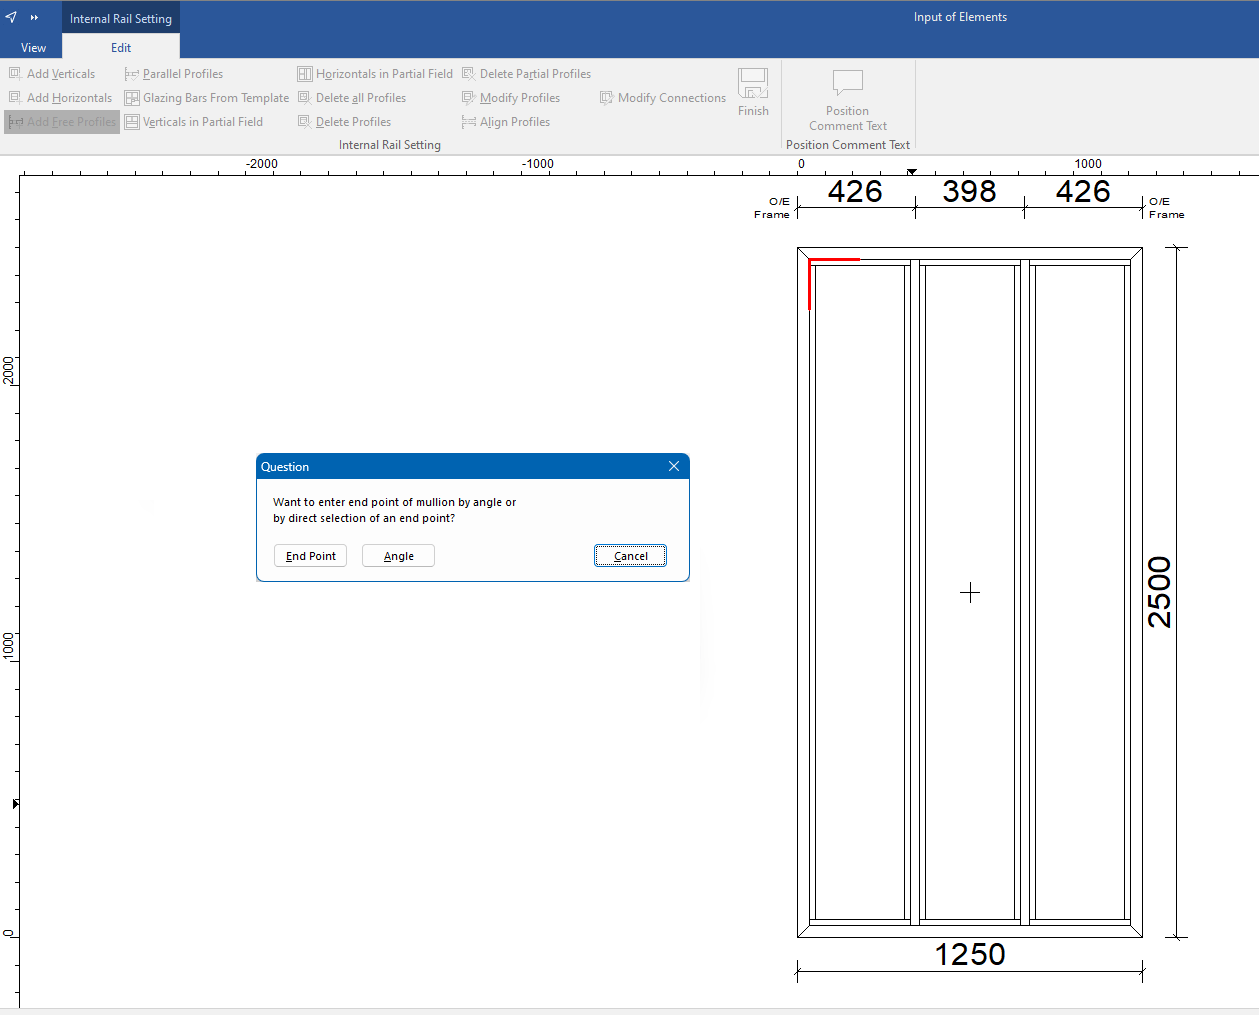
- After selecting the "end point" option in the following window, click in the position drawing to set the end point of the internal rail and, if necessary, correct the defined dimension in the following window.
- After selecting the "Angle" option, enter an angle and click "OK":
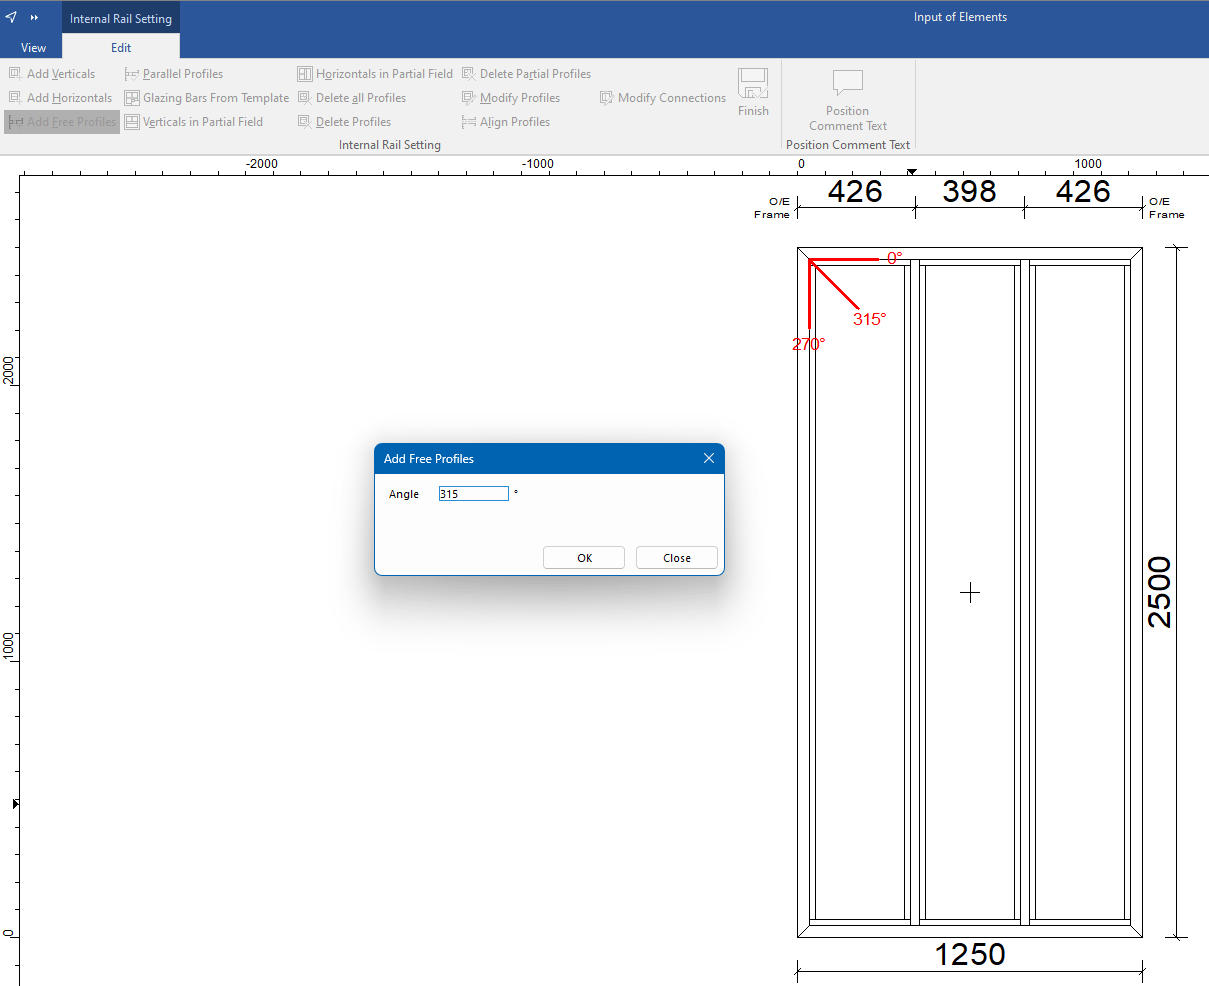
- Select a profile for the internal rail.
- Choose the orientation of the profile:
Parallel profiles
You can transfer internal rail profiles from one field to an adjacent field. The profile orientation is extended according to the axis.
- Select the field where you want the profile to be placed.
- On the "Edit" tab, click "Parallel profiles".
- Select the internal rail profile to be extended. It will be integrated into the selected field:
Glazing bars from template
- Select a field.
- On the "Edit" tab, click "Glazing bars from template".
- Choose a template:

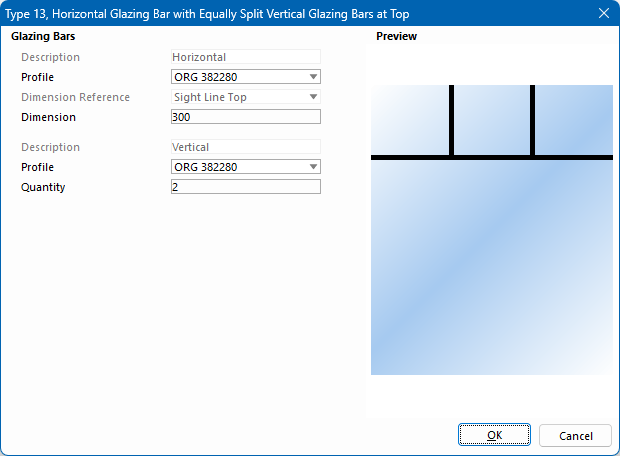
- Select the profiles and define the number and dimensions for positioning the horizontal and vertical glazing bars:
Verticals in partial field
- Select a field with internal rails.
- On the "Edit" tab, click "Verticals in partial field".
- Click the partial field where you want to add more verticals.
- Enter the number of verticals.
- After selecting equal glass dimensions, select the profile for the vertical and click "OK".
- After selecting free dimensions, select the dimension reference, the profile and enter the dimension.
- Click "OK". The verticals are integrated into the position drawing.
Horizontals in partial field
- Select a field with internal rails.
- On the "Edit" tab, click "Horizontals in partial field".
- Click the partial field where you want to add more horizontals.
- Enter the number of horizontals.
- After selecting equal glass dimensions, select the profile for the horizontal and click "OK".
- After selecting free dimensions, select the dimension reference, the profile and enter the dimension.
- Click "OK". The horizontals are integrated into the position drawing.
Delete all profiles
- Select the field from which you want to remove all internal rails.
- On the "Edit" tab, click "Delete all profiles" to remove all internal rails from the field.
Delete profiles
- Select the field from which you want to remove an internal rail.
- On the "Edit" tab, click "Delete profiles".
- Select the profile you want to remove.
Delete partial profiles
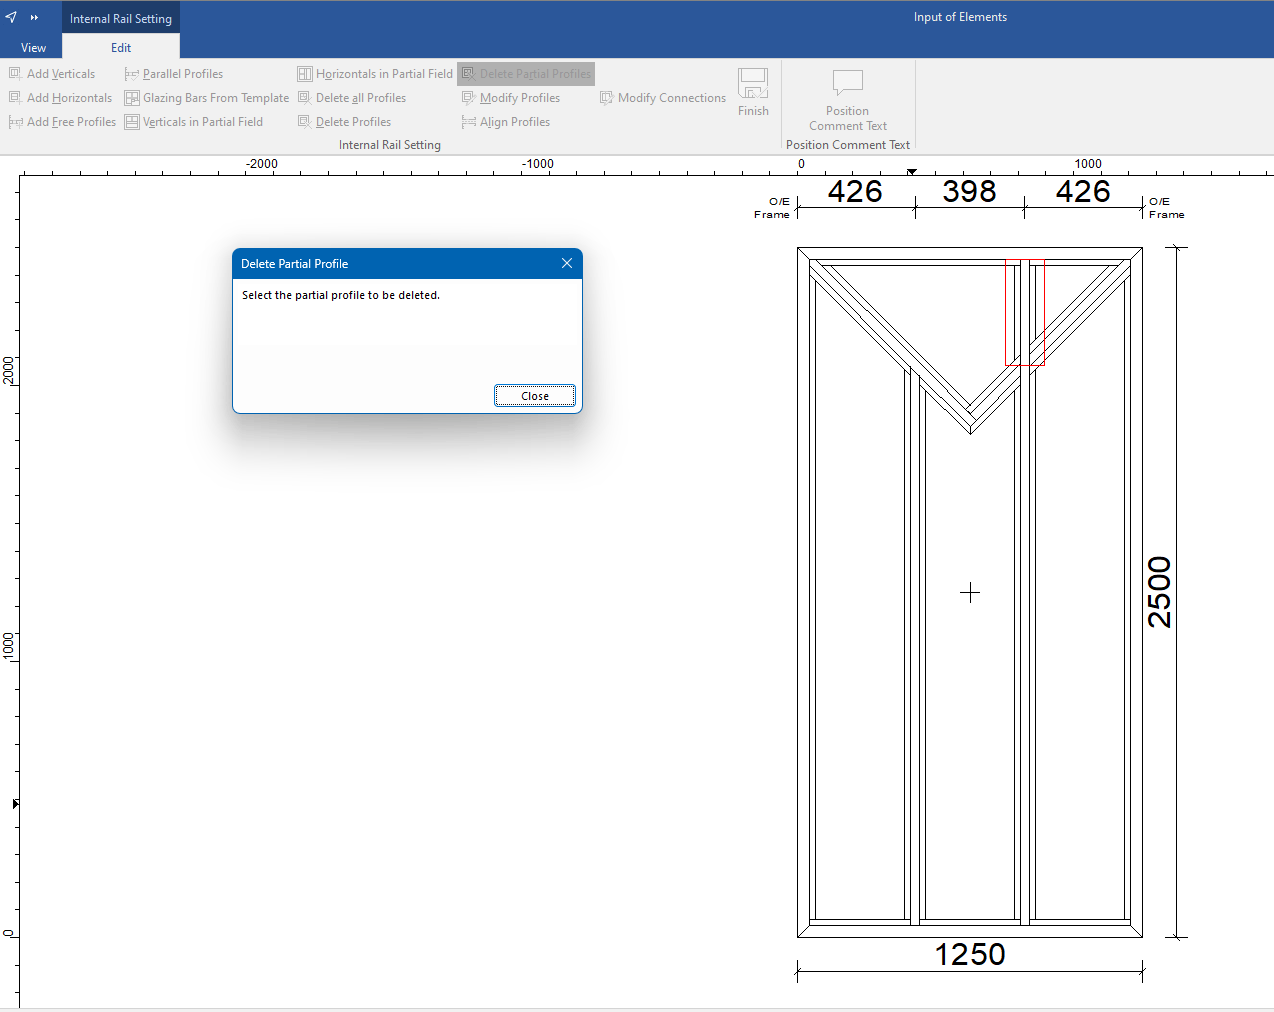
- Select the field from which you want to remove a partial profile.
- On the "Edit" tab, click "Delete partial profiles".
- Select the partial profile you want to delete:
Modify profiles
- Select a field with internal rails.
- On the "Edit" tab, click "Modify profiles".
- Select the profile you want to modify.
- Select a different profile in the profile selection.
Align profiles
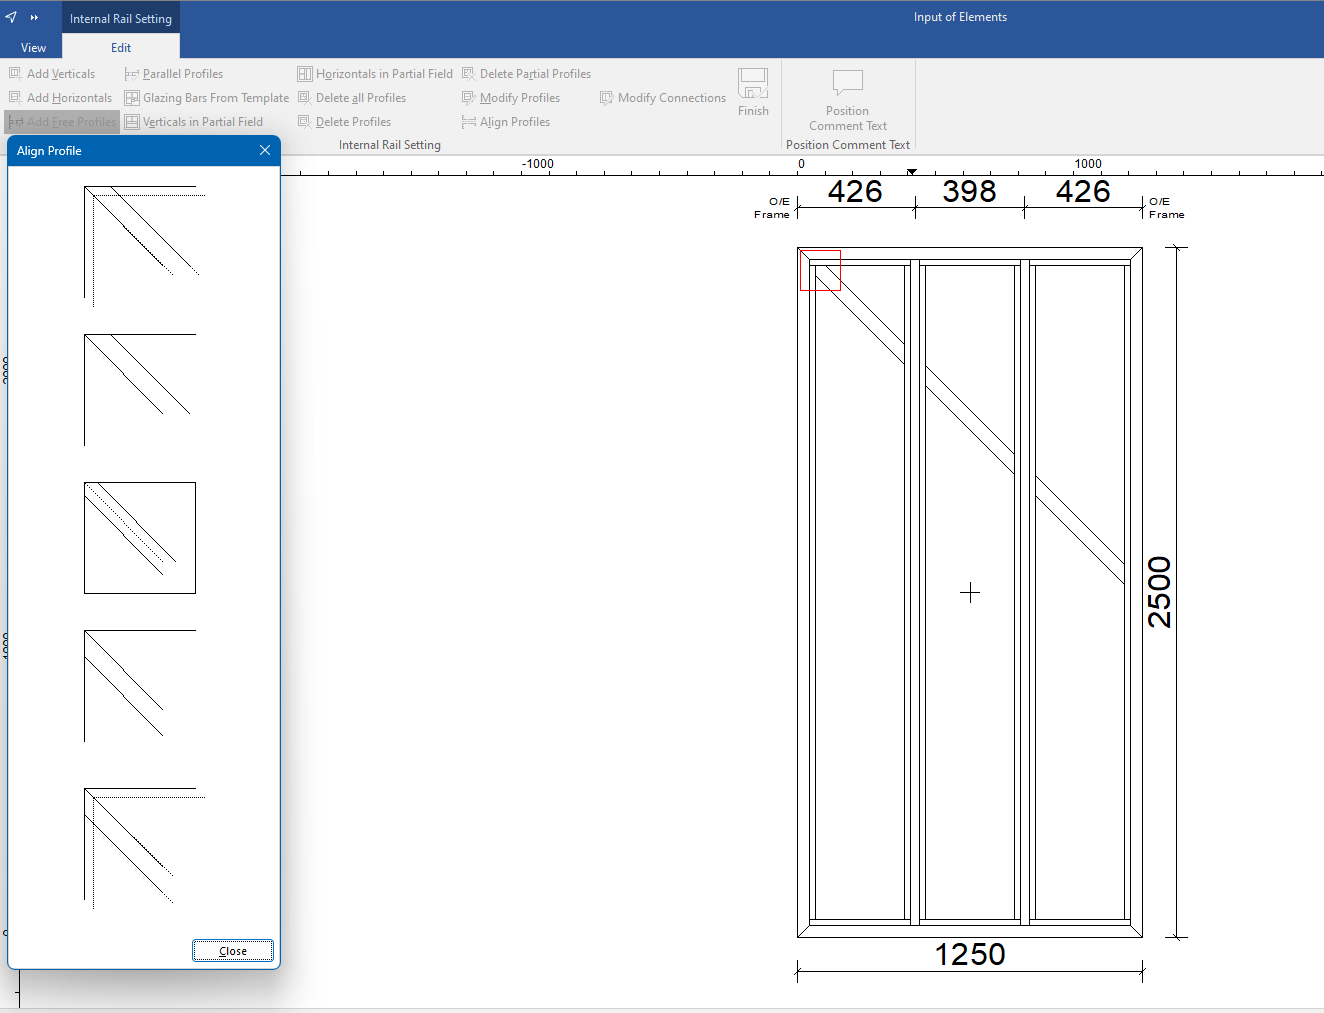
- Select a field that contains free profiles.
- On the "Edit" tab, click "Align profiles". The selectable profile end points are marked in the position drawing.
- In the position drawing, click the profile end point that you want to align.
- In the next window, select an end point orientation.
Modify connections
- Select a field that contains free profiles.
- On the "Edit" tab, click "Modify connections". The selectable connections are marked in the position drawing.
- Click the connection in the position drawing.
- In the next window, select a connection type.
See also:


 Deutsch
 English (UK)
 Français