You can save comment texts for each position, which will be displayed on the printouts if required.
- In the project environment, right-click a position.
- Under "Edit", select "Position comment text":
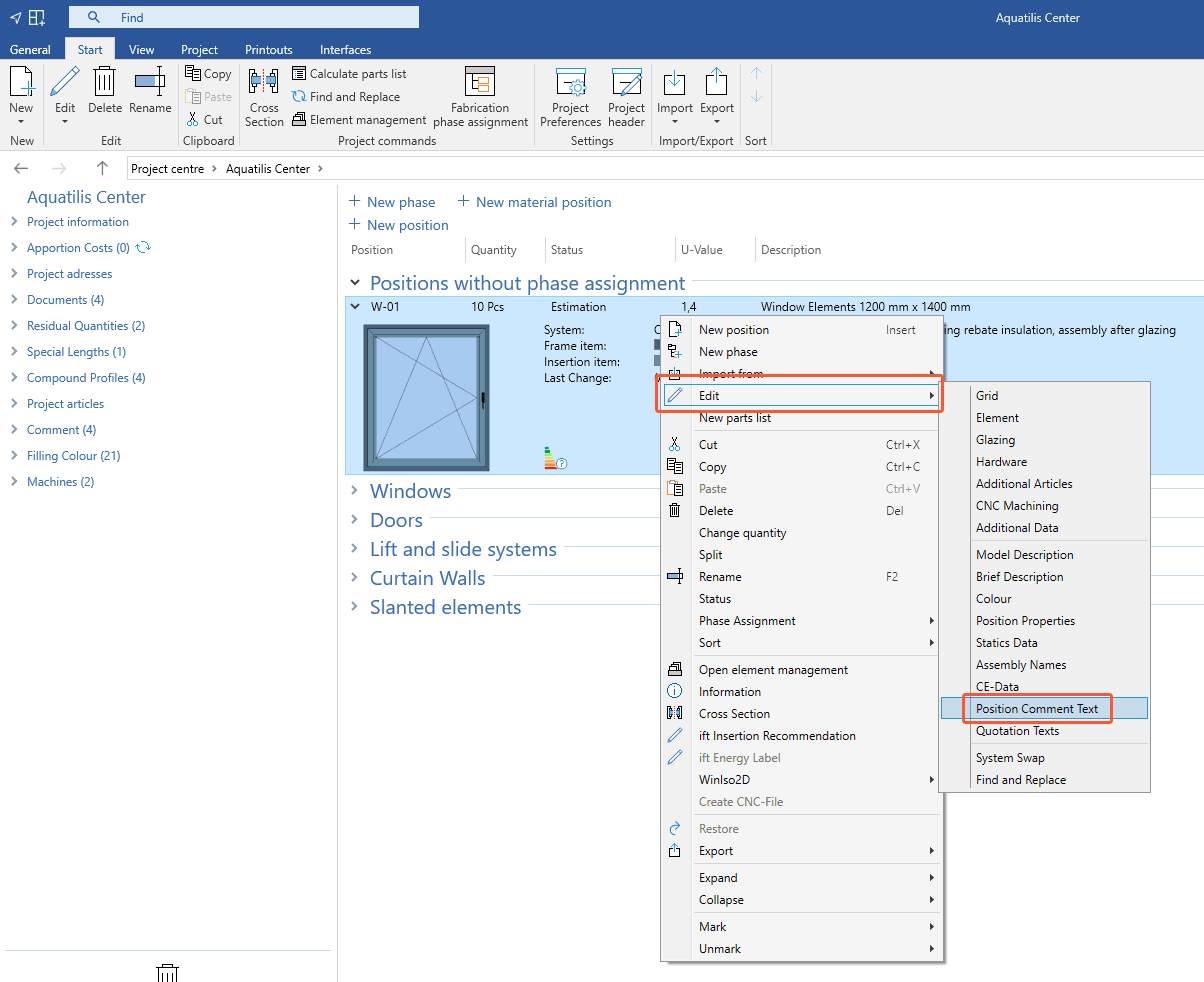
- The following window opens:
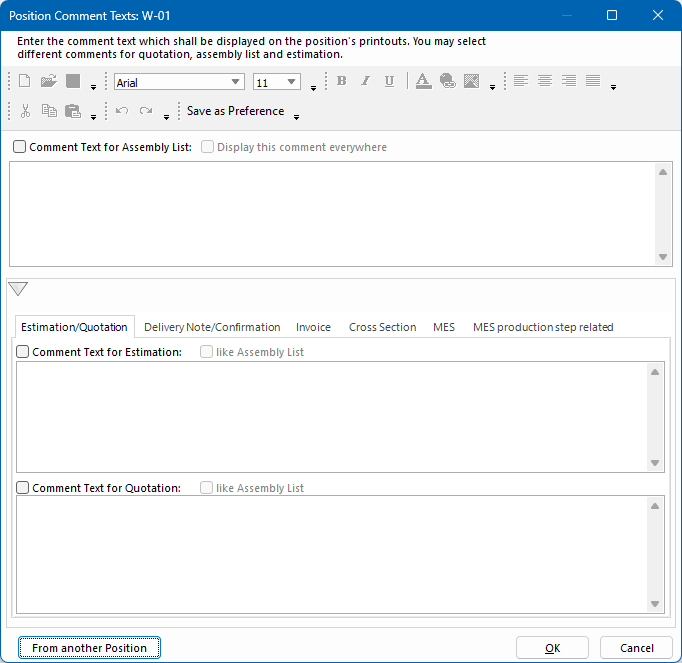
Text editor
Save and insert templates
- Click the floppy disk icon to save the entered text as a template in RTF format. Define the template location in the file dialogue.
- Click the folder icon to insert an already created template in RTF format. The text from the template is added below the text which was already entered in the text window.
- Click the paper icon to delete the previously entered text.
Font
In the text editor, all common font options are available to you. You can also add hyperlinks, add graphics, and paste text from the clipboard.
Save as preference
The "Save as preference" feature saves the selected formatting for future position comment texts that you create for this or other positions in the project.
- Highlight the text with the required formatting.
- Click "Save as preference". The text you enter in the next text box will appear directly in the saved formatting.
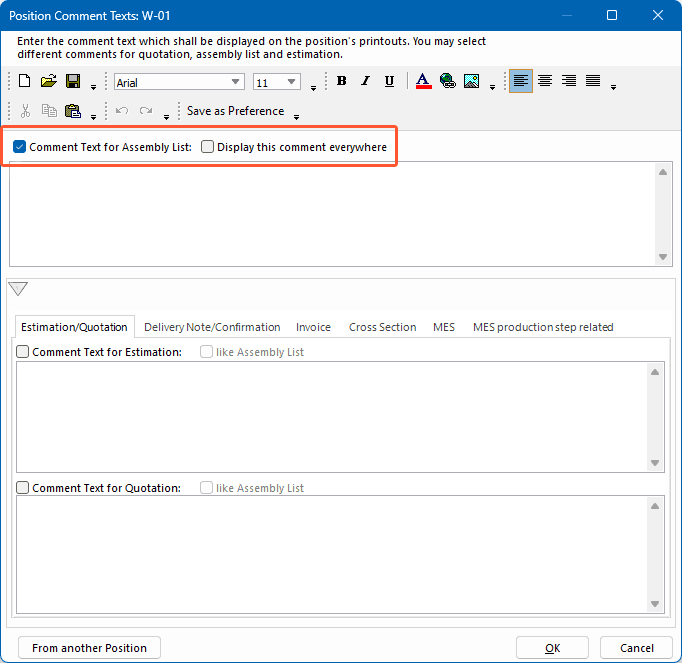
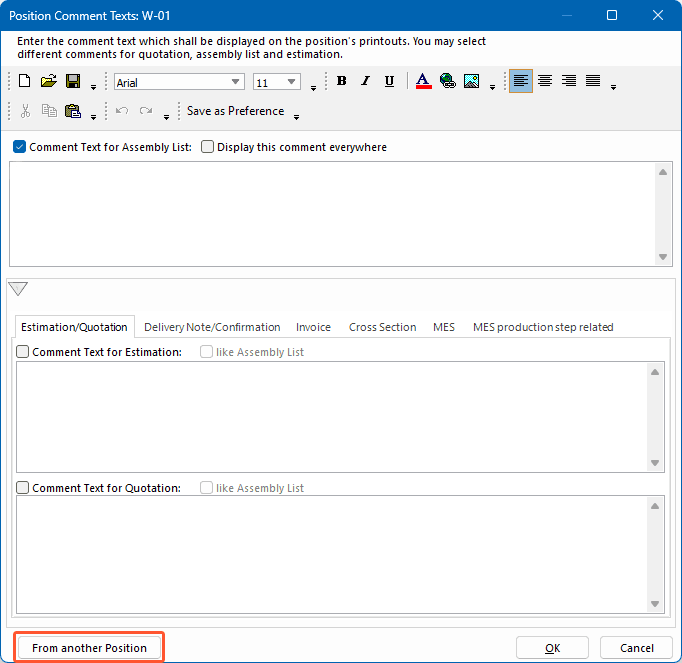
Add comment text (Assembly list)
- Select "Comment text for assembly list" to display the comment text on the assembly list:
- Select "Display this comment everywhere" to display the comment text on the following printouts:
- Estimation/Quotation
- Delivery note/Confirmation (Order confirmation)
- Invoice
- Cross section (cross section drawings and cross section plan)
- MES
- MES production step related
- Enter the text in the text box below.
Calculation/offer, delivery note/confirmation, invoice, pattern design
At the bottom of the window, use the tabs to define if the position comment text also will be displayed on other printouts:
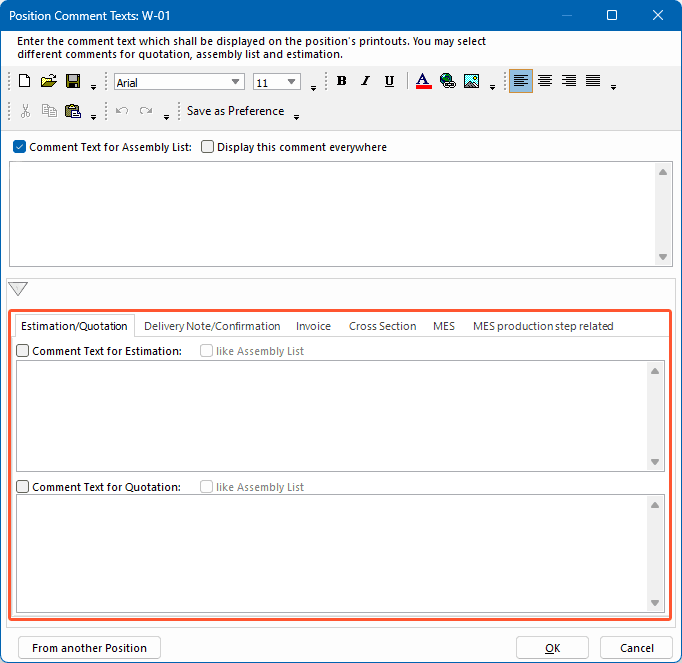
- In the respective tab of the printout, select the "Comment text for…" option to display the comment text on this printout.
- Enter the comment text in the empty text box if you want the comment text to differ from that of the assembly list.
- Select "like assembly list" if you want the entered comment text for the assembly list to be displayed on this printout as well.
MES
The comment text is displayed on all MES terminals.
MES production step related
Position comment texts can be added here, which are only displayed on the terminals of certain workstations. Thus, the work preparation or the workshop supervisor can provide important information for production:
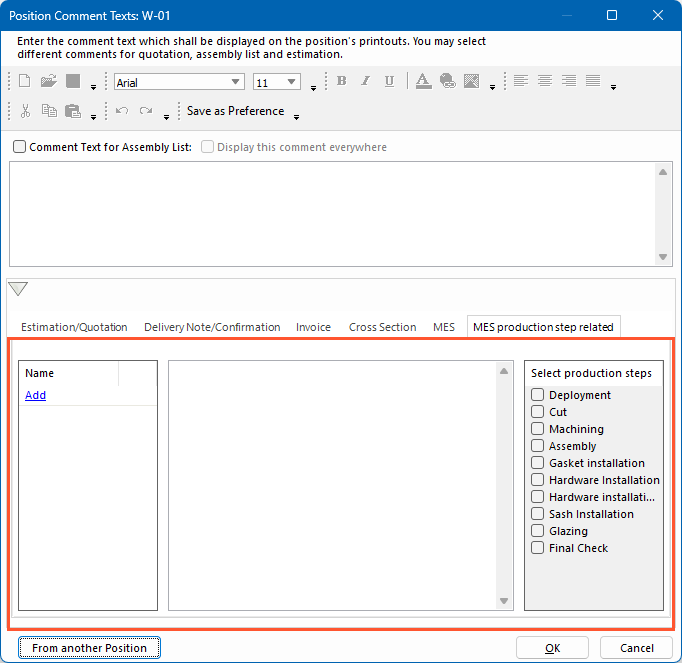
- Click "Add" in the "Name" list on the left. The entry "New comment" appears in the list.
- Double-click "New Comment" or right-click it and select "Edit" to rename the comment.
- In the centre box, enter the comment text.
- In the list on the right, select the production steps where you want the comment text to be displayed on the terminals.
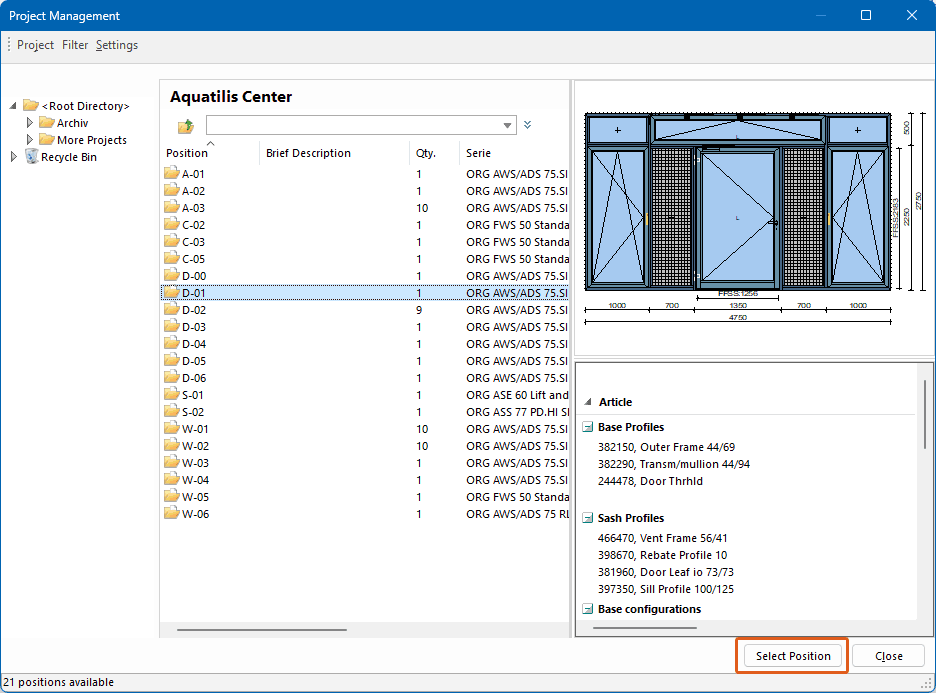
Apply comment text from another position
- Click "From another position":
- Select a project, and then select a position.
- Click "Select position" to apply the comment text from the position:


 Deutsch
 English (UK)
 Français
 Italiano
 Ελληνικά