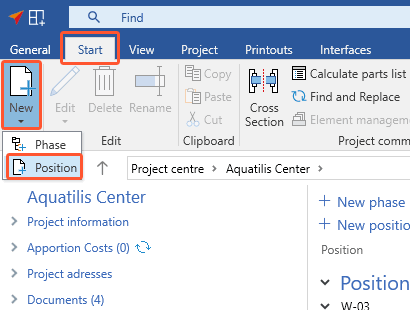
- In the "Start" tab, click "New" and select "Position":
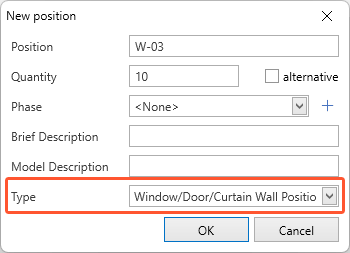
- In the following window, under "Position", enter a name for the position.
- Under "Quantity", determine the quantity of the position.
- Under "Phase", assign the position to a phase.
- Enter a brief description.
- Enter a model description.
- Under "Type", select "Window/Door/Curtain wall position" and click "OK":
- In the following window, under "Structural analysis", choose the option "Check statics" if necessary:
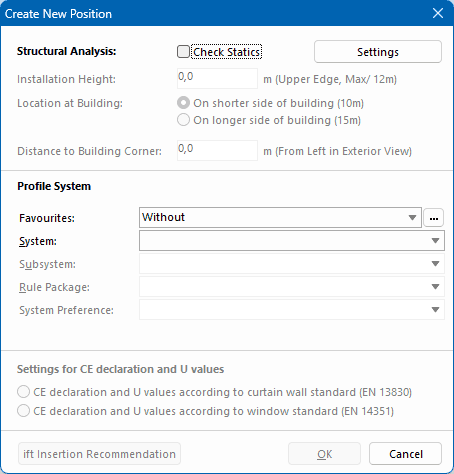
- Under "Profile system", select a system. Depending on the system you can also select a subsystem and/or a rule package.
- Under "Settings for CE declaration and U-values", select the standard on which the calculation is based.
- Click "OK" to start the input of elements. Read "Grid" for further details.
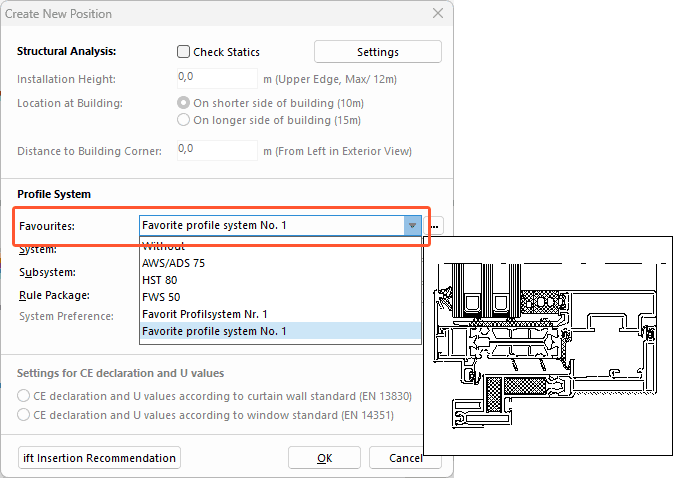
Add the profile system to favourites
For your user, you can add frequently used combinations to your favourites and apply them to every project. You can select your favourite profile system presets when you create a new position:
Add current selection to favourites
- In the "Create new position" window, first select system, subsystem and rule package.
- After that, under "Favourites", click the button with the three dots:

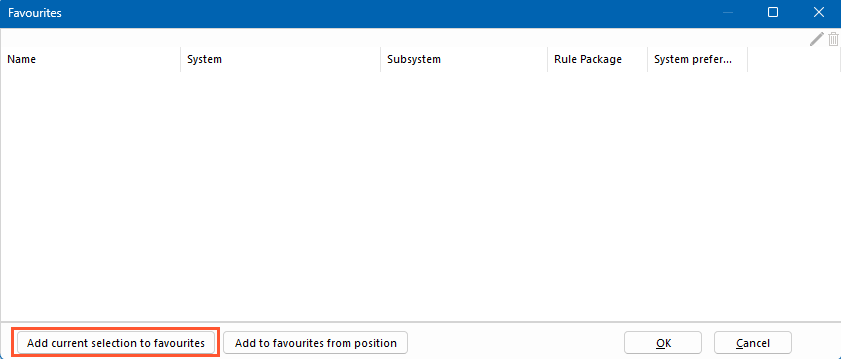
- In the following window, click "Add current selection to favourites":
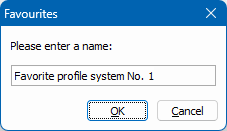
- Enter a name and confirm with OK:
- In the "Favourites" window, click the "OK" button.
Add to favourites from position
If you want to apply the profile system presets from an existing position, you can add them to your favourites.
- In the "Create new position" window, under "Favourites", click the button with the three dots:
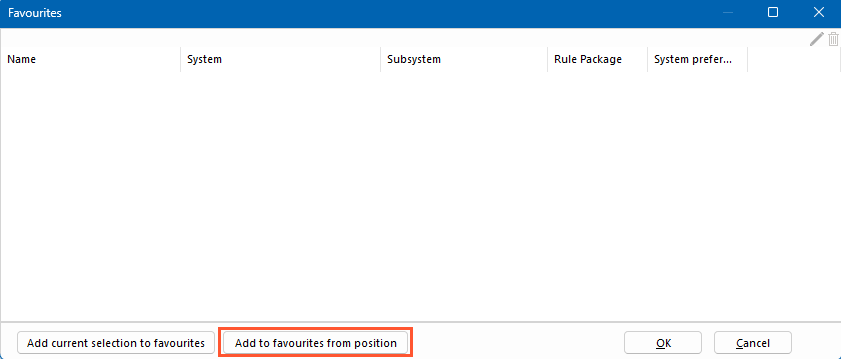
- In the following window, click the "Add to favourites from position":
- In the following window "Project Management", select a project and then select the position from which you want to apply the profile system presets.
- Enter a name and confirm with OK:
- In the "Favourites" window, click the "OK" button.


 Deutsch
 English (UK)
 Français
 Italiano
 Ελληνικά