When you create a new position, you are automatically directed to the "Hardware input" and the "Hardware configuration" after selecting the glazing:
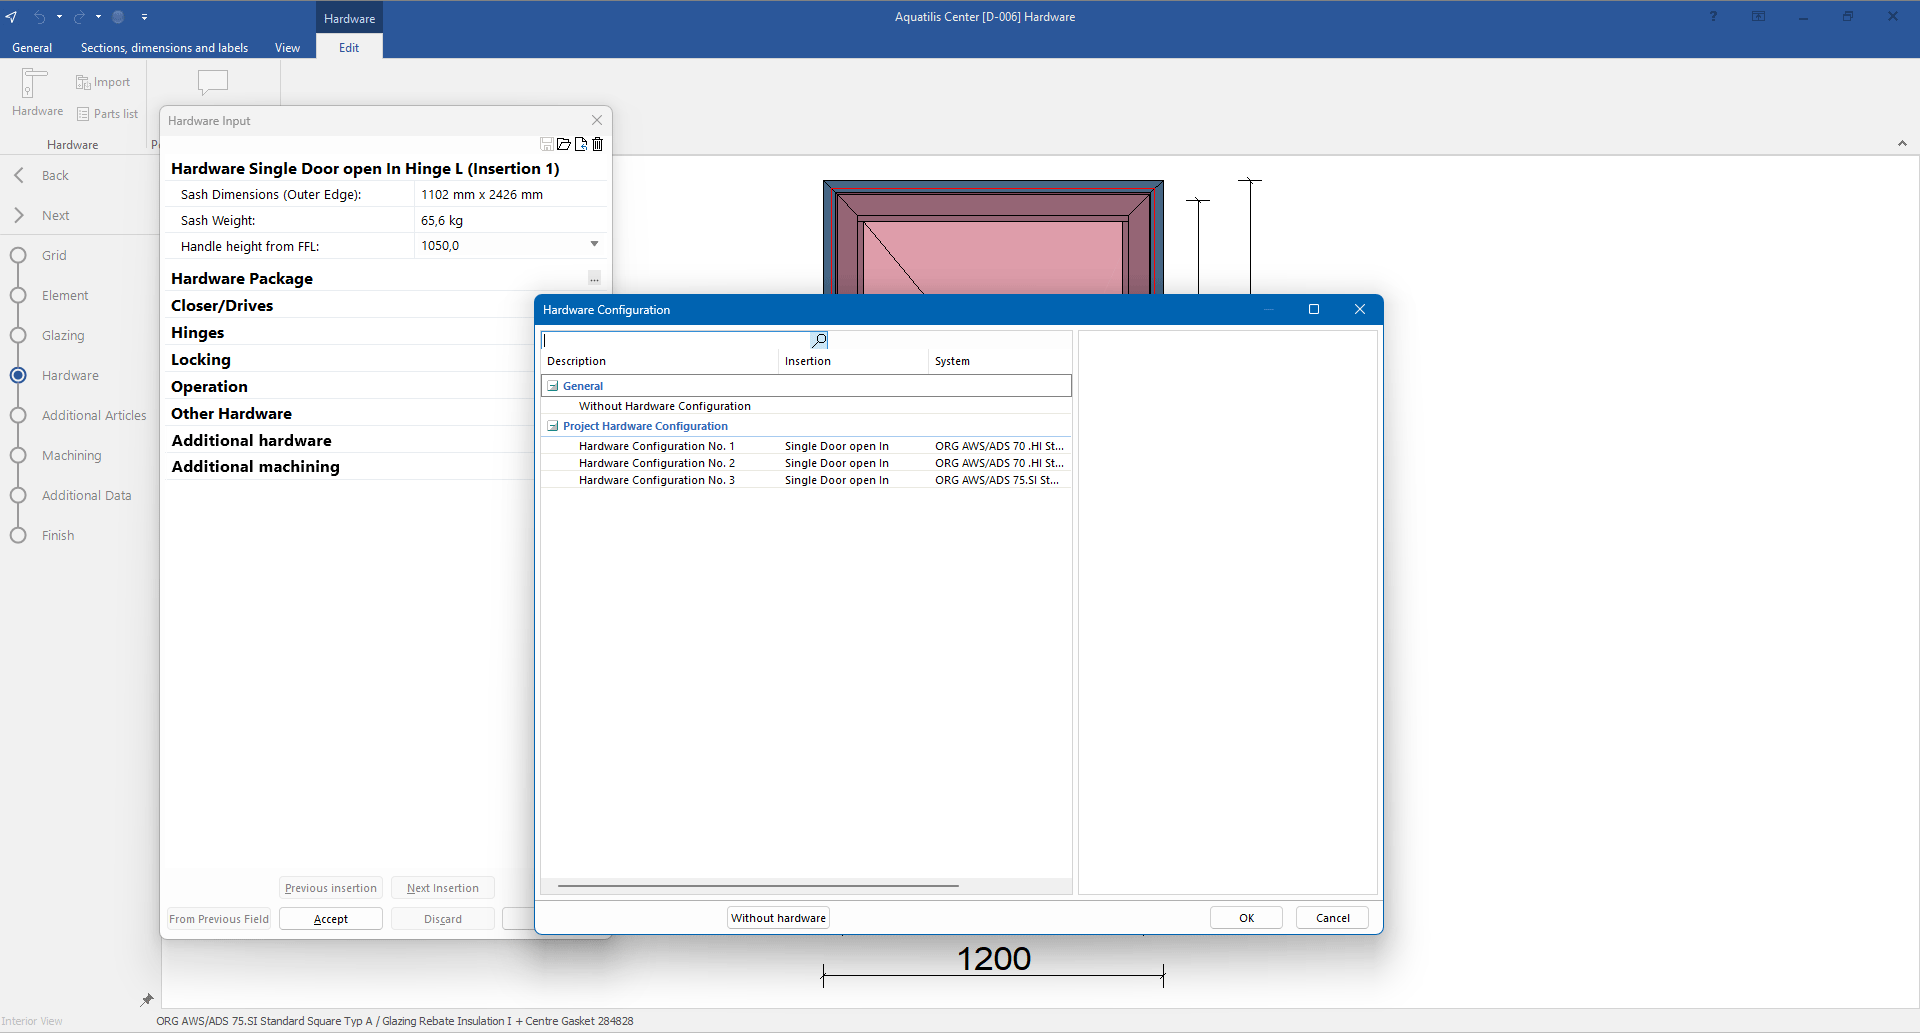
- If necessary, select a hardware configuration and click "OK".
- Select "Without hardware configuration" and click "OK" to choose the hardware manually. The hardware selection will automatically open for the following articles:
- Hardware packages
- Closer/Drives
- Hinges
- Locking
- Operation
- Additional hardware
- Additional machining
Hardware input
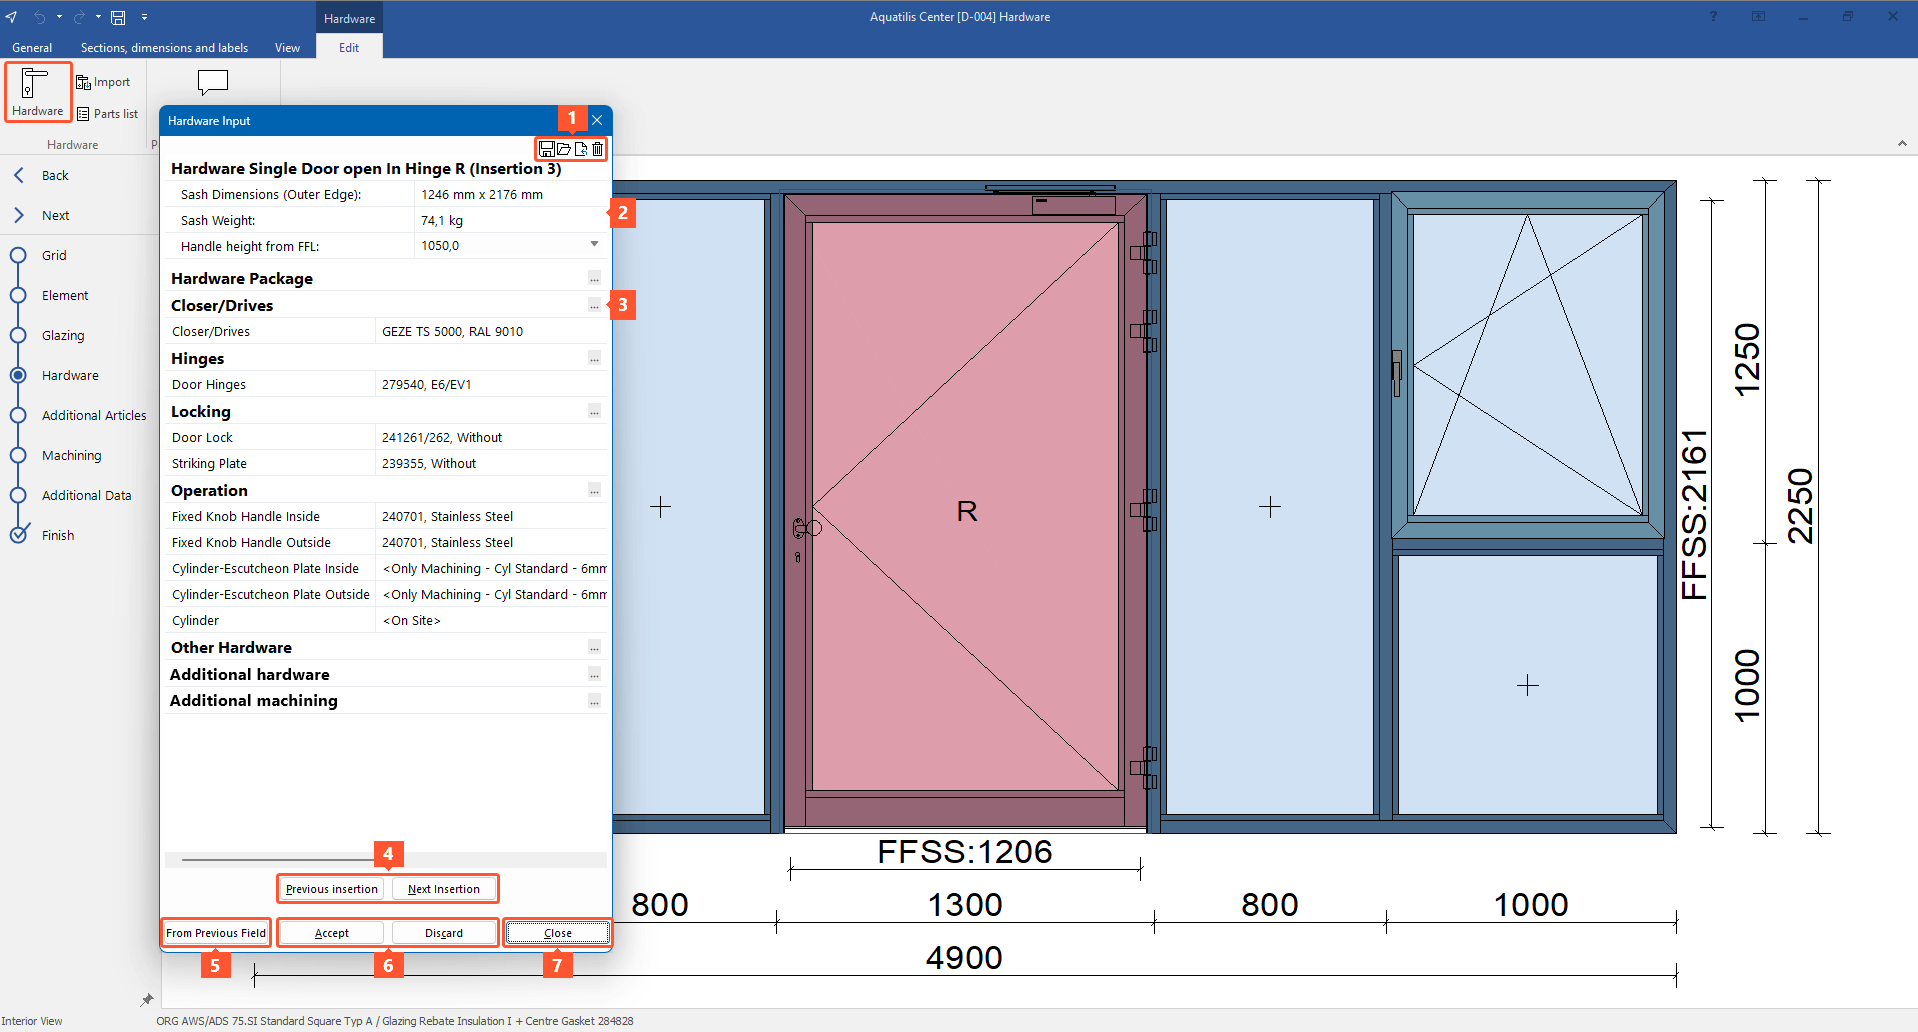
- In the "Hardware" section, on the "Edit" tab, click "Hardware". The hardware input opens for the first field:
1
- Click the floppy disk icon to save the current hardware selection as a hardware configuration.
- Click the folder icon to apply a saved hardware configuration to the selected field.
- Click "Select hardware from scratch" to delete all hardware and restart the hardware selection.
- Click "Without hardware" if you don't want the field to contain any hardware.
2 Information on the insertion type:
- Sash/Leaf dimension (outer edge)
- Sash/Leaf weight
- Handle height from FFL: Click the "Handle Height" field to select the handle height.
- Dimensions from sash/leaf outer edge
3 Double-click an article type or click the "…" icon at the end of the headings to open the hardware selection for the article type.
4 Click "Previous insertion" or "Next insertion" to select the previous or next field and select the hardware for it.
5 Click "From previous field" to apply the hardware of the previous field to the currently selected field.
6 Click "Accept" or "Discard" to apply or discard the changes.
7 Click "Close" to exit the hardware input.
Hardware selection
- In the "Hardware" section, on the "Edit" tab, click "Hardware". The hardware input opens for the first field.
- Double-click an article type or click the "…" icon at the end of the headings. The hardware selection for the article type opens:

8 Use the drop-down menus to filter the articles by fields in the database to get a clear selection.
9 Enter article numbers or descriptions in the search box to filter the selection.
10 Change the view of the article overview:
- List (Display details):
Click the column's header to sort the columns alphabetically. - Tiles (Display icons)
- Article restrictions (Consider article restrictions):
Hardware articles independent of systems are displayed
11 Right-click a hardware article to open the following commands of the context menu:
- Expand and collapse all sections of the article overview
- Switch between tile and list view
- View detailed information about the selected article
- Add the selected article to favourites (12)
12 Select an article in the article overview and click "Add to favourites". The article will then appear at the top of the article selection.
13 Click "Back" and "Next" to switch between the various input windows of the hardware selection.
14 Preview image of the article:
- Right-click the image to open the context menu with the following commands:
- Display in CAD
- Full screen mode
- Export
See also:


 Deutsch
 English (UK)
 Français