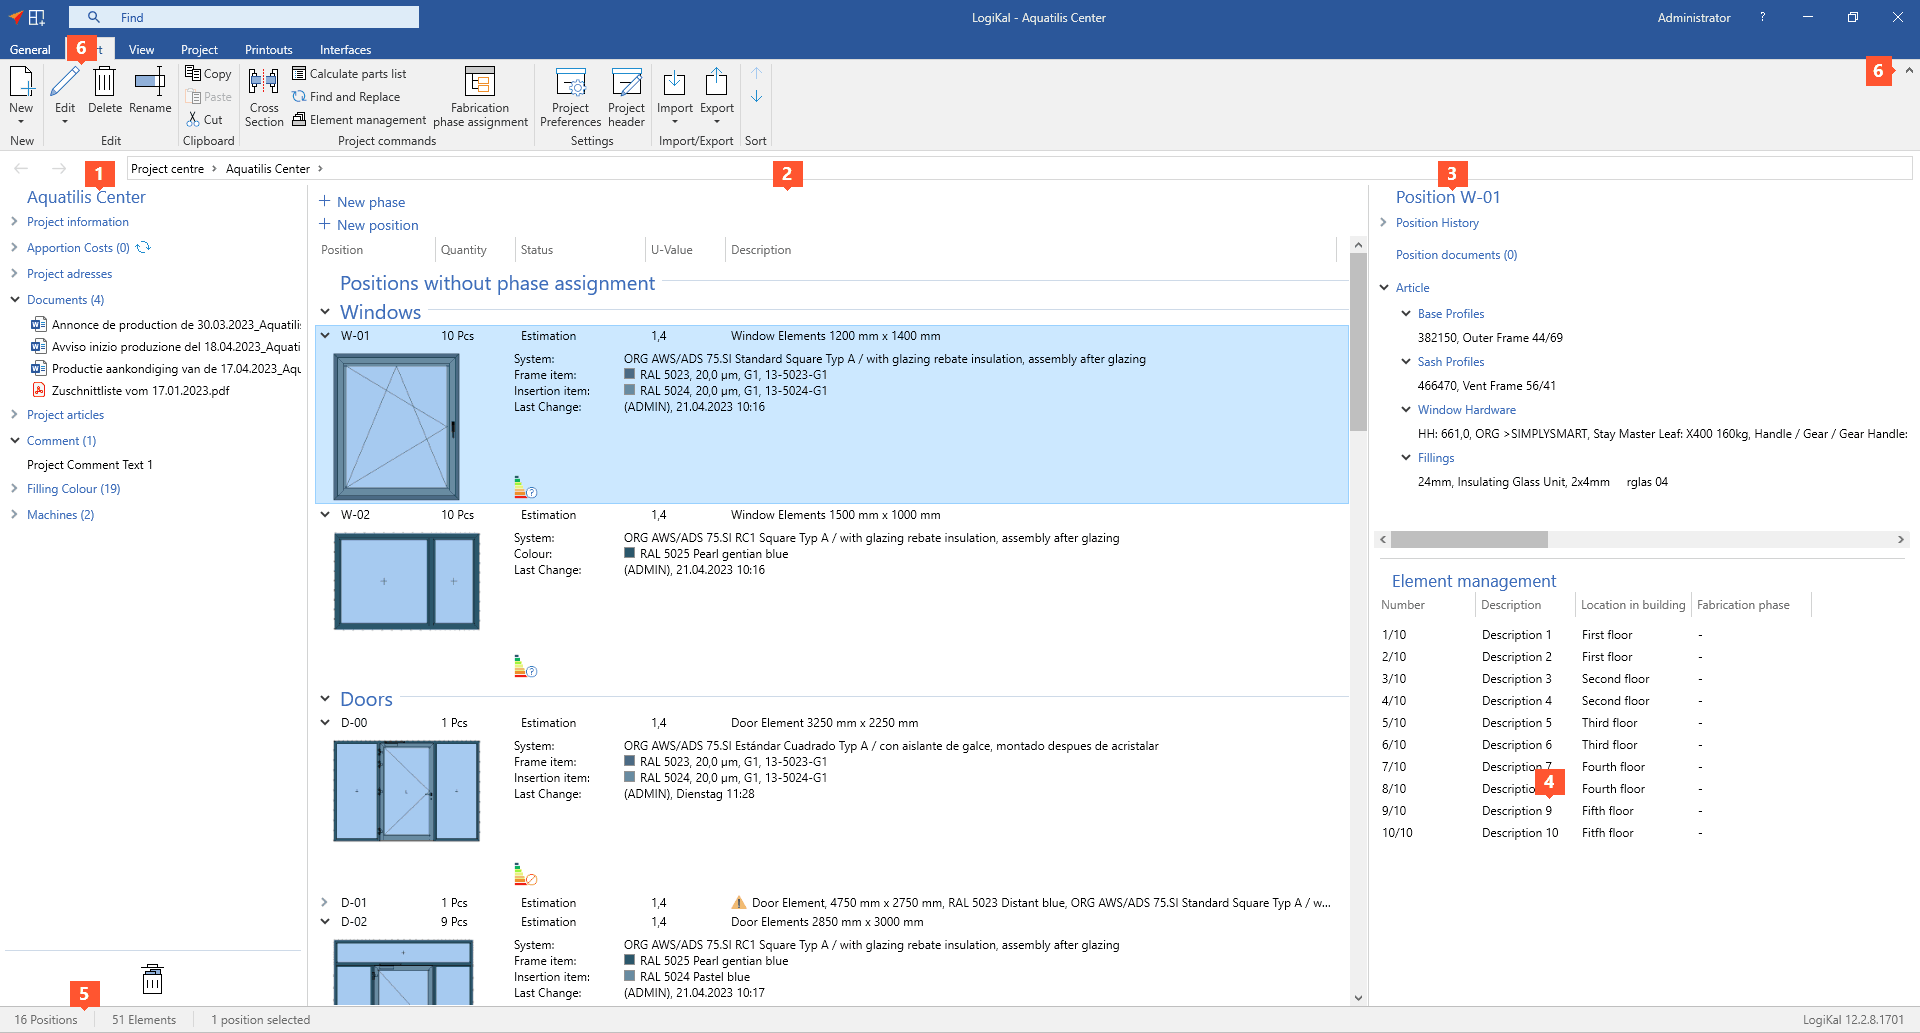
Double-clicking a project opens the project environment:
1 On the left side you will find information about the current project.
2 In the centre all positions of the current project are listed.
3 On the right side you will find information about the selected position.
4 For higher quantities, you have the option of splitting positions into several new positions. These are displayed in the section "Element Management".
5 The status bar displays the total number of positions in the project and the number of selected positions.
6 In the ribbon you will find all the commands you need to edit your project. You can hide the ribbon using the arrow icon on the right side to have more space available for your project environment.
Show or hide columns in the position list
- Right-click the title bar of the position list to open the context menu:
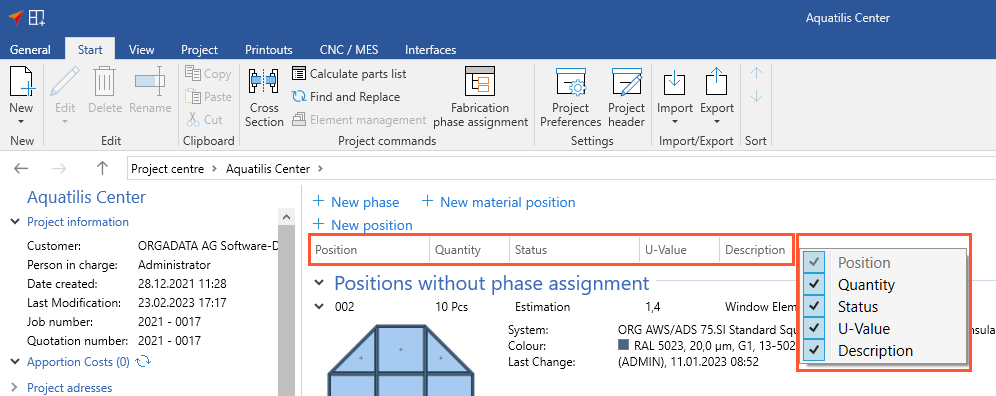
- In the context menu, select or deselect the columns to show or hide them in the position list.
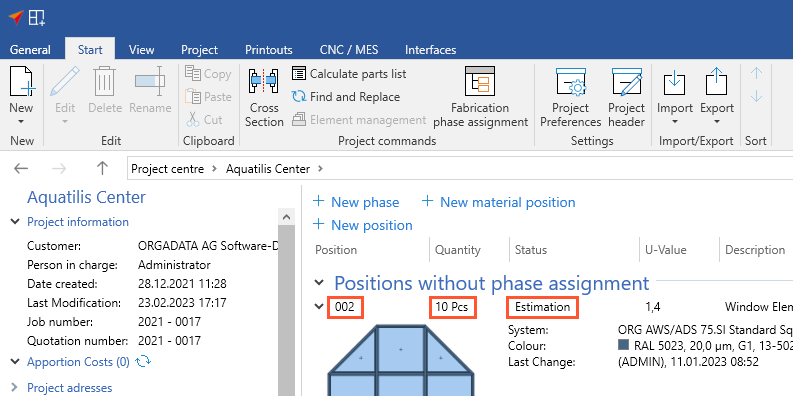
Change position number, quantity and processing status
- Click the position number of a position to change it.
- Click the quantity of a position to change it.
- Click the processing status of a position to change it.
Context menu
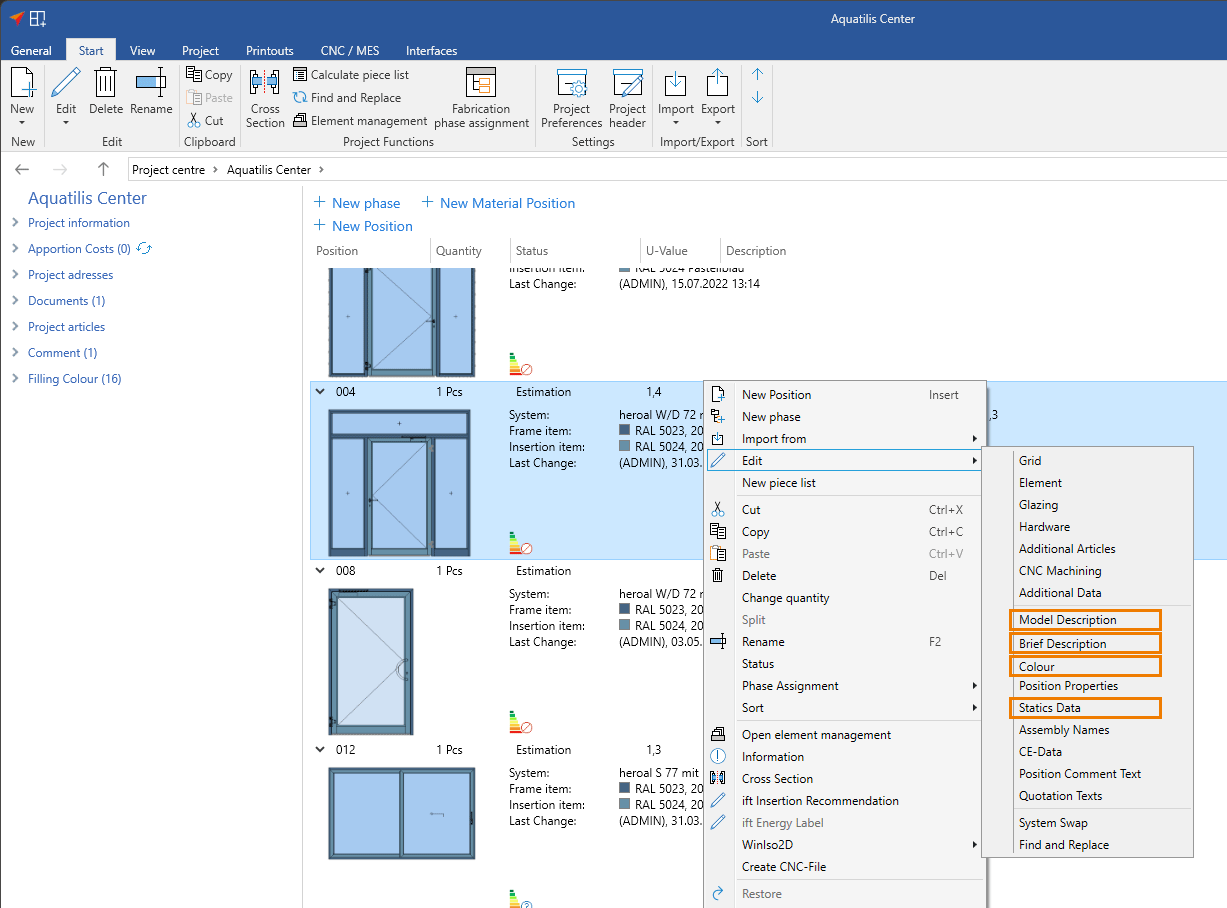
- Right-click a position to open the context menu. The context menu shows all commands available for the selected position:
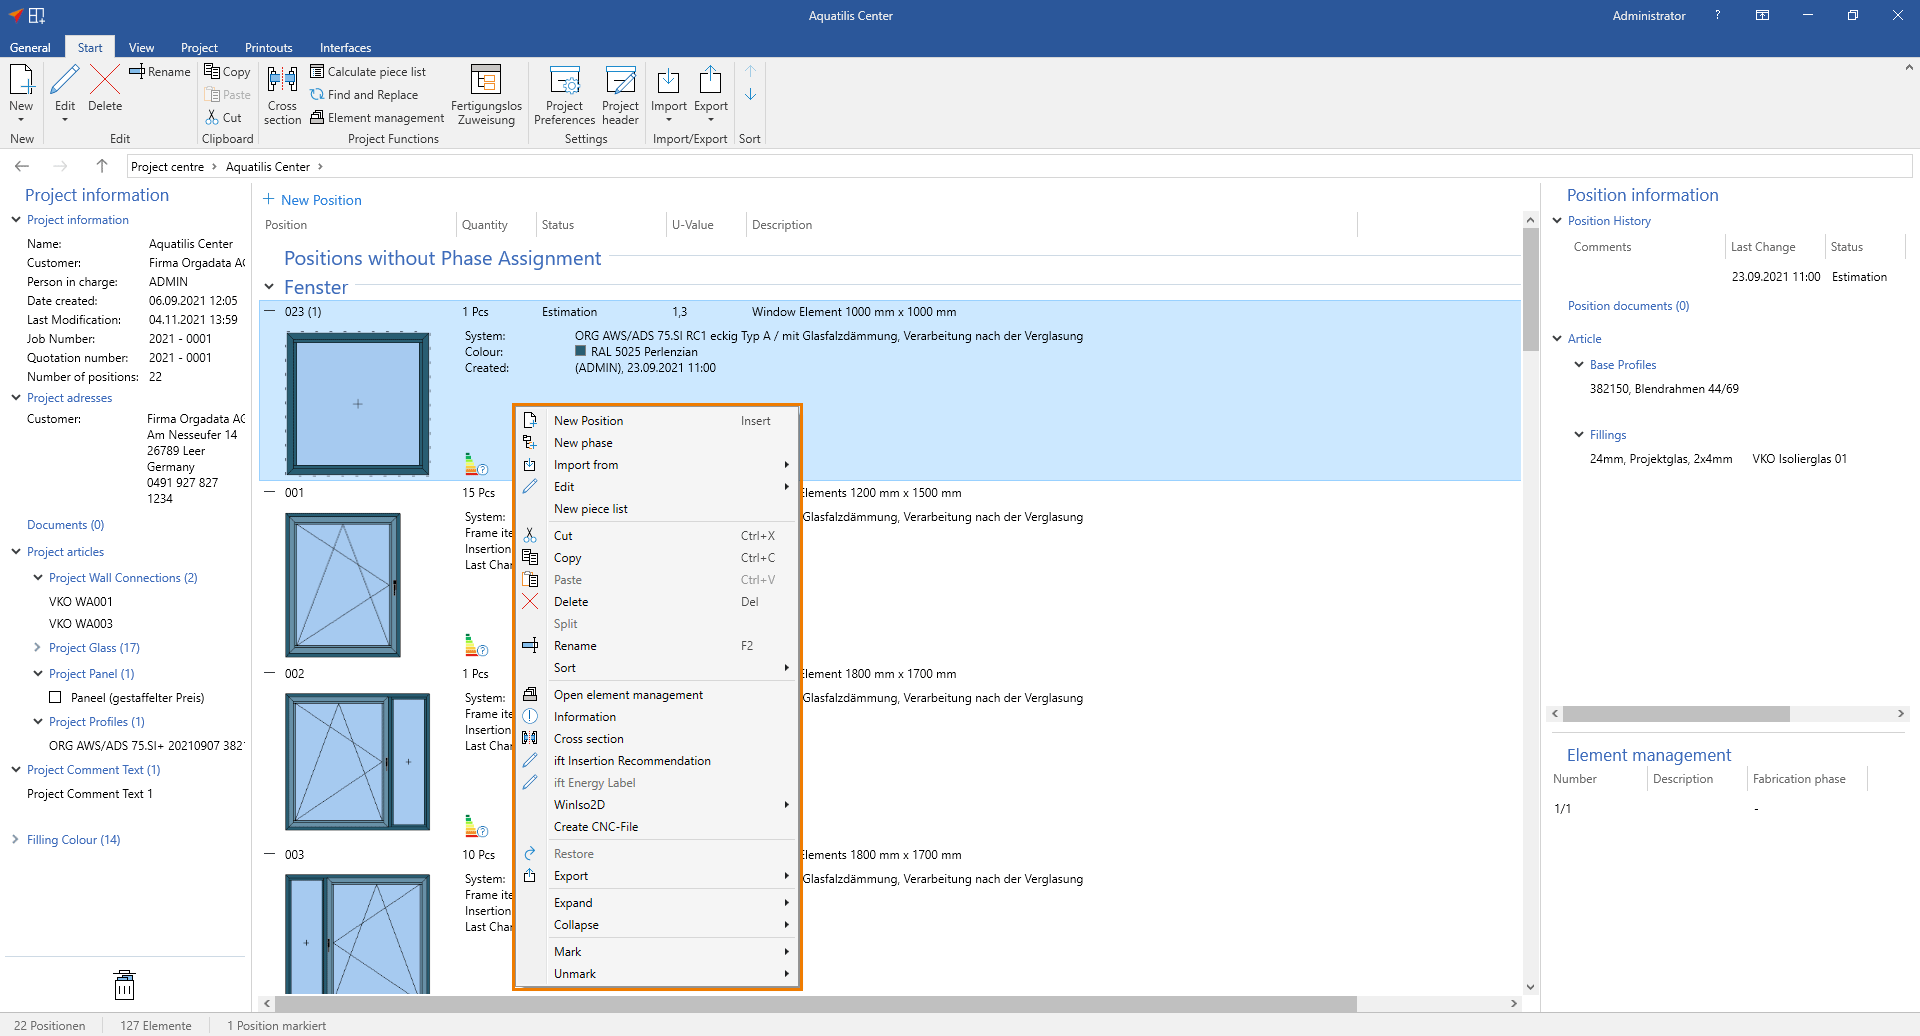
- As of software version 12.2 new context menu commands are available in the project environment. The following direct accesses have been added to the context menu under "Edit":
- Model Description
- Brief Description
- Colour
- Statics Data
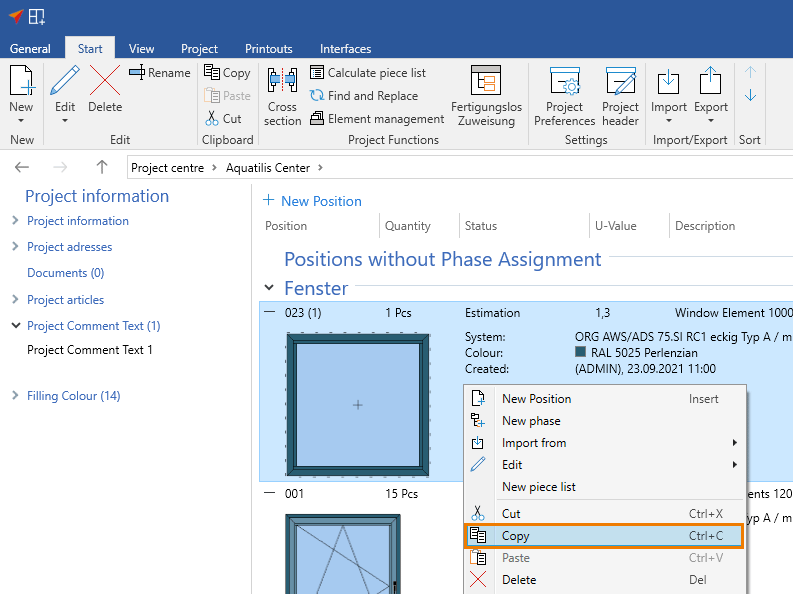
Copy positions across projects
- Open the project into which you want to insert the position.
- In the project environment, right-click to open the context menu and click "Paste".
- Enter information for the new position and confirm with "OK". The copied position is displayed in the list of positions.


 Deutsch
 English (UK)
 Español
 Français
 Italiano
 Nederlands
 Polski
 Čeština
 Ελληνικά