- Open a position.
- In the "Glazing" section, on the "Edit" tab, click "Glazing". The glass input opens for the first field:
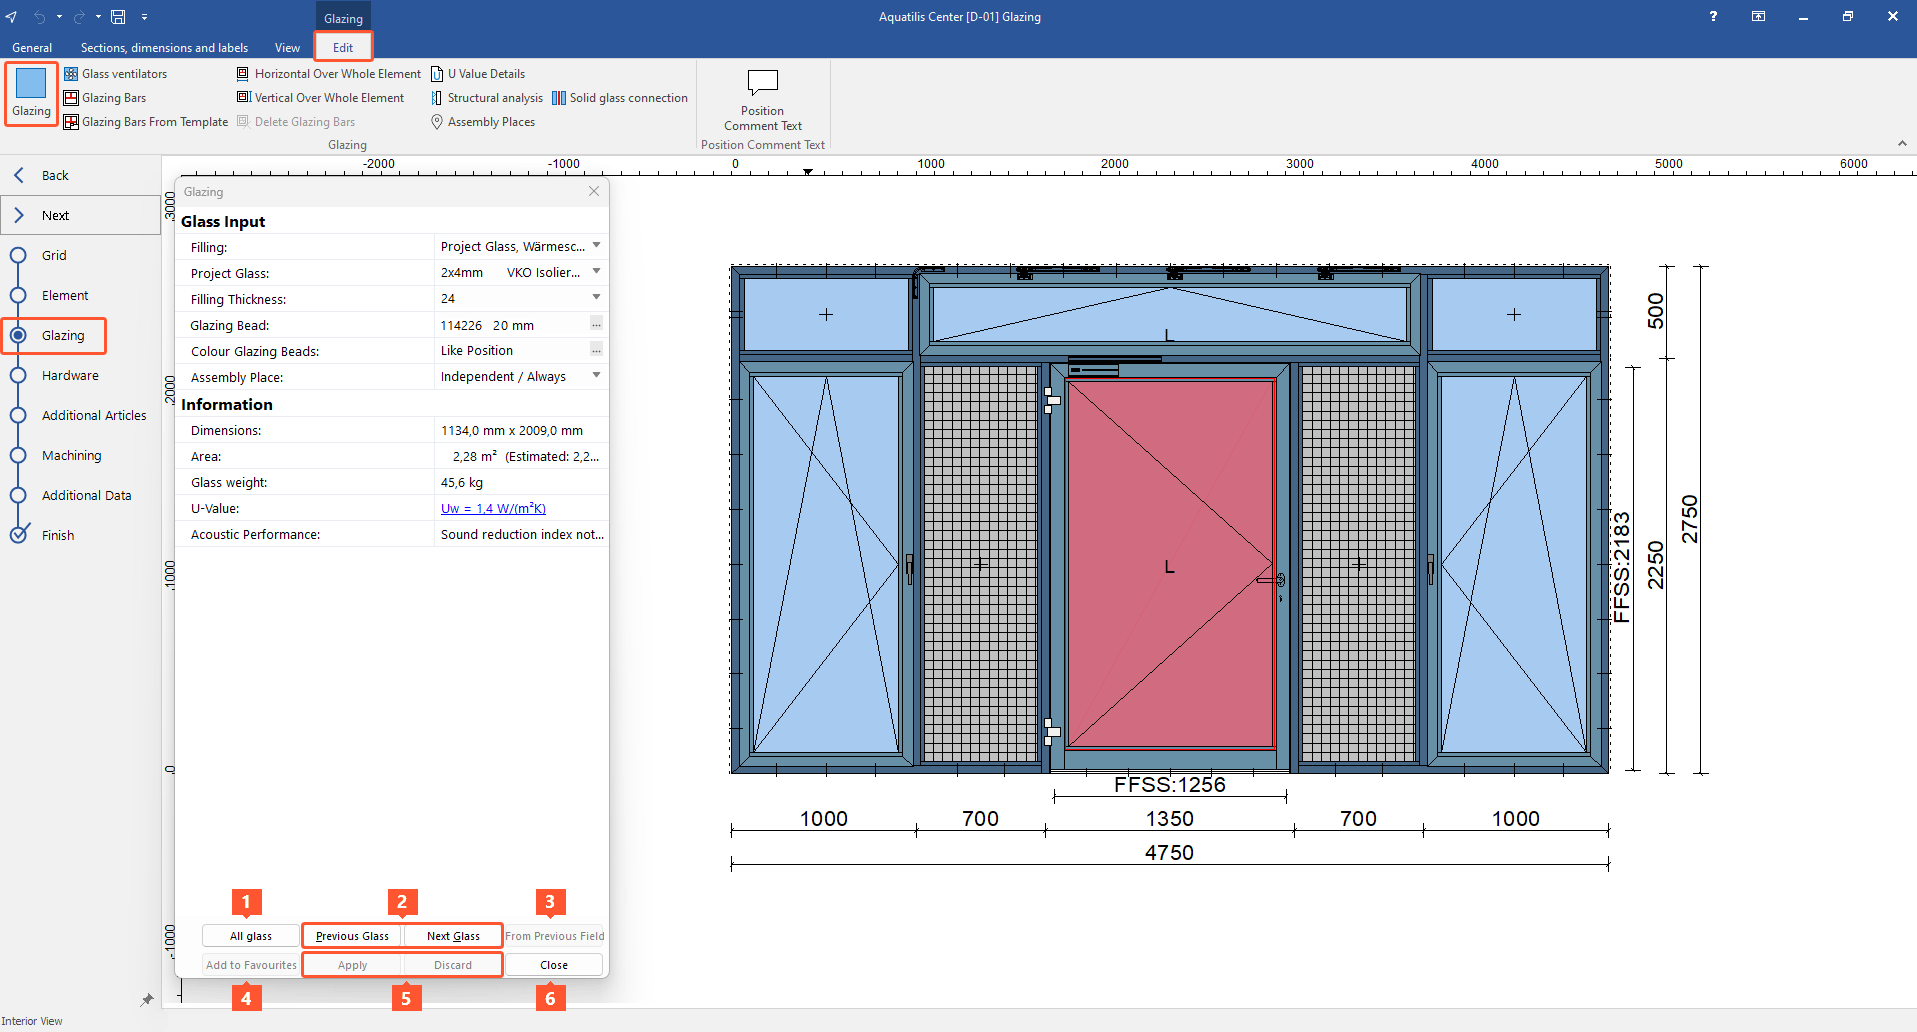
Glass input
- Choose a filling for the field:
- Glass favourites
- Project glass:
Read "Project glass" for further details. - Project panels:
Read "Project panels" for further details. - Panel
- Insulating glass unit
- Special glass
- Manual glass input
- Manual panel input
- Door panels:
Read "Door panel configurators" for further details. - Mailboxes:
Read "Mailboxes" for further details. - Fire protection glass
- No glass – no GB/gasket
- No glass – with GL/gasket:
The following values are used to calculate the element weight:- From 1 mm – 19 mm = total thickness x 2.5 kg/m²
- From 20 mm – 25 mm = 8 mm x 2.5 kg/m²
- From 26 mm – 27 mm = 10 mm x 2.5 kg/m²
- From 28 mm – 63 mm = 12 mm x 2.5 kg/m²
- Choose the glass and, if necessary, special glass outside and inside.
- Select the filling thickness.
- If necessary, choose a glazing bead.
- Select the colour of the glazing bead:
- Single-colour
- Dual-colour
- Like position
- Select the assembly place.
Information
In the "Information" section, the dimensions, area, glass weight, U-value and acoustic performance of the glazing of the selected field are displayed.
Navigation
1 Click "All glass" to select all fields and choose the same glazing for all fields.
2 Click "Previous glass" or "Next glass" to select the previous or next field and choose the glazing for it.
3 Click "From previous field" to apply the glazing of the previously selected field to the currently selected field.
5 Click "Apply" or "Discard" to apply or discard the changes.
6 Click "Close" to close the glass input.
Glass favourites
- Click "Add to favourites" (4) to add the current glazing data to your user's glass favourites across projects. The data can be selected in the glass input under "Filling" at the top of the list.
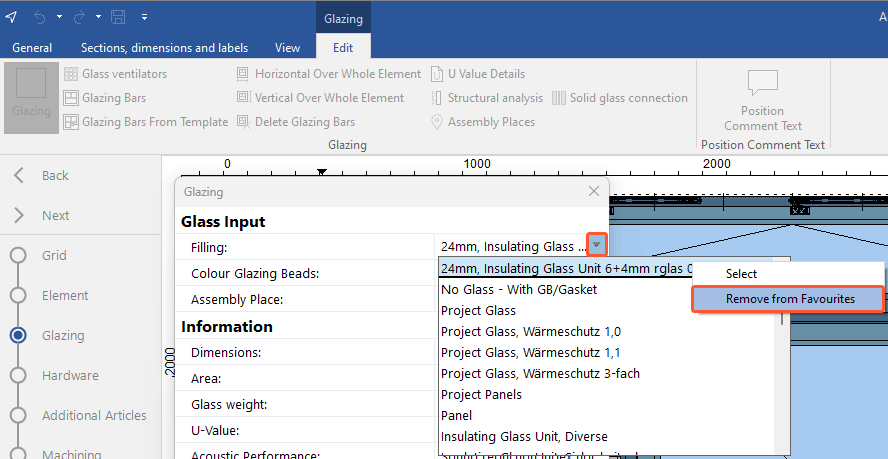
- Right-click the glass favourite and select "Remove from favourites" to remove the saved selection of glazing data:
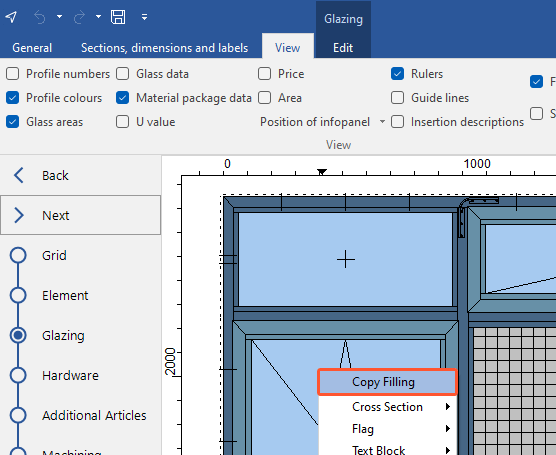
Copy filling
- Right-click the field you want to copy.
- From the context menu, select "Copy filling":
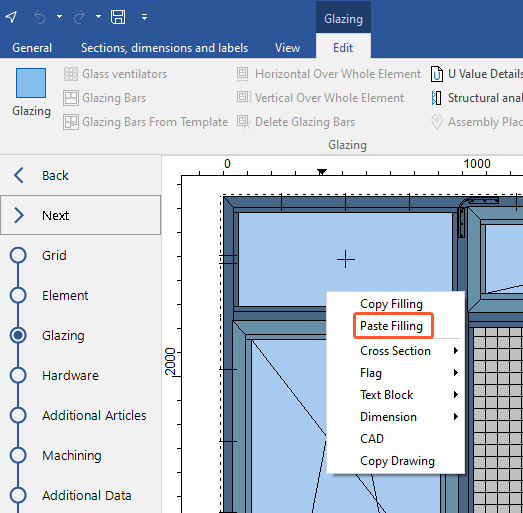
- Right-click the field where you want to apply the filling.
- From the context menu, select "Paste filling":
Edit filling
- Select the field you want to edit. To select multiple fields, hold down the CTRL key and click the required fields.
- In the "Glazing" section, on the "Edit" tab, click "Glazing" to edit the glazing.


 Deutsch
 English (UK)
 Français