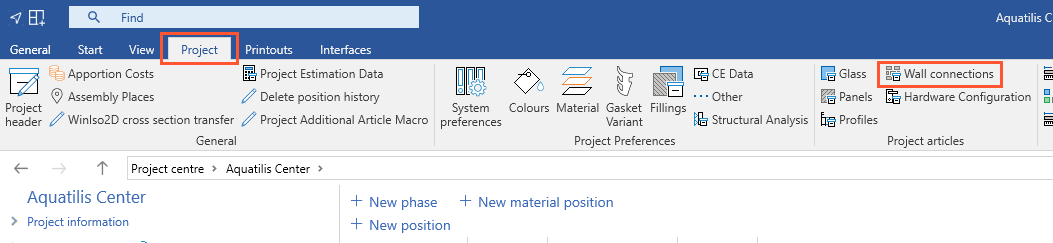
- Select the "Project" tab and click "Wall connections":
- A new window opens.
Create project wall connections
- Click "Add":
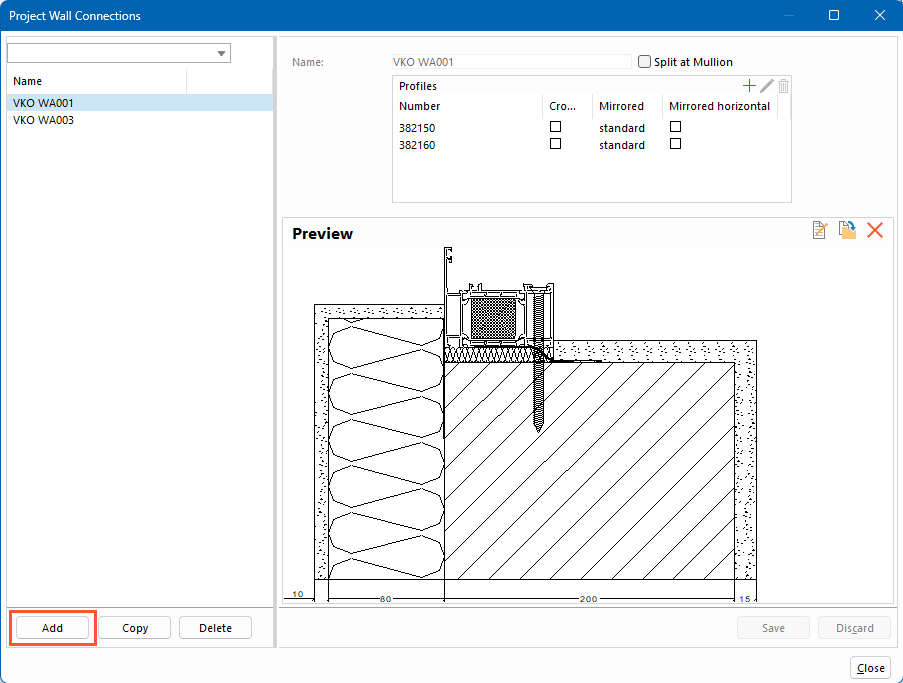
- On the right-hand side, enter a name for the wall connection.
- If necessary, select the "Split at mullion" option.
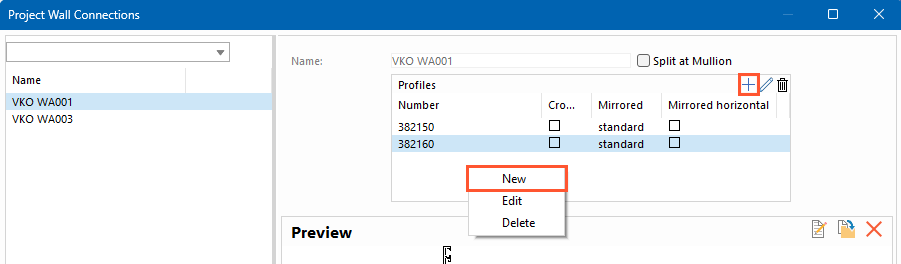
- In the "Profiles" section, click the + icon, press the "Insert" key on your keyboard or right-click in the empty field and select "New" from the context menu.
- Enter the profiles for which the wall connection will be available:
- In the following window, select the profile number:
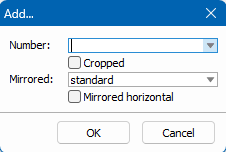
- Select "Cropped" if you want to crop profiles.
- Select under "Mirrored" for which profile orientation the wall connection will be available:
- Standard
- Mirrored
- Both
- If necessary, enable "Mirrored horizontally".
- Click "OK".
- Right-click the preview and select "Edit drawing" or click the respective icon above the preview:
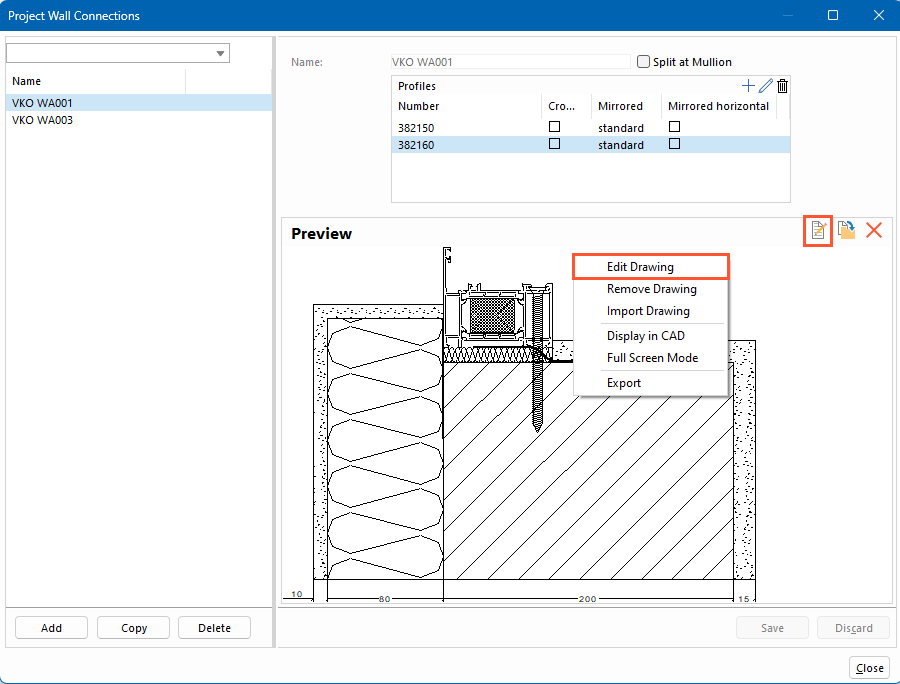
Note:
You can also import existing drawings.
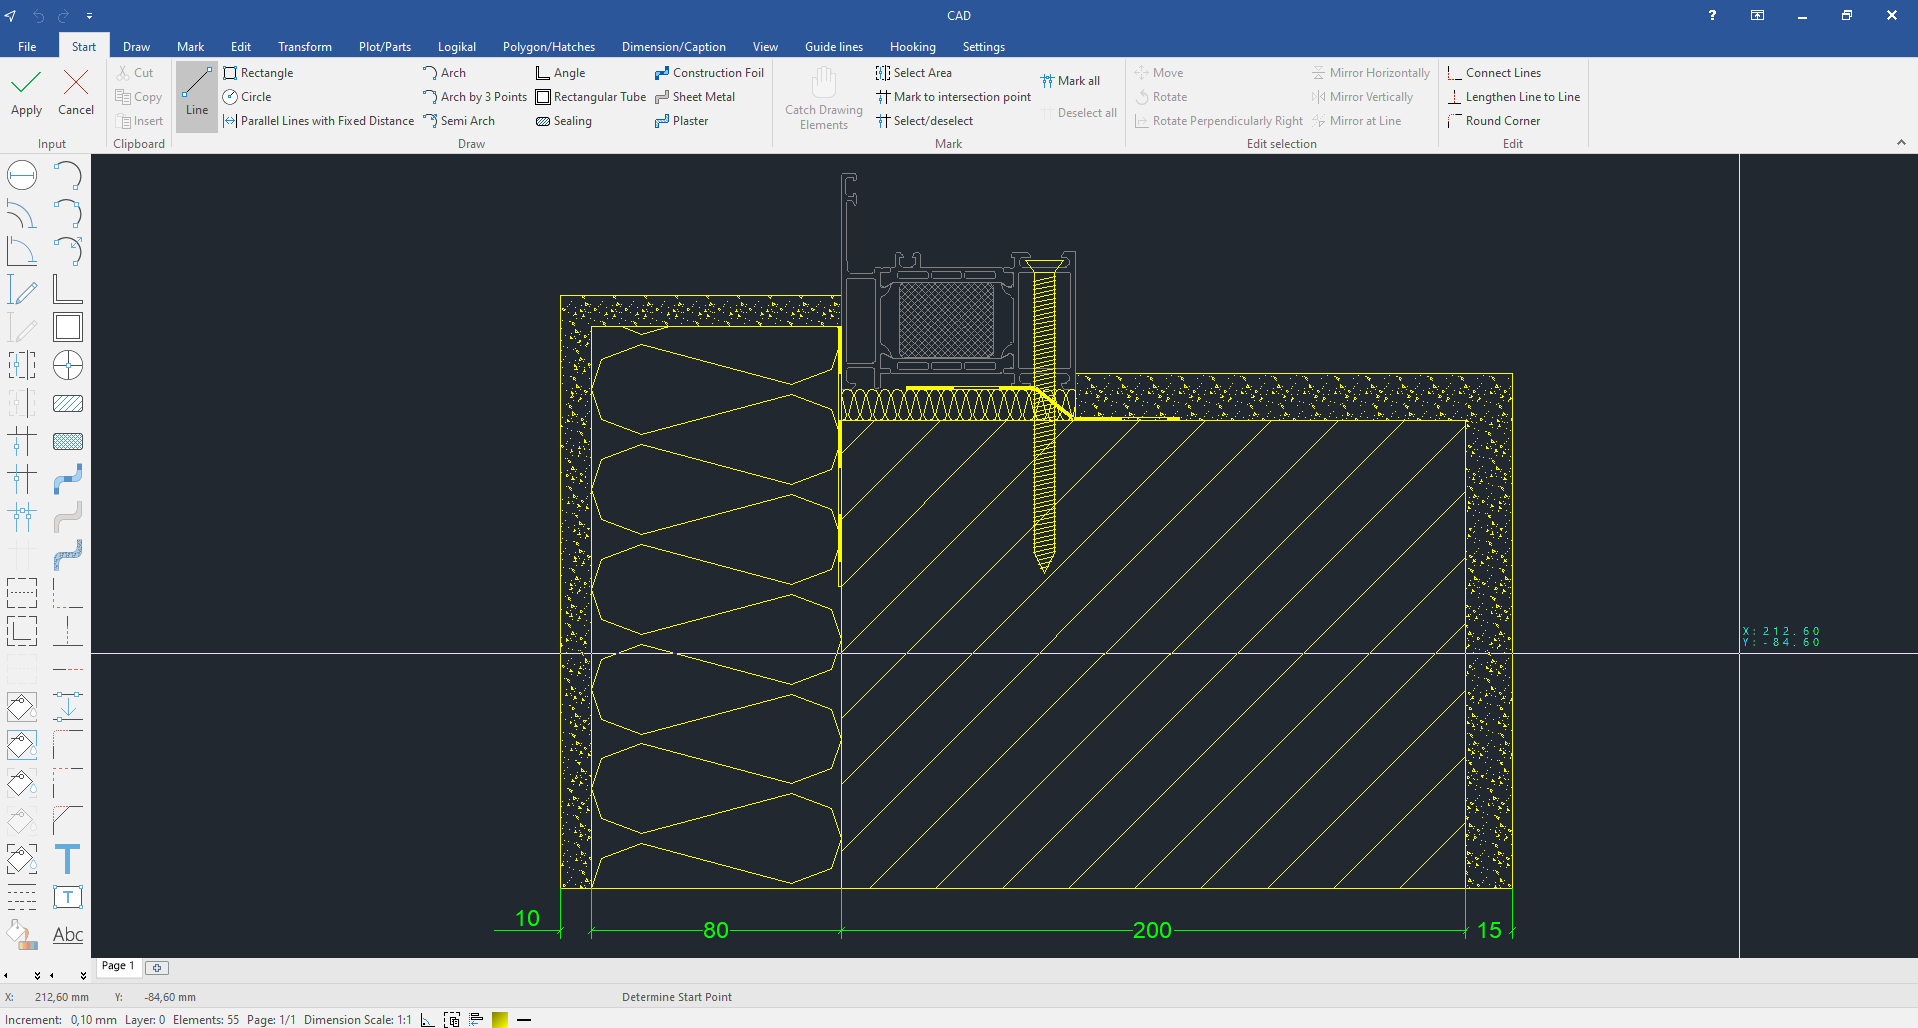
- The CAD opens. Draw the wall connection:
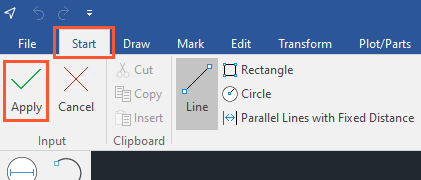
- After creating the drawing, select the "Start" tab and click "Apply" to return to the window for project wall connections:
- Click "Save":
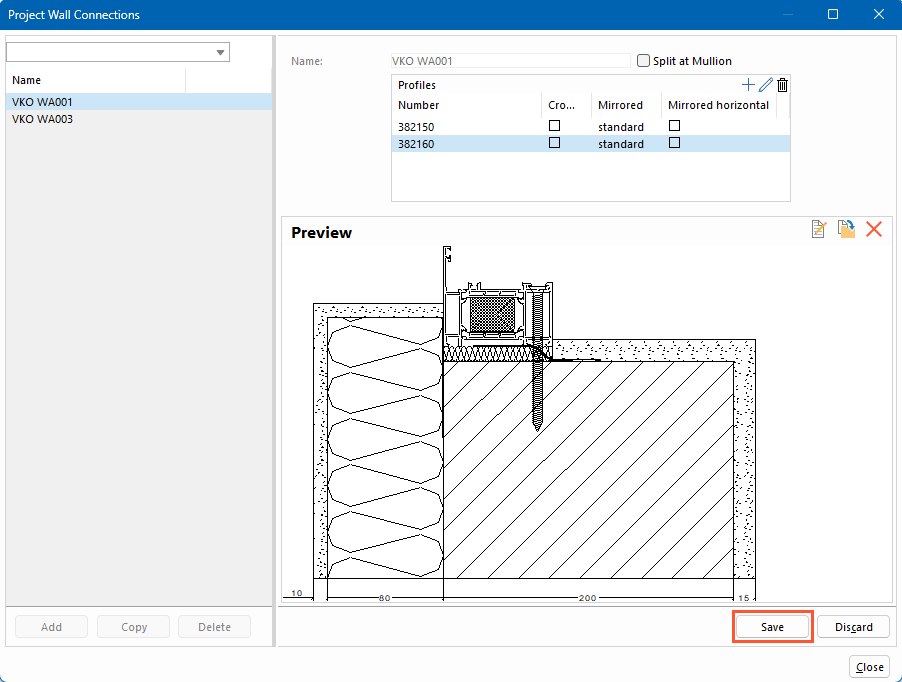
- The wall connection is now available for the project.
Use project wall connections
Read "Wall connections" for further information on how to insert project wall connections into a position.


 Deutsch
 English (UK)
 Français
 Italiano
 Čeština
 Ελληνικά