With project preferences you can shorten the processing time for your elements. The programme takes over the construction's default settings for you. When you put in the default settings for systems, colours, and fillings entirely, you can finish the position directly after choosing the insertions. The estimation, U-values, CE marking and other markings will immediately be available for your elements.
When creating a new project, you automatically get to the project preferences. The programme accompanies you through all default setting areas with a new assistant.
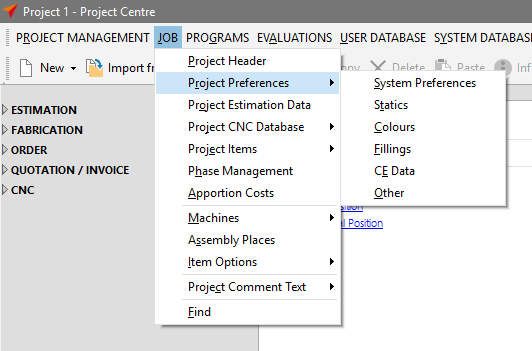
In an existing project you get to the preferences in the project centre. Click „Job" > „Project Preferences" in the menu. The different areas are available for you here.
Statics
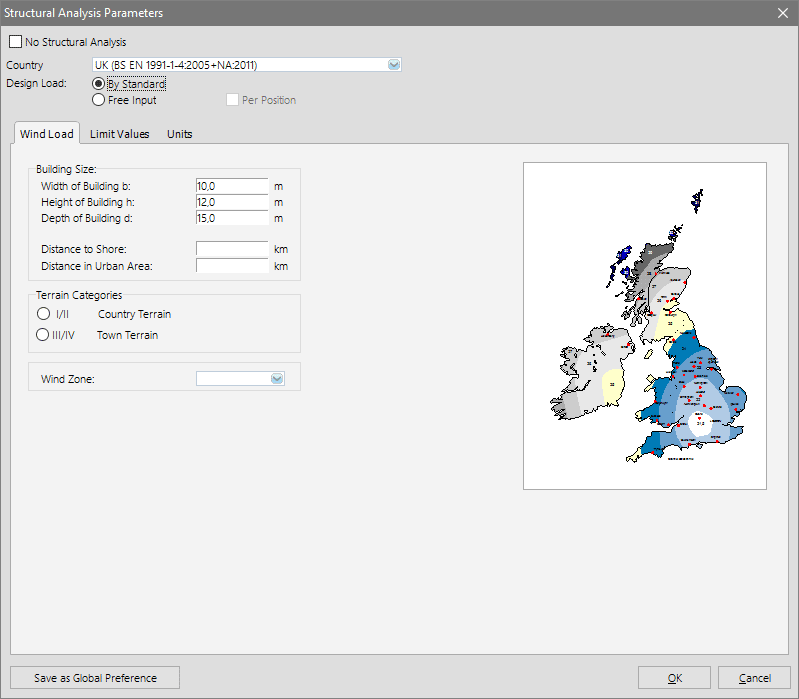
You can already have profiles and glass checked automatically during the input of elements. Activate the statics calculation in the project preferences and enter the effect and limits of your current project.
You automatically get to the statics preferences when entering a new project.
With an existing project, click „Job" > „Project Preferences" > „Statics" in the project centre's menu.
You will find detailed information regarding statics preferences in the chapter Structural Analysis.
Colours
In the project preferences you can define the colour coating for individual profiles, or for all items of an entire profile system. These will be automatically set during the input of elements.
When creating a new project you will automatically get to the colour preferences.
With an existing project, click „Job" > „Project Preferences" > „Colours" in the project centre's menu.
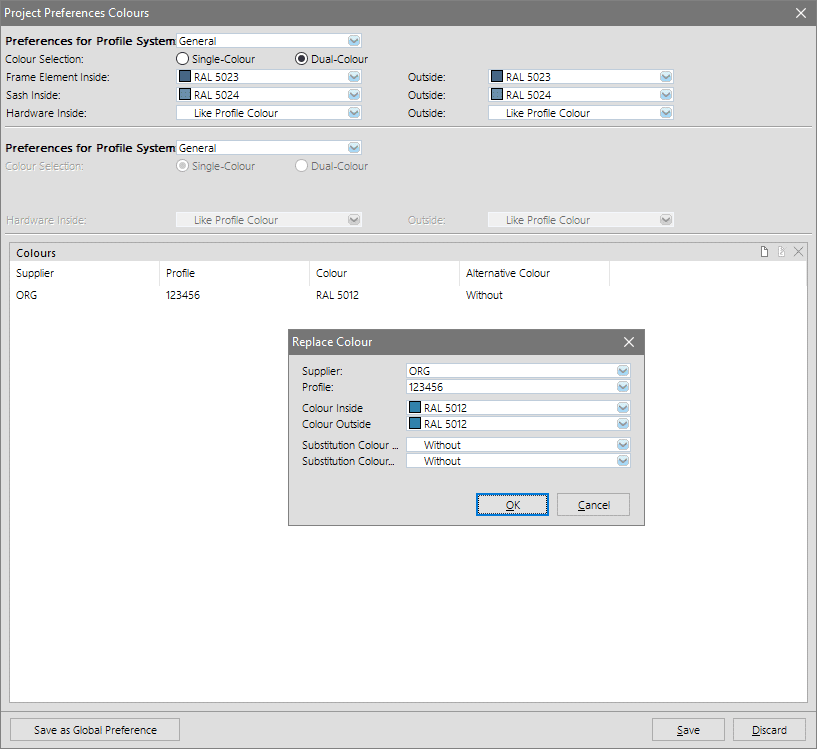
Define the profile system in the upper area of the programme window. Directly underneath you can determine, whether the colour selection is supposed to be uni-coloured or bi-coloured. Afterwards define the colours for basic elements, sashes, and hardware.
In the lower area you can assign a colour for the individual profiles / items. You also have the opportunity to select a substitute colour here. Right-click the list and select „New Entry" in the context menu.
Fillings
In the project preferences for fillings, you can determine glass, panels, and glazing bars for up to three defaults each. When only determining one default, this will be automatically set in the input of elements. In case of more than one default, the values will be requested during the input of elements.
When creating a new project you will automatically get to the fillings preferences.
With an existing project, click „Job" > „Project Preferences" > „Fillings" in the project centre's menu.
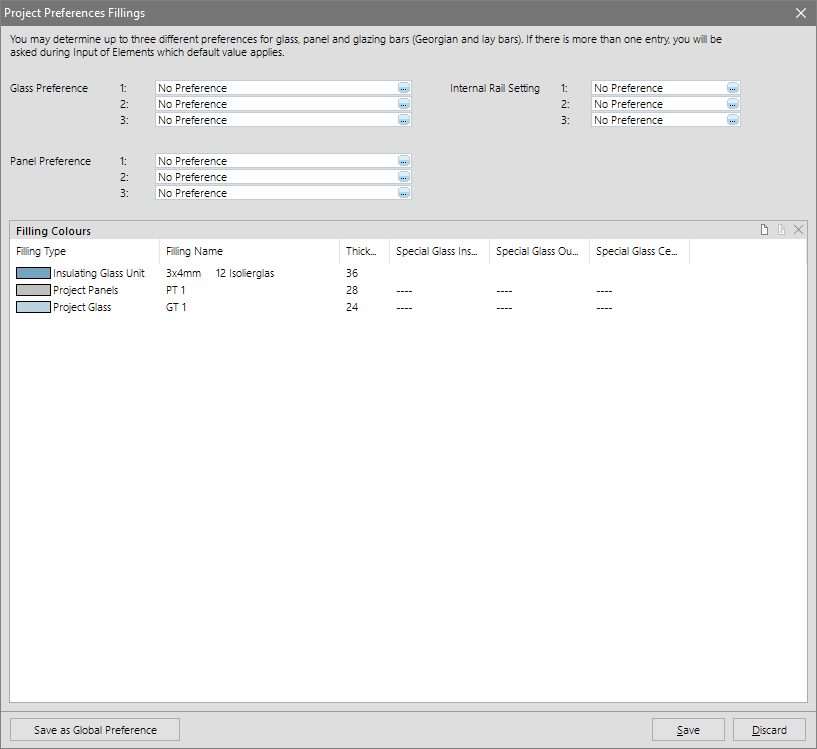
In the lower area you can determine the fillings' display colours. Right-click the list and select „New Entry" from the context menu.
Note: This function serves exclusively for a clearer display of the positions in the input of elements and the printouts and does not influence the estimation.
CE-Data
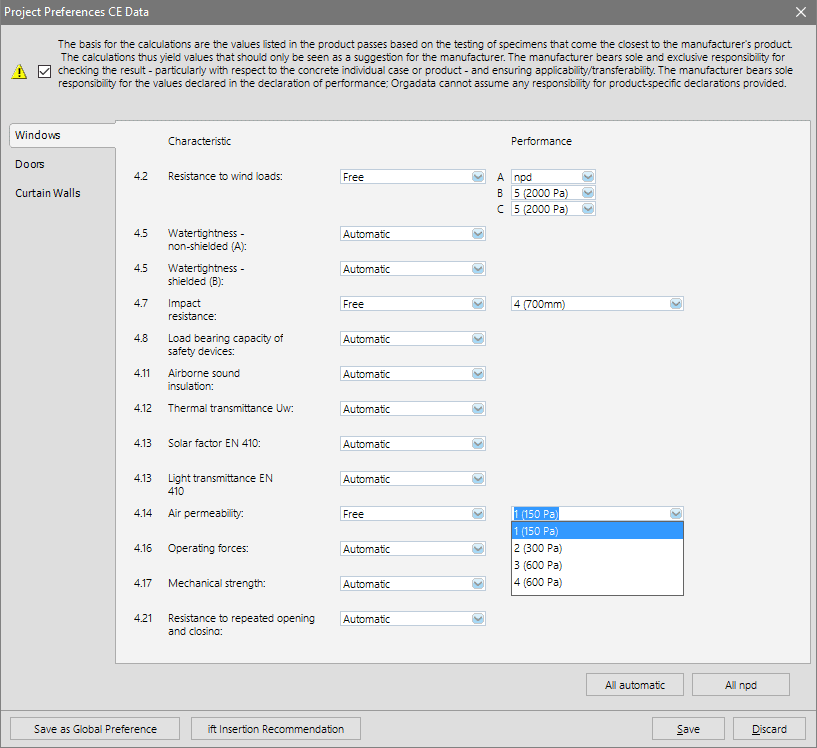
Part of your daily routine is a default of certain characteristics for systems which your elements have to fulfil. You can enter these performance preferences in the project preferences CE data area.
When creating a new project you will automatically get to the CE data preferences.
With an existing project, click „Job" > „Project Preferences" > „CE Data" in the project centre's menu.
You can enter the CE data here. On the left side you can switch between the tabs for „Windows", „Doors", and „Curtain Walls".
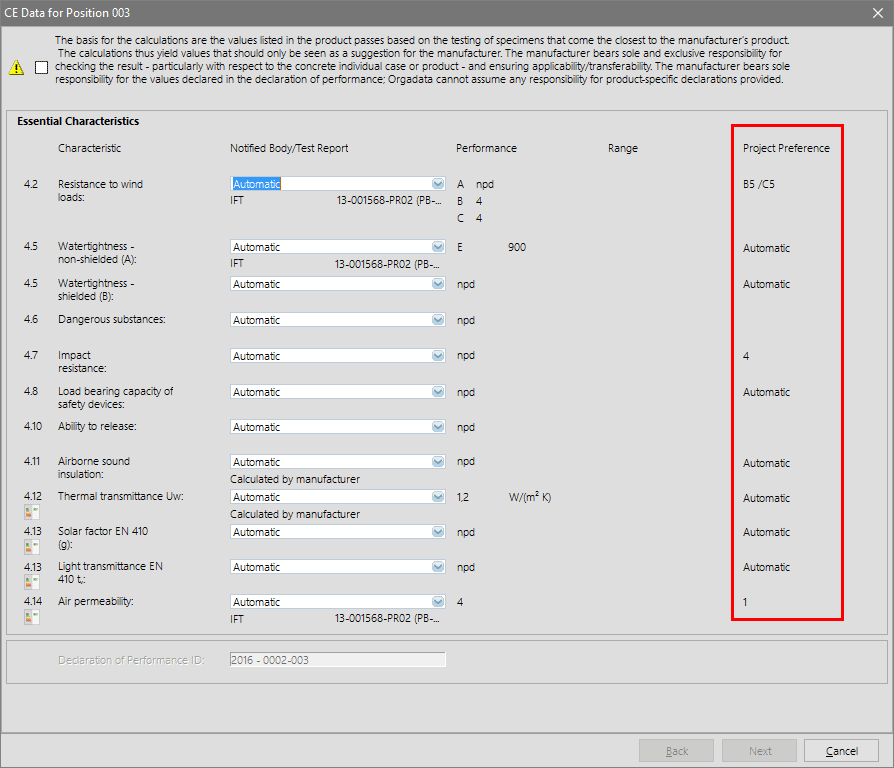
Following the input of elements, when determining the CE data, the data entered here will be displayed on the right in the column „Project Preferences".
Find out more regarding CE data in the chapter Construction Products Regulation.
Miscellaneous
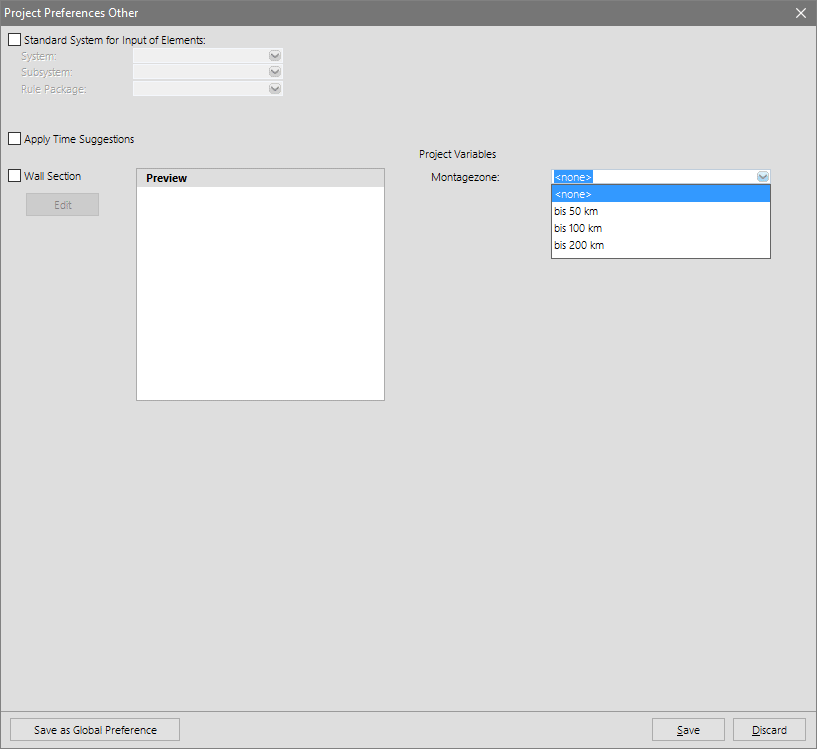
With the other project preferences you can determine a standard system with sub system and rule package for the input of elements. Activate the option „Apply Time Suggestions" and the programme will consider all entered times. This includes both times entered for systems and labour hours.
Find out more in the chapter labour hours.
Directly underneath you can determine a wall section which gets applied to all positions within a project. Find out more in the chapter wall connections.
Besides you have the opportunity to select project variables.
When creating a new project you will automatically get to the programme window for miscellaneous.
With an existing project, you will reach this programme window via „Job" > „Project Preferences" > „Other".
System Preferences
In order to get to the system preferences click „Job" > „Project Preferences" > „System Preferences" in the project centre's menu.
Item Preview in the System Preferences
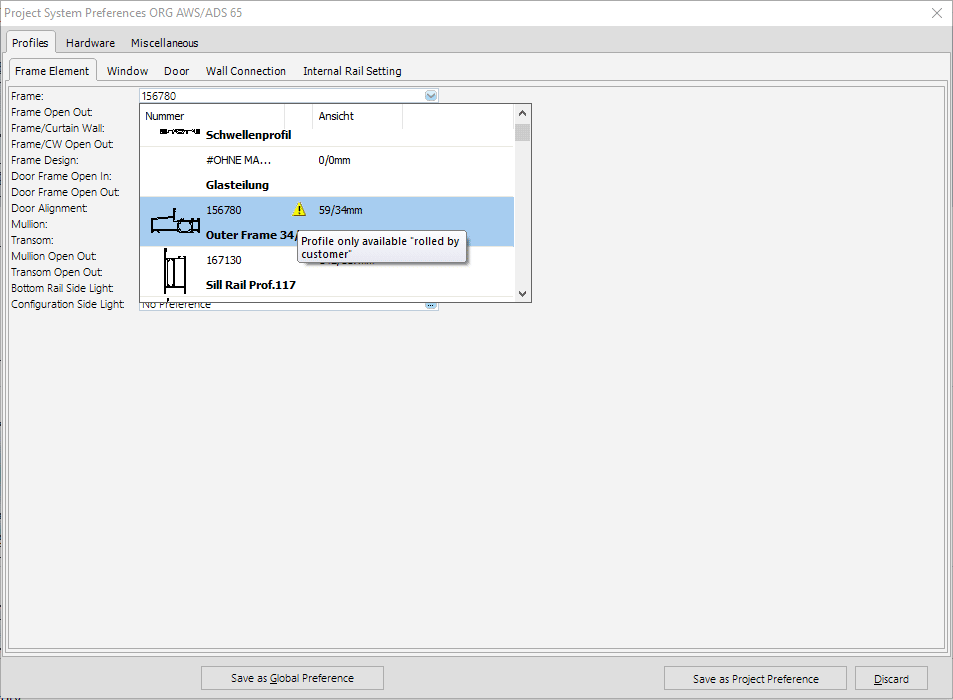
When selecting the default settings, the items and details will be displayed graphically. You will get additional information, whether it is a stock item or a repair item for example.
If an item is marked by the supplier as a repair items or is no longer in stock, you will find a yellow warning triangle displayed behind the item number. For detailed information scroll the mouse over the yellow warning triangle.
Thus you already have the assurance when creating your system preferences, to pre-select the appropriate item for your project.
Taking over System Preferences when swapping Systems
In case you wish to offer an element in a different system, you can use the function „Swap Systems". In the process the geometry and other element characteristics are taken over and the element will be created in a new system.
The system preferences can be applied to this design modification. Based on these preferences the element is built almost automatically. For projects with many positions, the result is a significant time advantage.
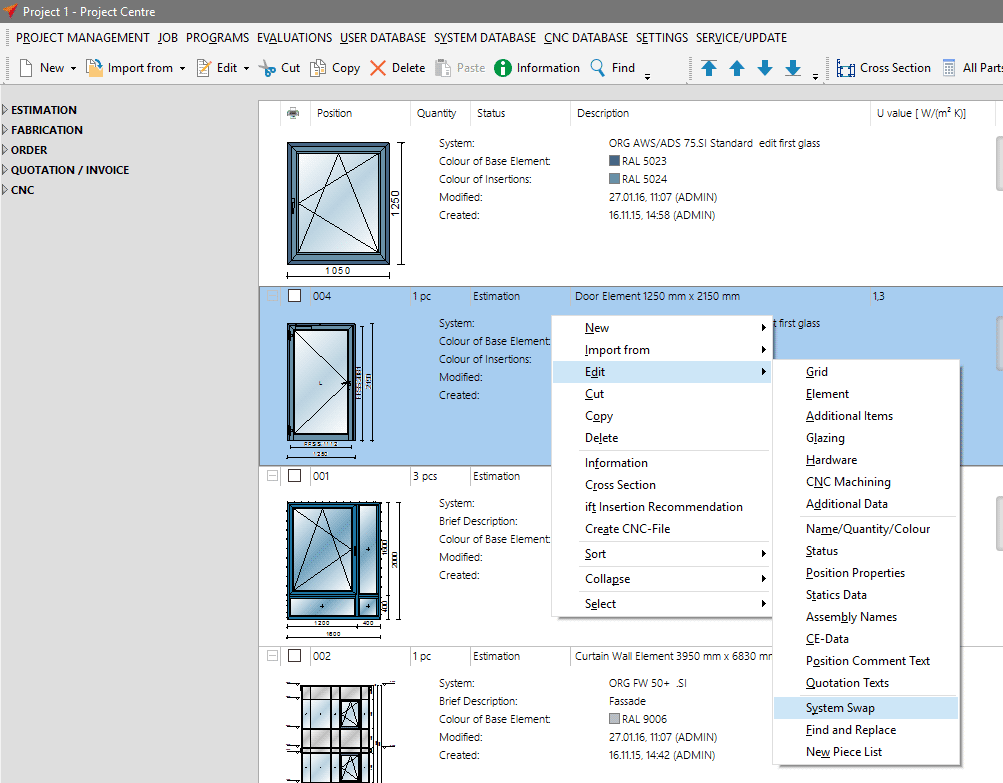
Right click the position and select „Edit" > „System Swap" from the context menu.
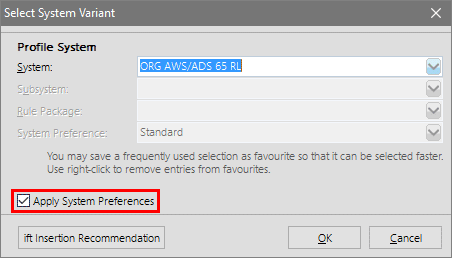
Select a new system and activate the function „Apply System Preferences".
Global Preferences
Besides the project preferences you can to determine global preferences. These preferences are applied automatically to all projects. The user can also add project preferences for a project additionally . The settings of the global preferences are not affected and will be used when project preferences are not available.
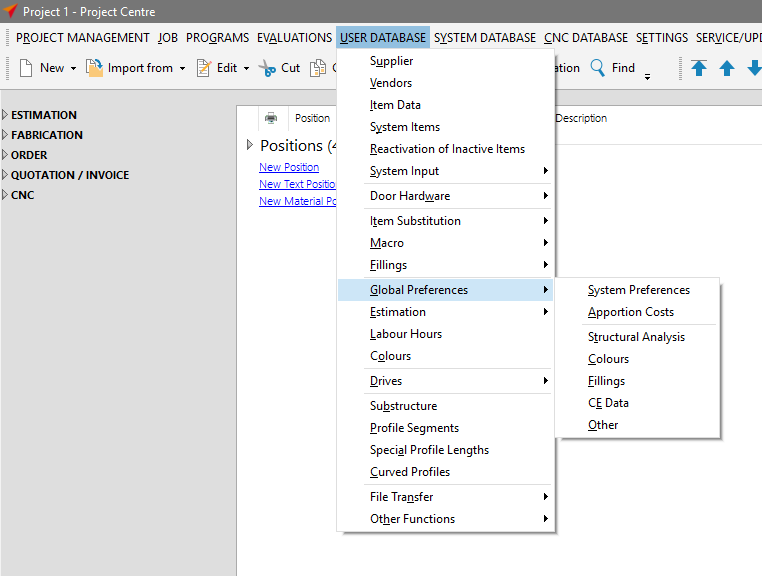
You can enter and edit global preferences in the Project Center by selecting „User Database" -> „Global Preferences" in the file menu.


 English (UK)