- Open an element.
- Open the "Documents" tab:
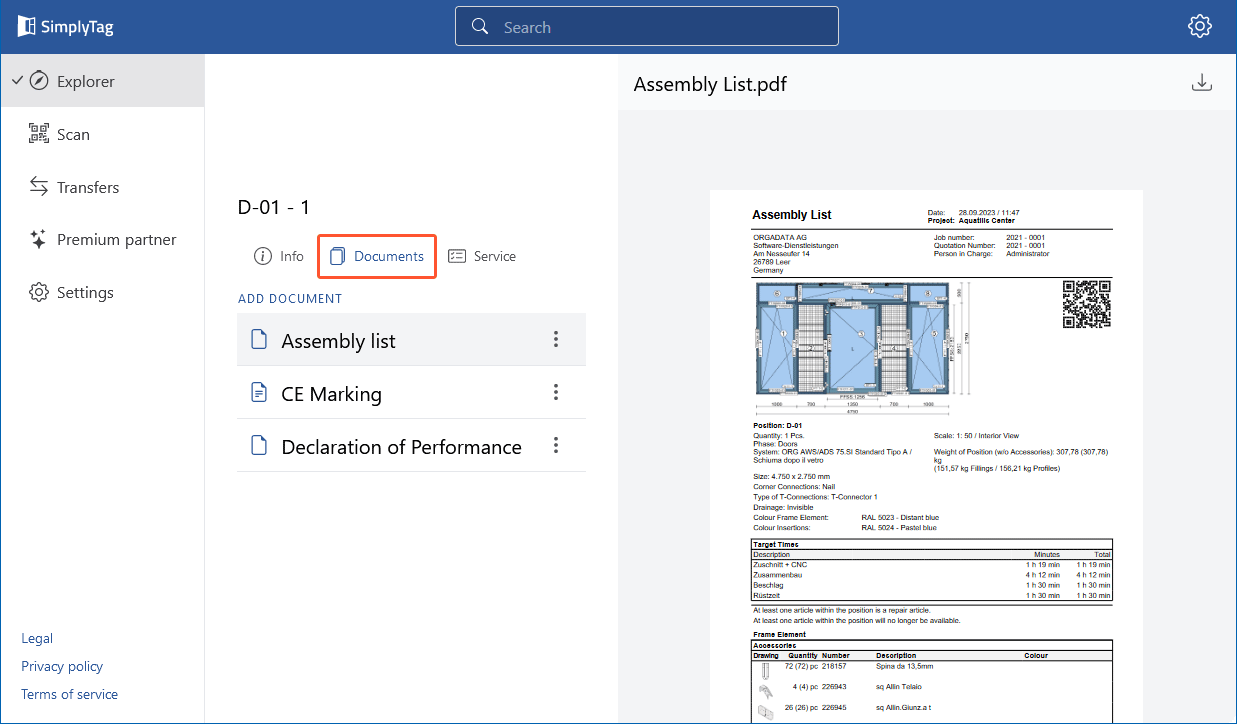
- On the left side, the documents for the element are listed:
- The CE marking, the assembly list and the declaration of performance are automatically transferred via the interface.
- As a Premium partner, you can choose which printouts are automatically transferred when setting up the interface.
- Documents with the symbol with the described paper are publicly visible. They can be viewed without registration by anyone who scans the QR code on the element:
| Non-public document | |
| Public document |
- On the right side, you will see the content of the document.
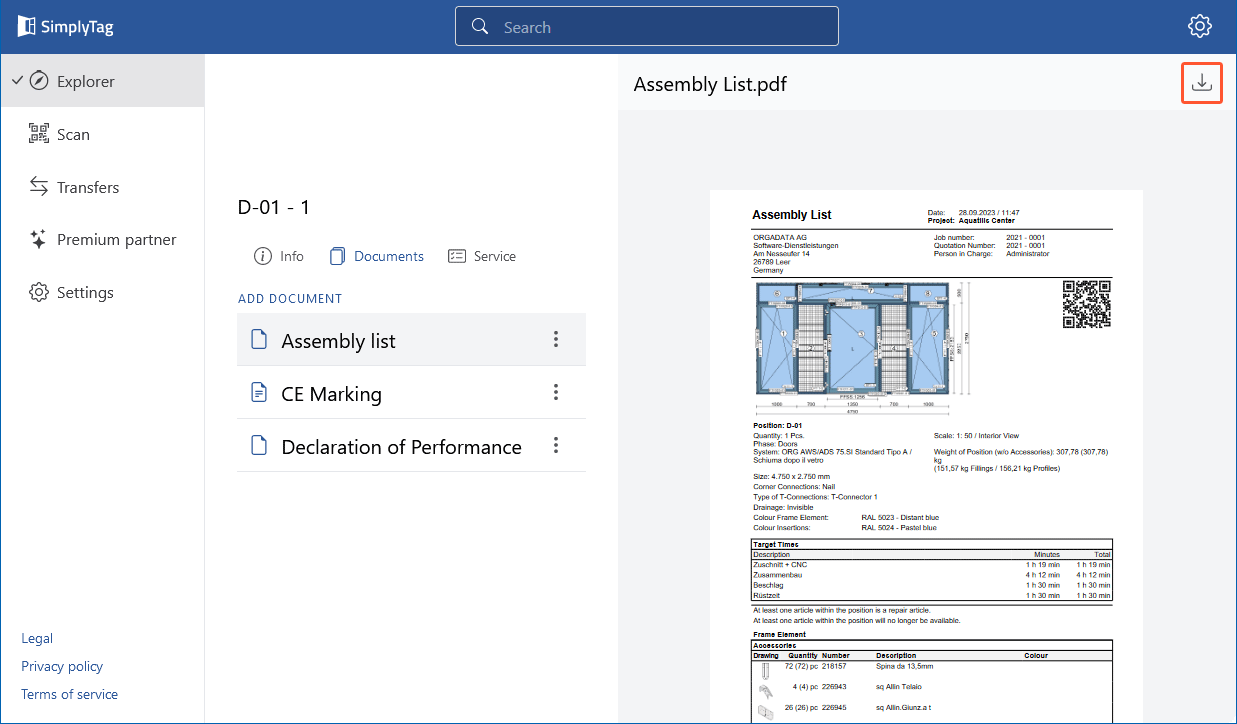
Download document
- Select the document from the list.
- Click on the download icon in the top right corner:
- In the following dialog, select the directory where you want to save the PDF file and click "Save".
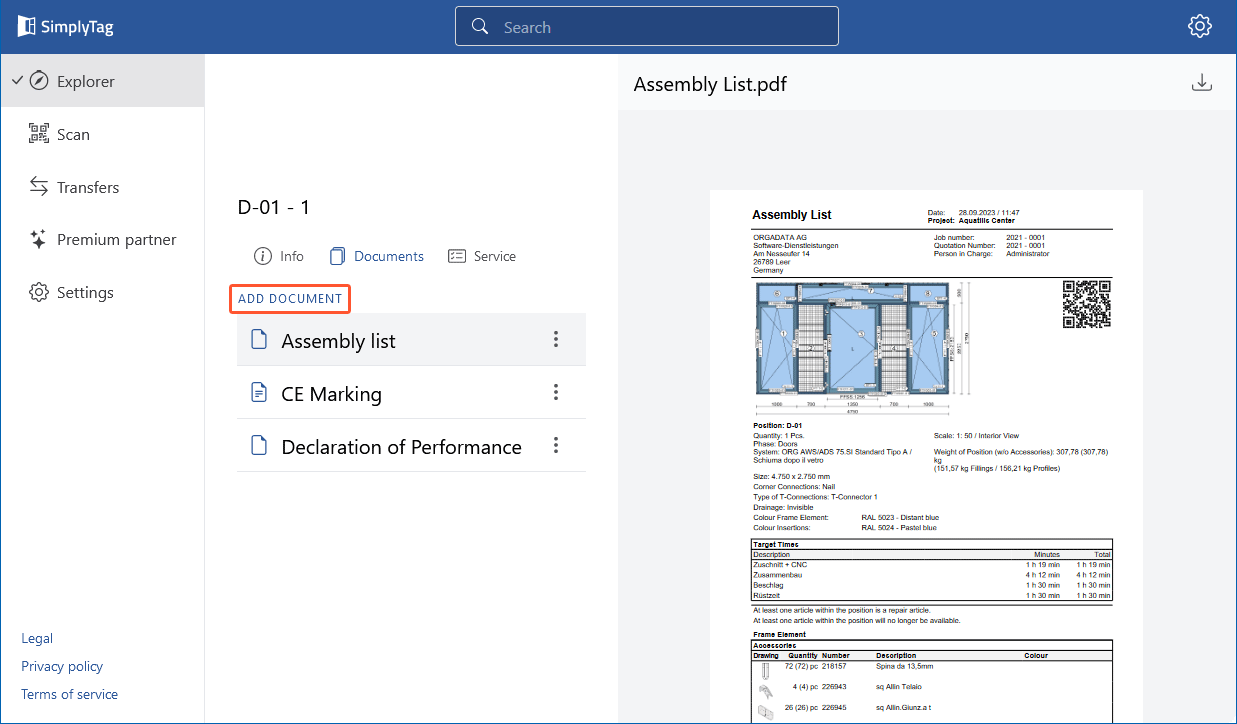
Add document
- Click "Add document":
- A new form opens on the right side:
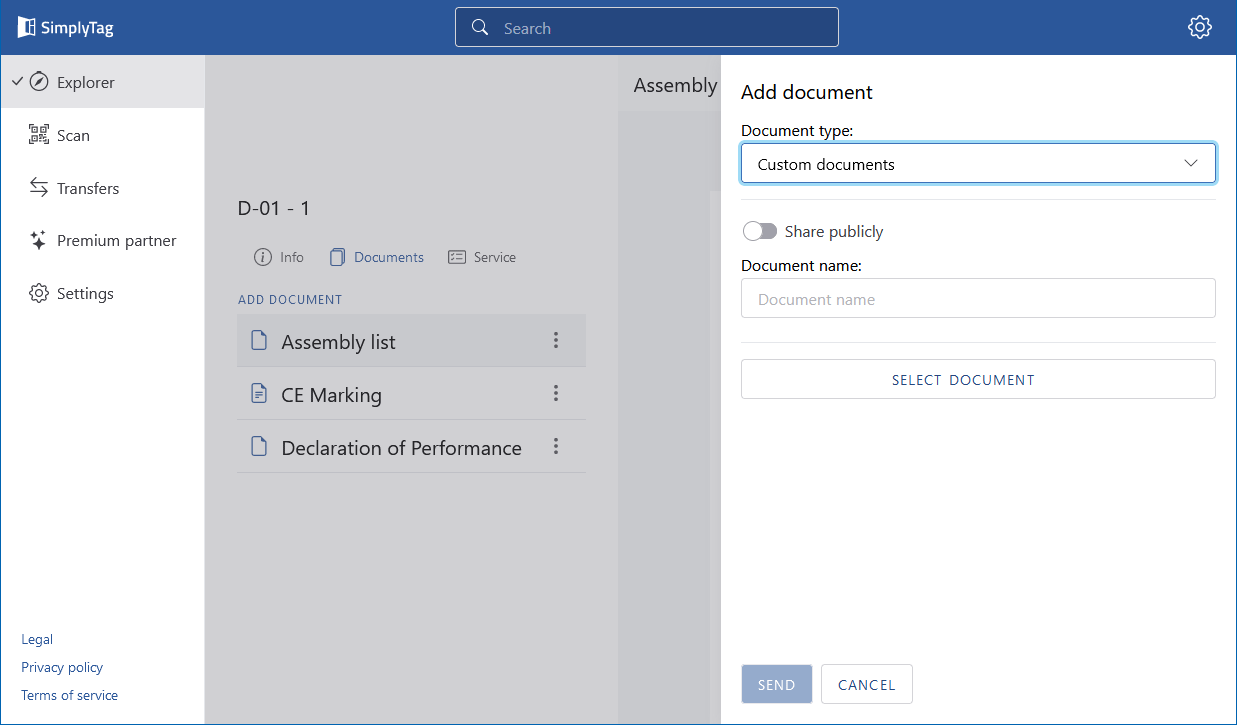
- Select the "Document type". For printouts and "Custom documents" the file format "pdf" must be used. For images, the file format "jpg", "jpeg" or "png" must be used.
- Select the option "Share publicly" for the document types "Image" and "Custom document" to make them visible when scanning the QR code on the element even without registration.
- Enter the name for the document.
- Click "Select document" to upload a document.
- Confirm the following message if you can ensure that no personal data is included in the document:
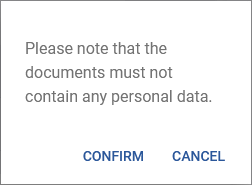
- Click "Send" to upload the document.
Edit document
Note:
Printouts transferred from the interface cannot be edited.
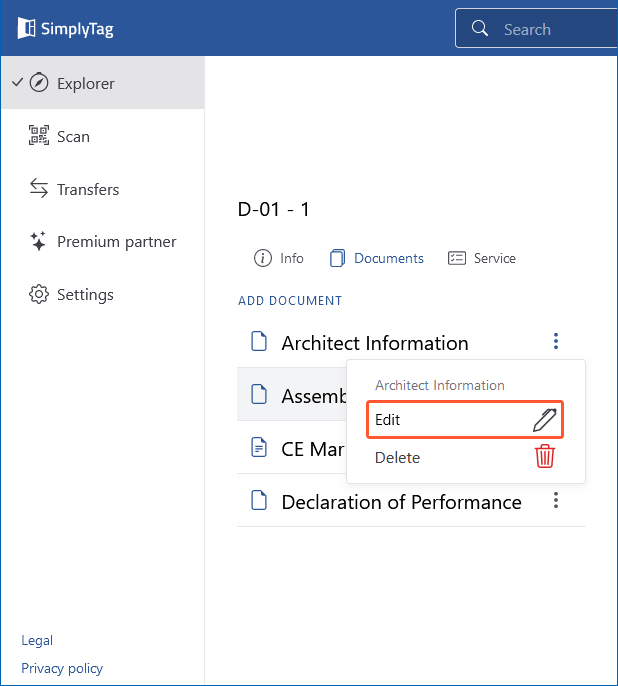
- Click the three dots next to the document and select "Edit":
- In the following window, enter a new document name:
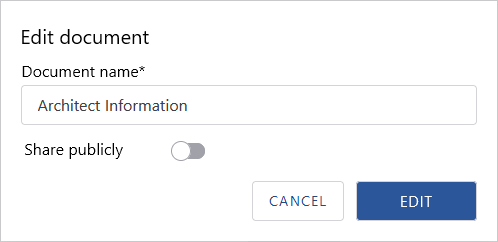
- If necessary, click the slider to share the document publicly or to end the previous public sharing.
- Click "Edit" to confirm the changes.
Delete document
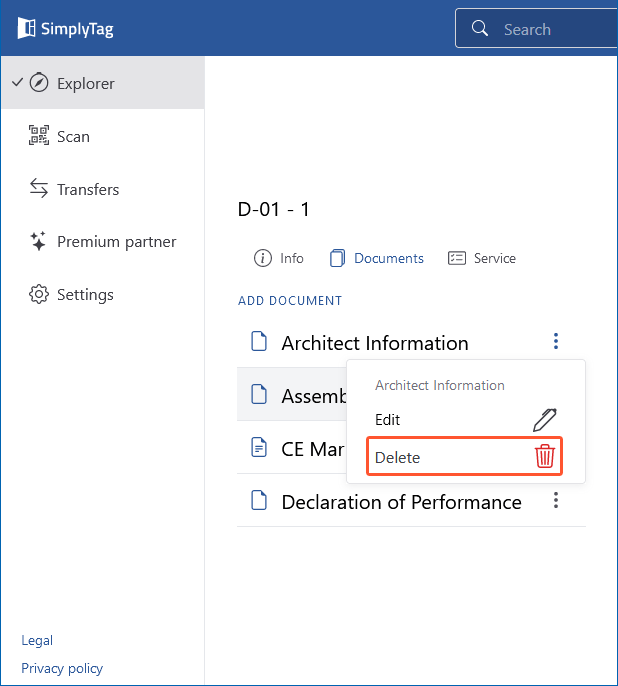
- Click the three dots next to the document and select "Delete":
- Click "Delete" to confirm the deletion:


 Deutsch
 English (UK)
 Français
 Italiano
 Nederlands
 Türkçe
 Čeština