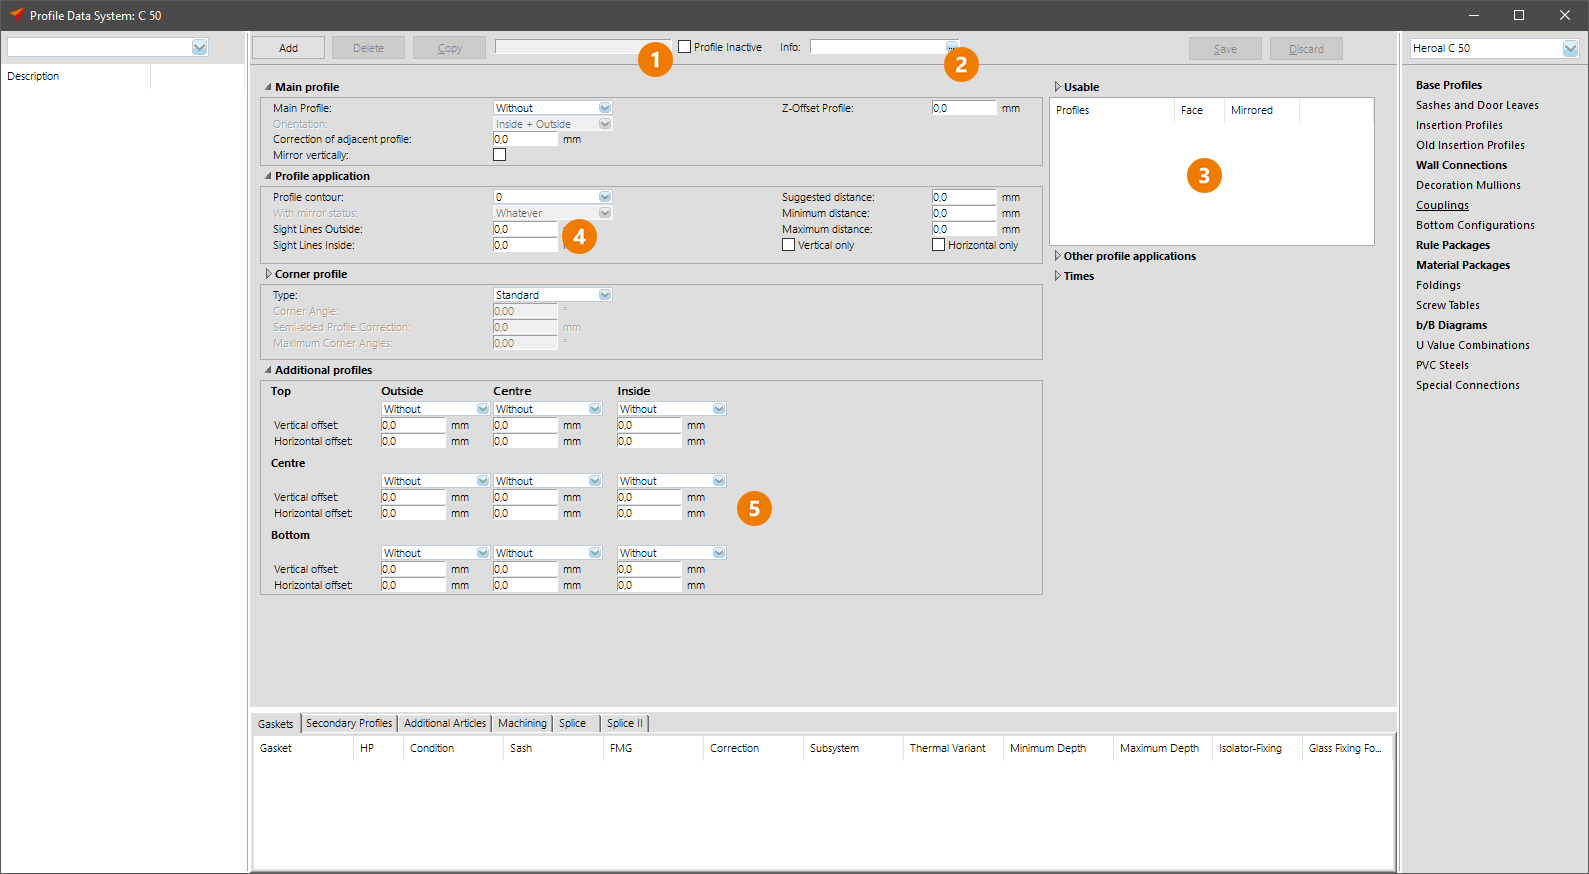
Click „System database" > „System Input" > „Profile Data" in the project centre and select a profile series.
Click on „Coupling" on the navigation bar on the right-hand.
Coupling with mounted pocket frame
To enter a coupling with mounted pocket frame, please proceed as follows:

1.) Enter a name for the coupling in field 1
2.) If necessary enter additional info in field 2
3.) In field 3 all mounted frames which can be combined in connection with this coupling need to be added
4.) In field 4 you can determine the clearance between the two adjacent mounted frames. You can check the entered dimension immediately in the view at the bottom left.
5.) In the area 5 (in case of three pockets also centred) you can enter the coupling sealing. These items already have to exist as an item data entry including the drawing. System accessories will be added by database updates. The correct position is performed by values DZ and DY. If you have our CAD module available you can determine the offset by the window at the bottom left (by right mouse click).
Coupling with main profile
For the coupling type with main profile we recommend that you have a free CAD license available:
1.) Points 1 – 3 are identical to the previous coupling
2.) In point 4 you can determine a main profile to which the coupling profiles shall connect. This item also has to exist including drawing in the database. Since the main profile mostly is just used if it is a case of a more complex display of gaskets, sheet metal etc. the drawing has to be entered as a dummy in the item data beforehand.
3.) Since the drawing is a dummy the required material for the piece list has to be entered in area 5 (differentiated into gaskets, secondary profiles, and additional items). After entering the coupling please check with the aid of a test position whether the required material shows up in the correct quantity and add


 Deutsch
 English (UK)
 English (US)
 Español
 Français
 Italiano
 Nederlands
 Polski
 Türkçe
 Čeština
 Ελληνικά