Enter machinings
Click "CNC Database" > "CNC Machining" and select a system or click the button "All Systems".
The input window for the CNC machining opens.
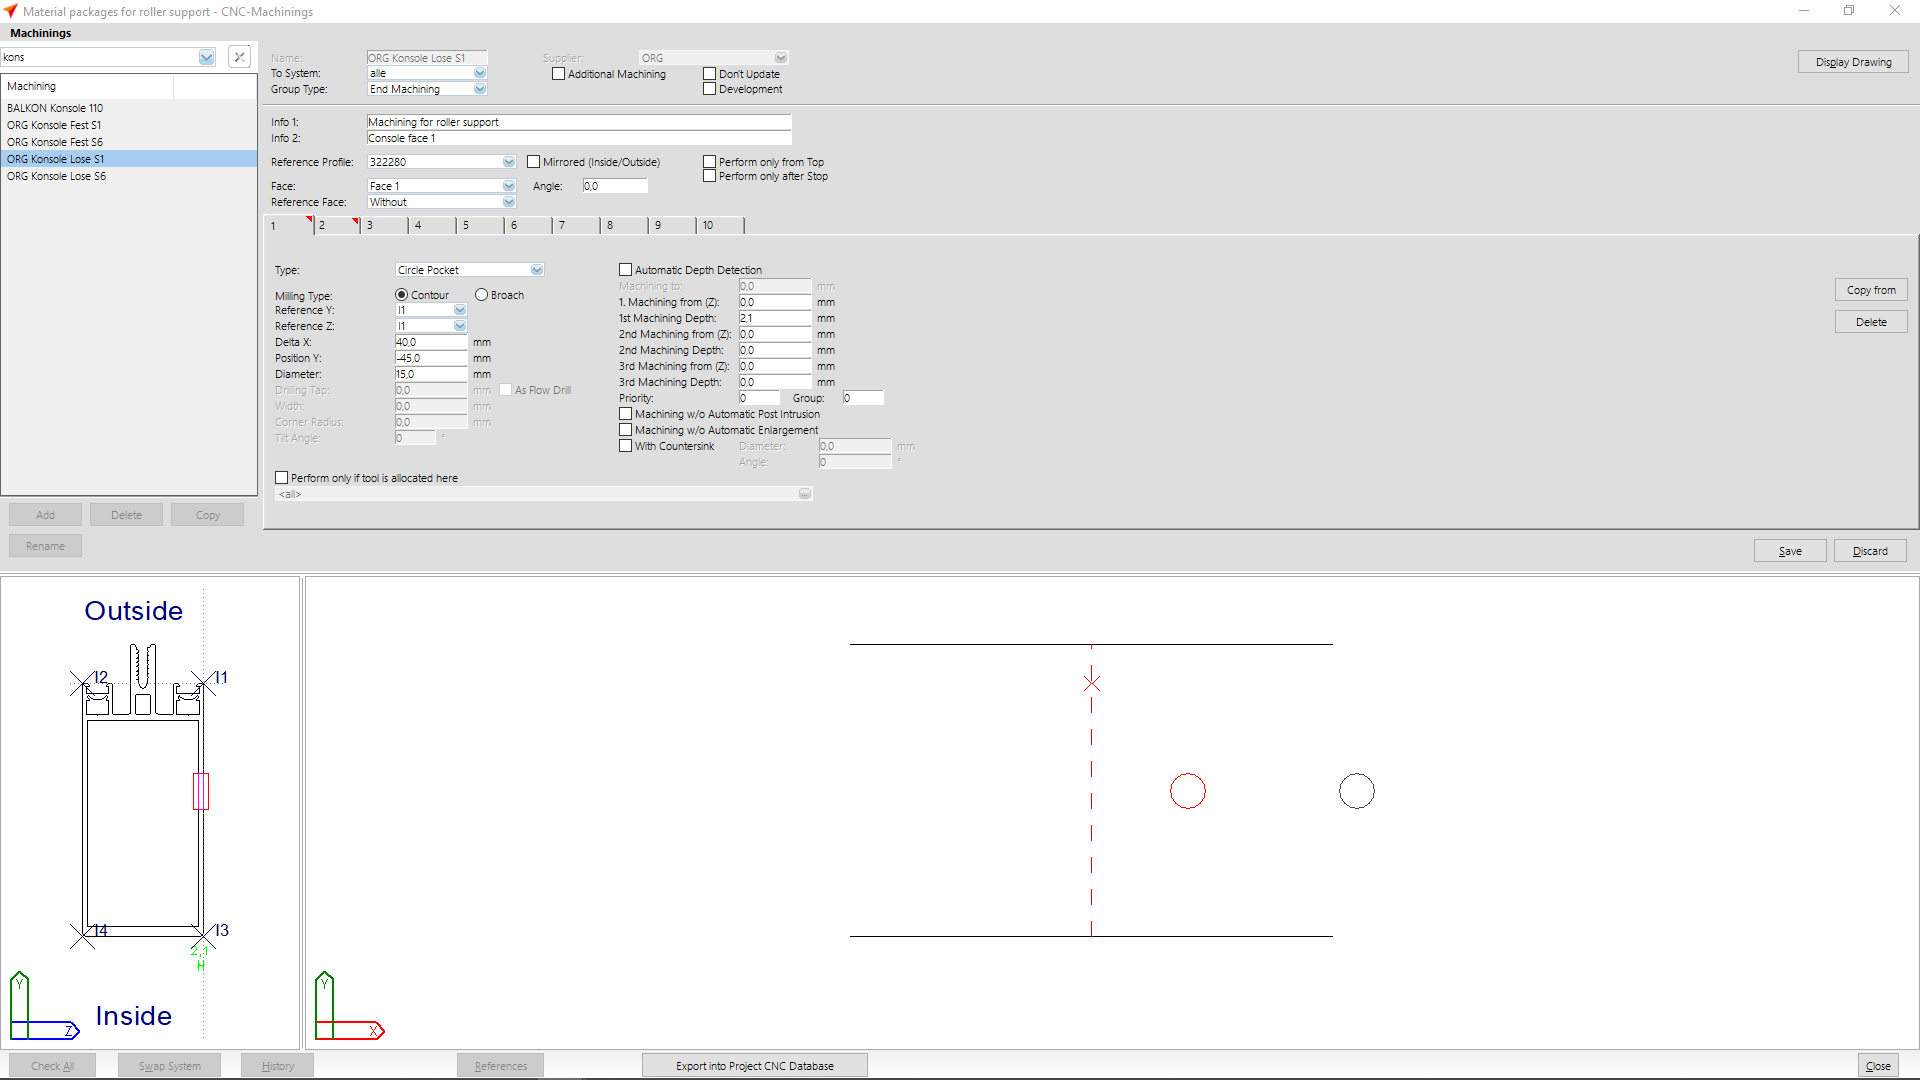
Machinings for a roller support face 1
The first step is to create the machinings for the roller support on face 1.
Enter the name of the machining at "Name". The CNC's list of abbreviations will show the most common abbreviations of machining names.
At "Group type" select the option "End machining".
Enter a description of the machining in "Info 1" and "Info 2".
At "Reference profile" you select the basic profile by which the machining is to be executed.
At "Face", select "Face 1".
At tab "1" you enter the following data:
- Type: circle pocket
- Milling type: contour
- Reference Y: I1
- Reference Z: I1
- Delta X: 40,0 mm
- Position Y: -45,0 mm
- Diameter: 15,0 mm
- Machining from (Z): 0,0 mm
- Machining depth: 2,1 mm
In the pre-view window at the bottom you can see the result of your input and if necessary you can correct it.
At tab "2" you enter the following data
- Type: circle pocket
- Milling type: contour
- Reference Y: I1
- Reference Z: I1
- Delta X: 110,0 mm
- Position Y: -45,0 mm
- Diameter: 15,0 mm
- Machining from (Z): 0,0 mm
- Machining depth: 2,1 mm
After you have entered the data, click on the "Save" button.
In the pre-view window at the bottom you can see the result of your input and if necessary you can correct it.
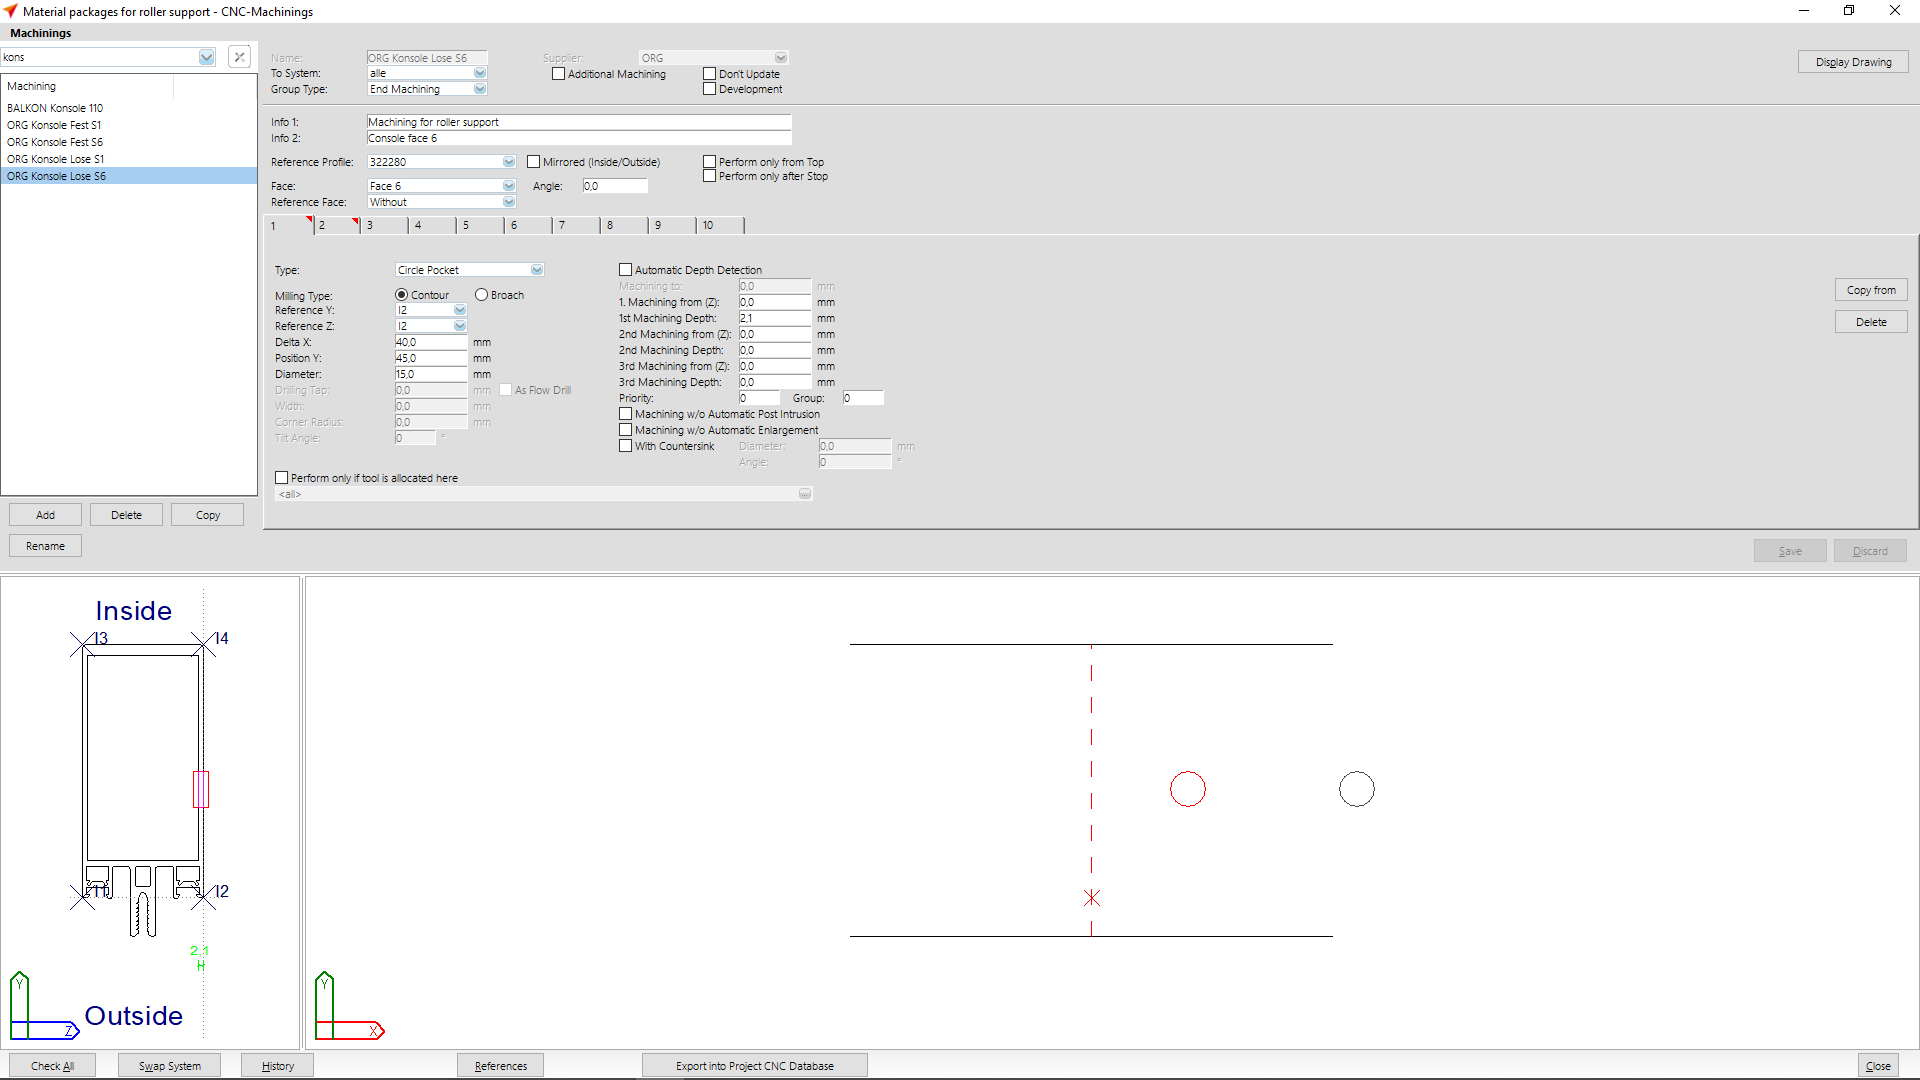
Machinings for a roller support face 6
The next step is to create the machinings for the roller support on face 6.
Enter the name of the machining at "Name". The CNC's list of abbreviations will show the most common abbreviations of machining names.
At "Group type" select the option "End machining".
Enter a description of the machining in "Info 1" and "Info 2".
At "Reference profile" you select the basic profile by which the machining is to be executed.
At "Face", select "Face 6".
At tab "1" you enter the following data:
- Type: Circle pocket
- Milling type: contour
- Reference Y: I2
- Reference Z: I2
- Delta X: 40,0 mm
- Position Y: 45,0 mm
- Diameter: 15,0 mm
- Machining from (Z): 0,0 mm
- Machining depth: 2,1 mm
In the pre-view window at the bottom you can see the result of your input and if necessary you can correct it.
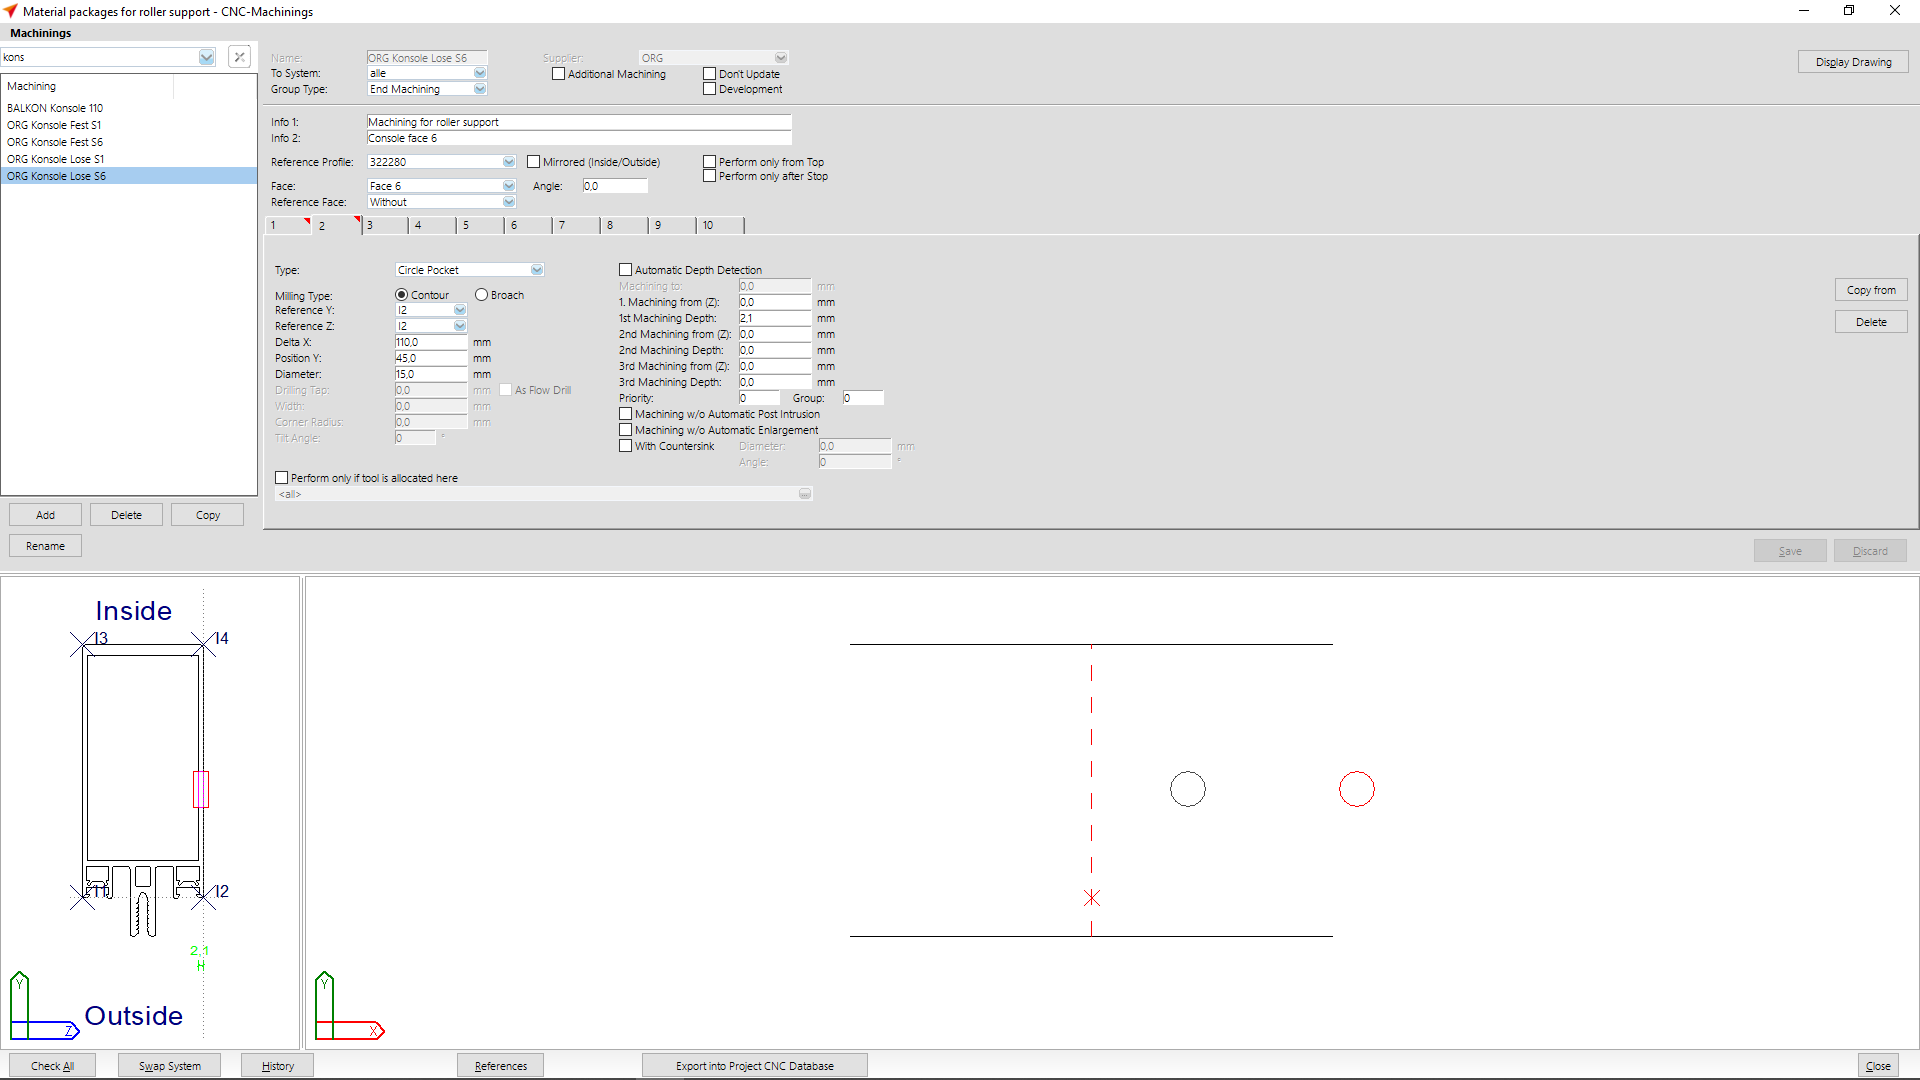
At tab "2" you enter the following data:
- Type: Circle pocket
- Milling type: contour
- Reference Y: I2
- Reference Z: I2
- Delta X: 110,0 mm
- Position Y: 45,0 mm
- Diameter: 15,0 mm
- Machining from (Z): 0,0 mm
- Machining depth: 2,1 mm
After you have entered the data, click on the "Save" button.
In the pre-view window at the bottom you can see the result of your input and if necessary you can correct it.
Grouping machinings
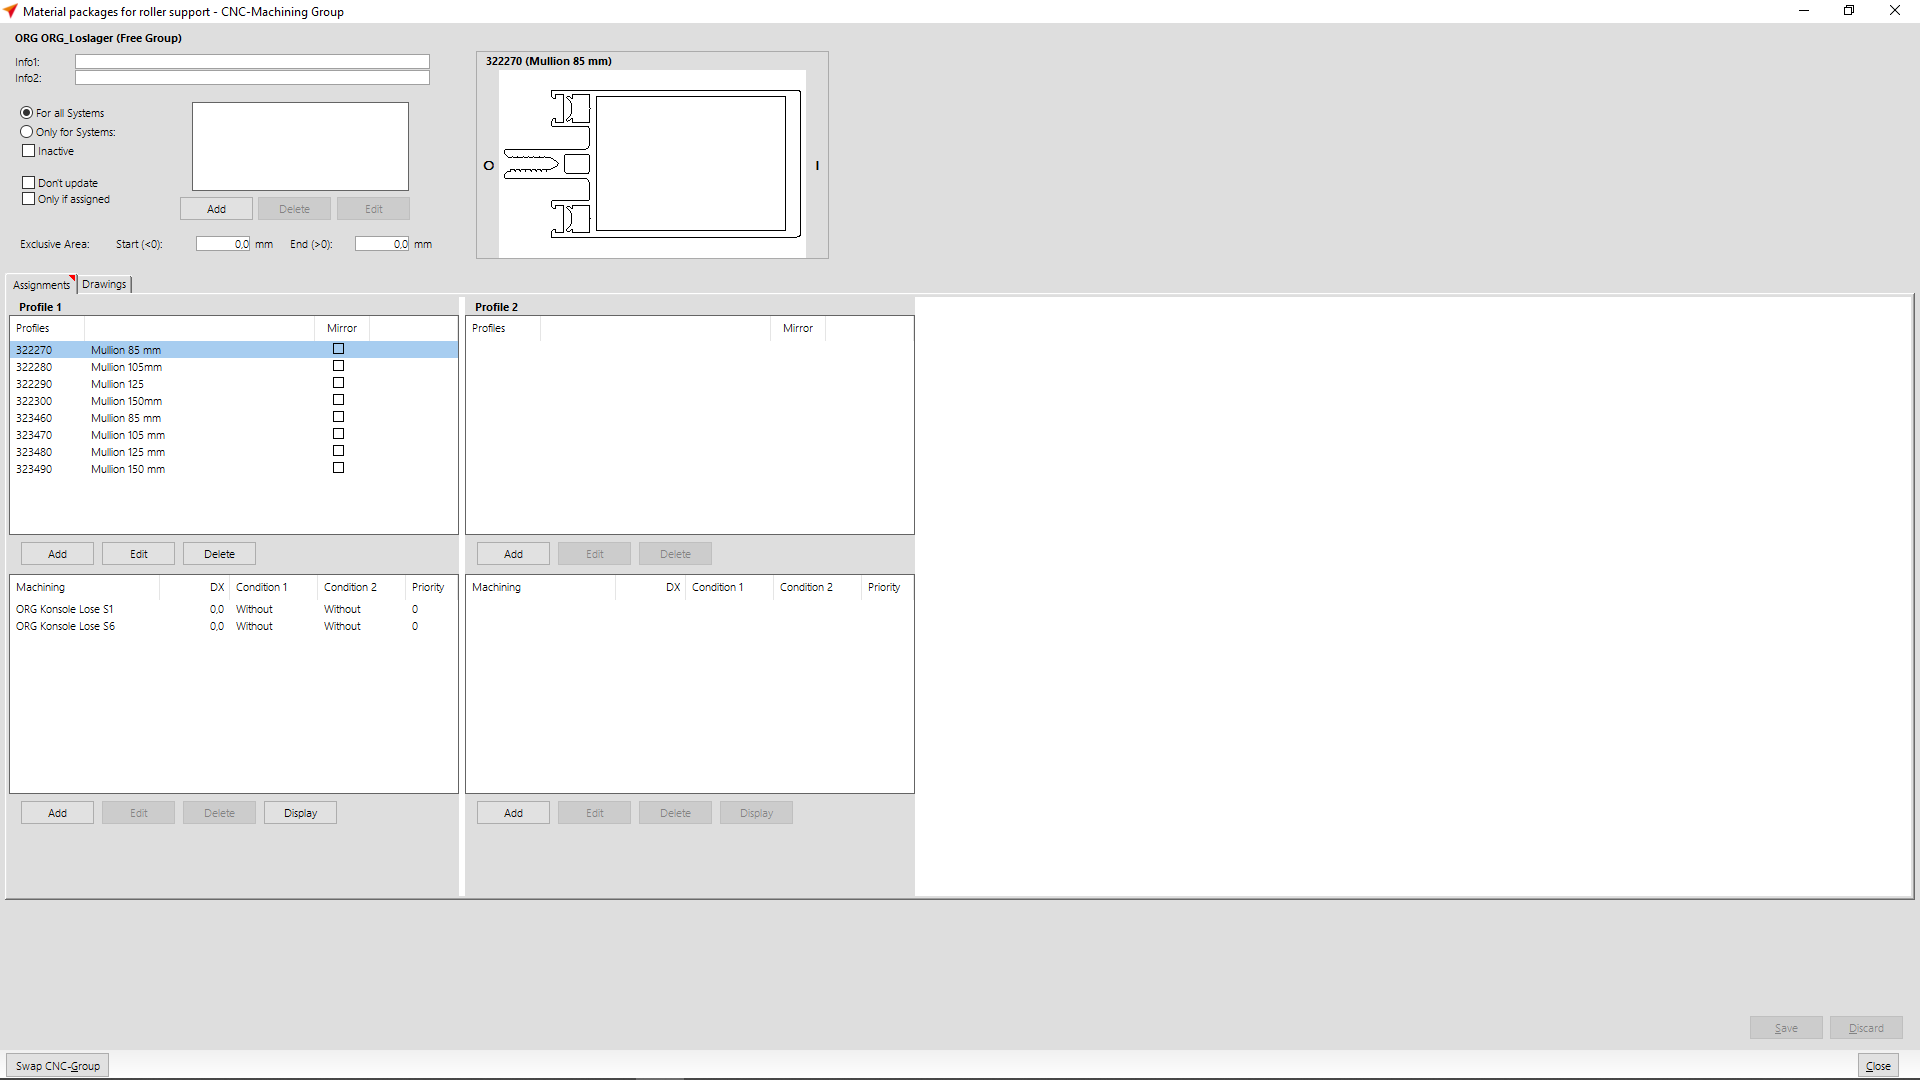
Select at "CNC Database" > "CNC Groups".
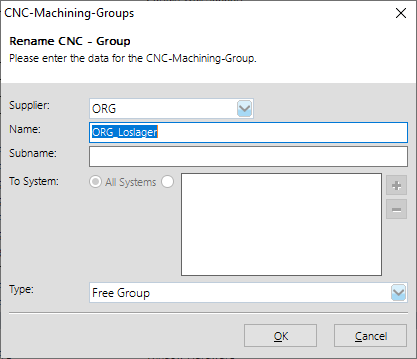
Click the "Add" button to create a new group.
Enter the main group name at "Name".
Determine the system in which the machining is to be used and select the option "Free group" at Type.
Click "OK".
In the next window, you define the profiles and machinings to be used in this group.
In section "Profile 1" you enter the profile numbers of the mullions for which the machinings are to be considered. In the input area below, enter the machinings that you have created for this purpose.
Creating a material package
The next step is to create a material package.
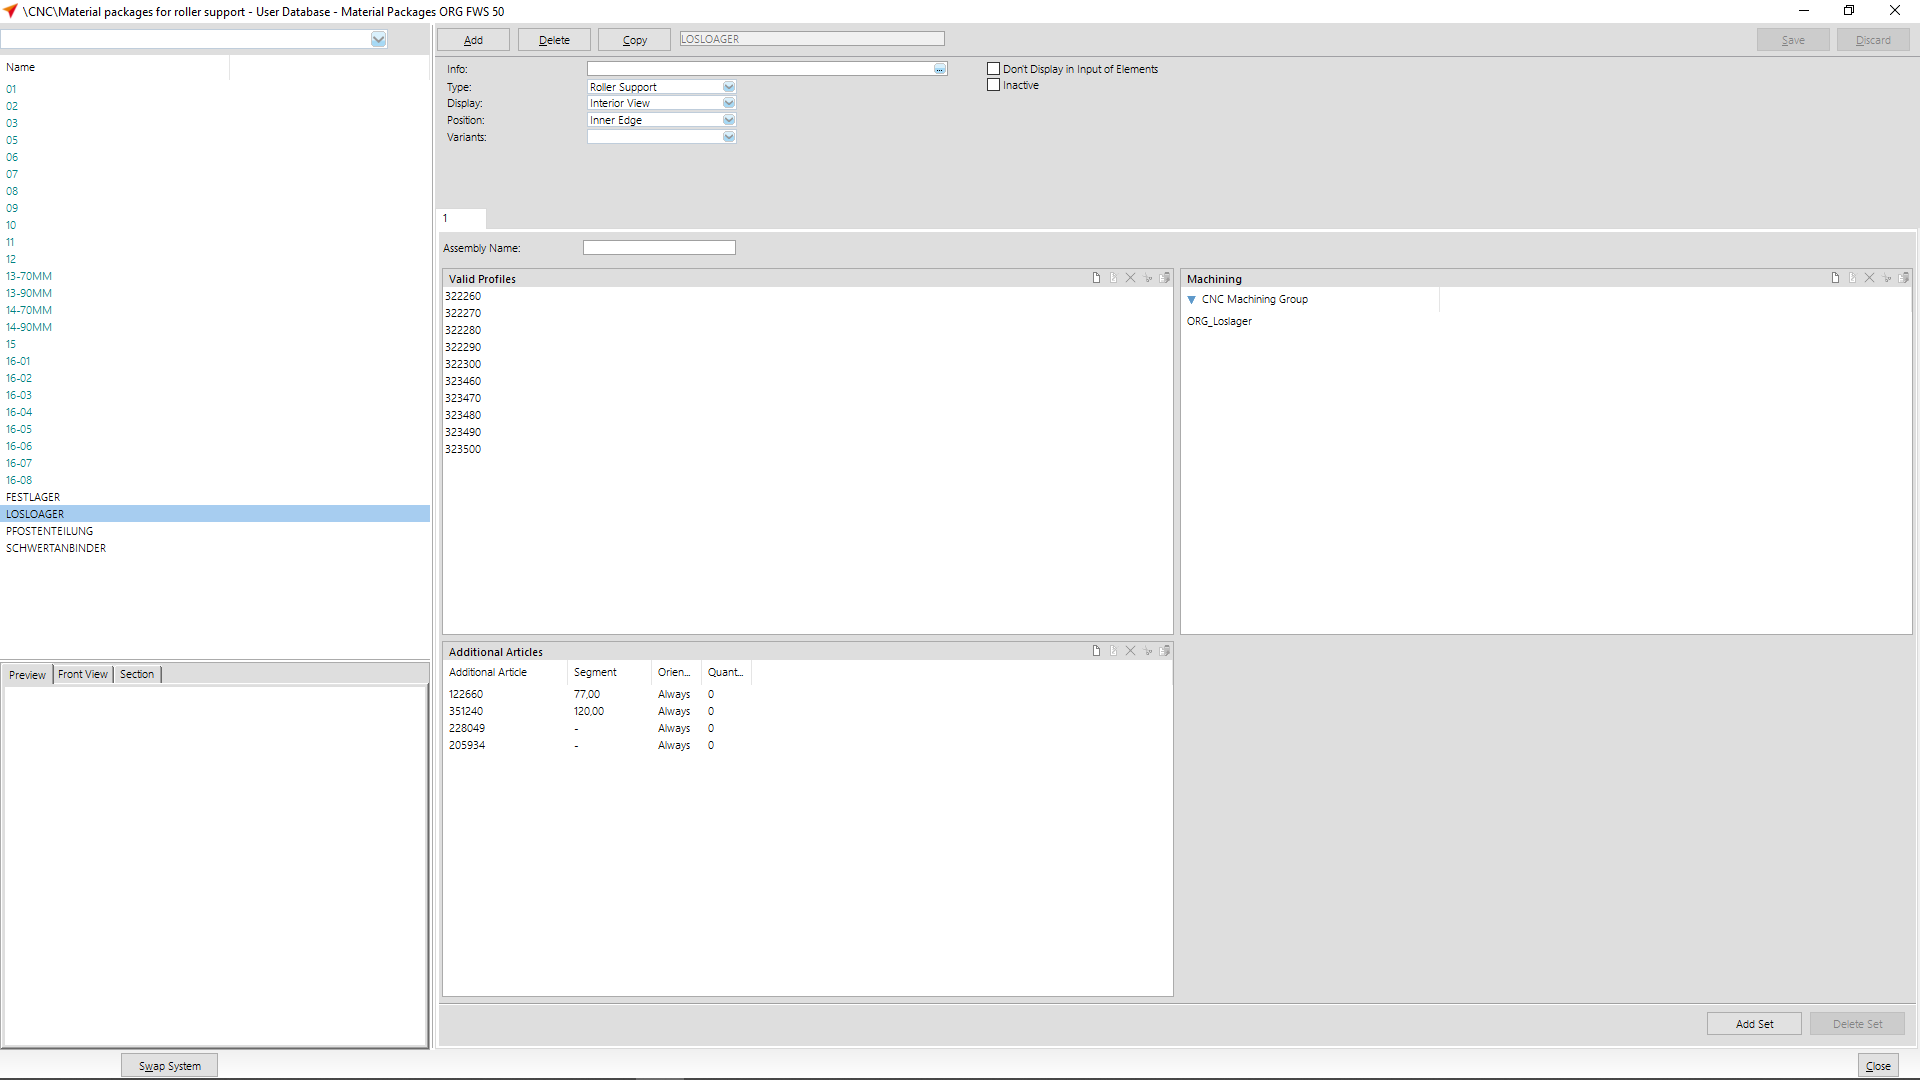
In the Project Center, on the File menu, click User Database > System input > Material Packages and select a system.
The input window for material packages opens.
Click the "Add" button to create a new material package.
Enter a name for the material package.
Select "Roller support" at "Type".
At "Valid profiles" you enter the article numbers of the mullions for which the material package is to be considered.
In the right-hand column, enter the machining group that you have created for this purpose.
Additional articles can be added in the area below at "Additional articles".
Use in element input
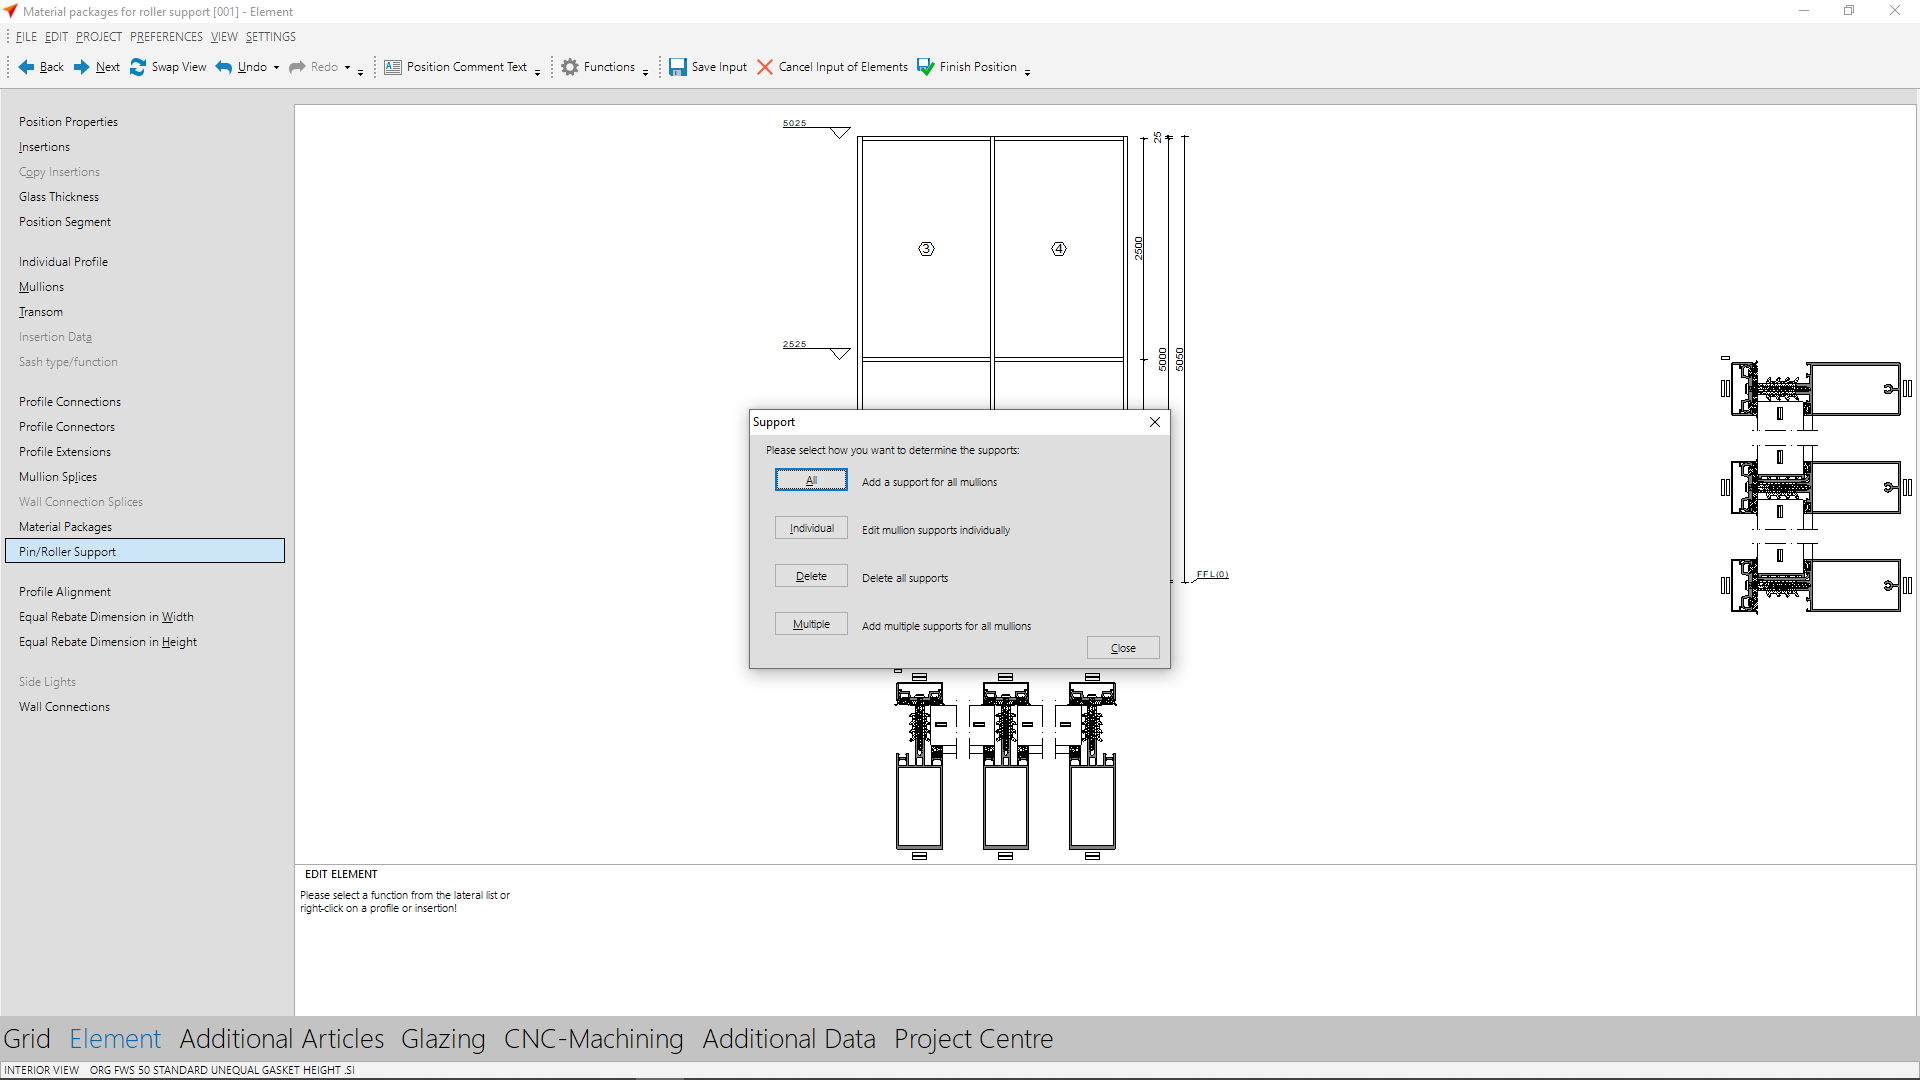
Create a curtain wall position in the input of elements.
Click on "Pin/Roller Support" in the section "Element" and choose the button "All".
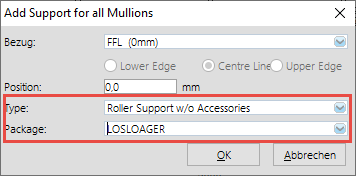
At "Reference" enter the height reference of the material package.
At "Position" enter the positioning height of the material package.
At "Type" select the option "roller support w/o accessories".
At "Package" you select the material package you created for roller supports.
In CNC-Machining, the machining of the material package is displayed.




 Deutsch
 English (UK)
 English (US)
 Español
 Français
 Italiano
 Nederlands
 Polski
 Türkçe
 Čeština
 Ελληνικά