With the Orgadata app „Smart Measure" having bits of paper everywhere at the construction site is a thing of the past. As a Logikal user you can transfer the element positions to an iPad/iPhone and digitise them directly. You can enter the site dimension data for single positions and revise it directly in the app. Since the app also handles site dimension pictures the user is kept informed about the allocation of dimensions. Via Internet all data can be transferred to the computer in the office. In case of a subsequent site meeting the determined data will be in the office sooner than the person who measured them.
System requirements
Operating system: Minimum IOS 7.0
In order to use the app minimum requirement is an iPad 2 or an iPhone 4 which established a connection to the Internet.
The PC which has Logikal installed has also got to have an Internet access.
Additional you need the export interface for measures. For more information please contact your Area Sales Manager.
1. Downloading the app
Smart Measure can be downloaded in the Apple app store.
It requires an Apple-ID which you can register for at no charge under: www.apple.com
Download the Smart Measure app here.
2. Connect Smart Measure and Logikal
In order for Logikal to communicate with Smart Measure you require a ticket ID.
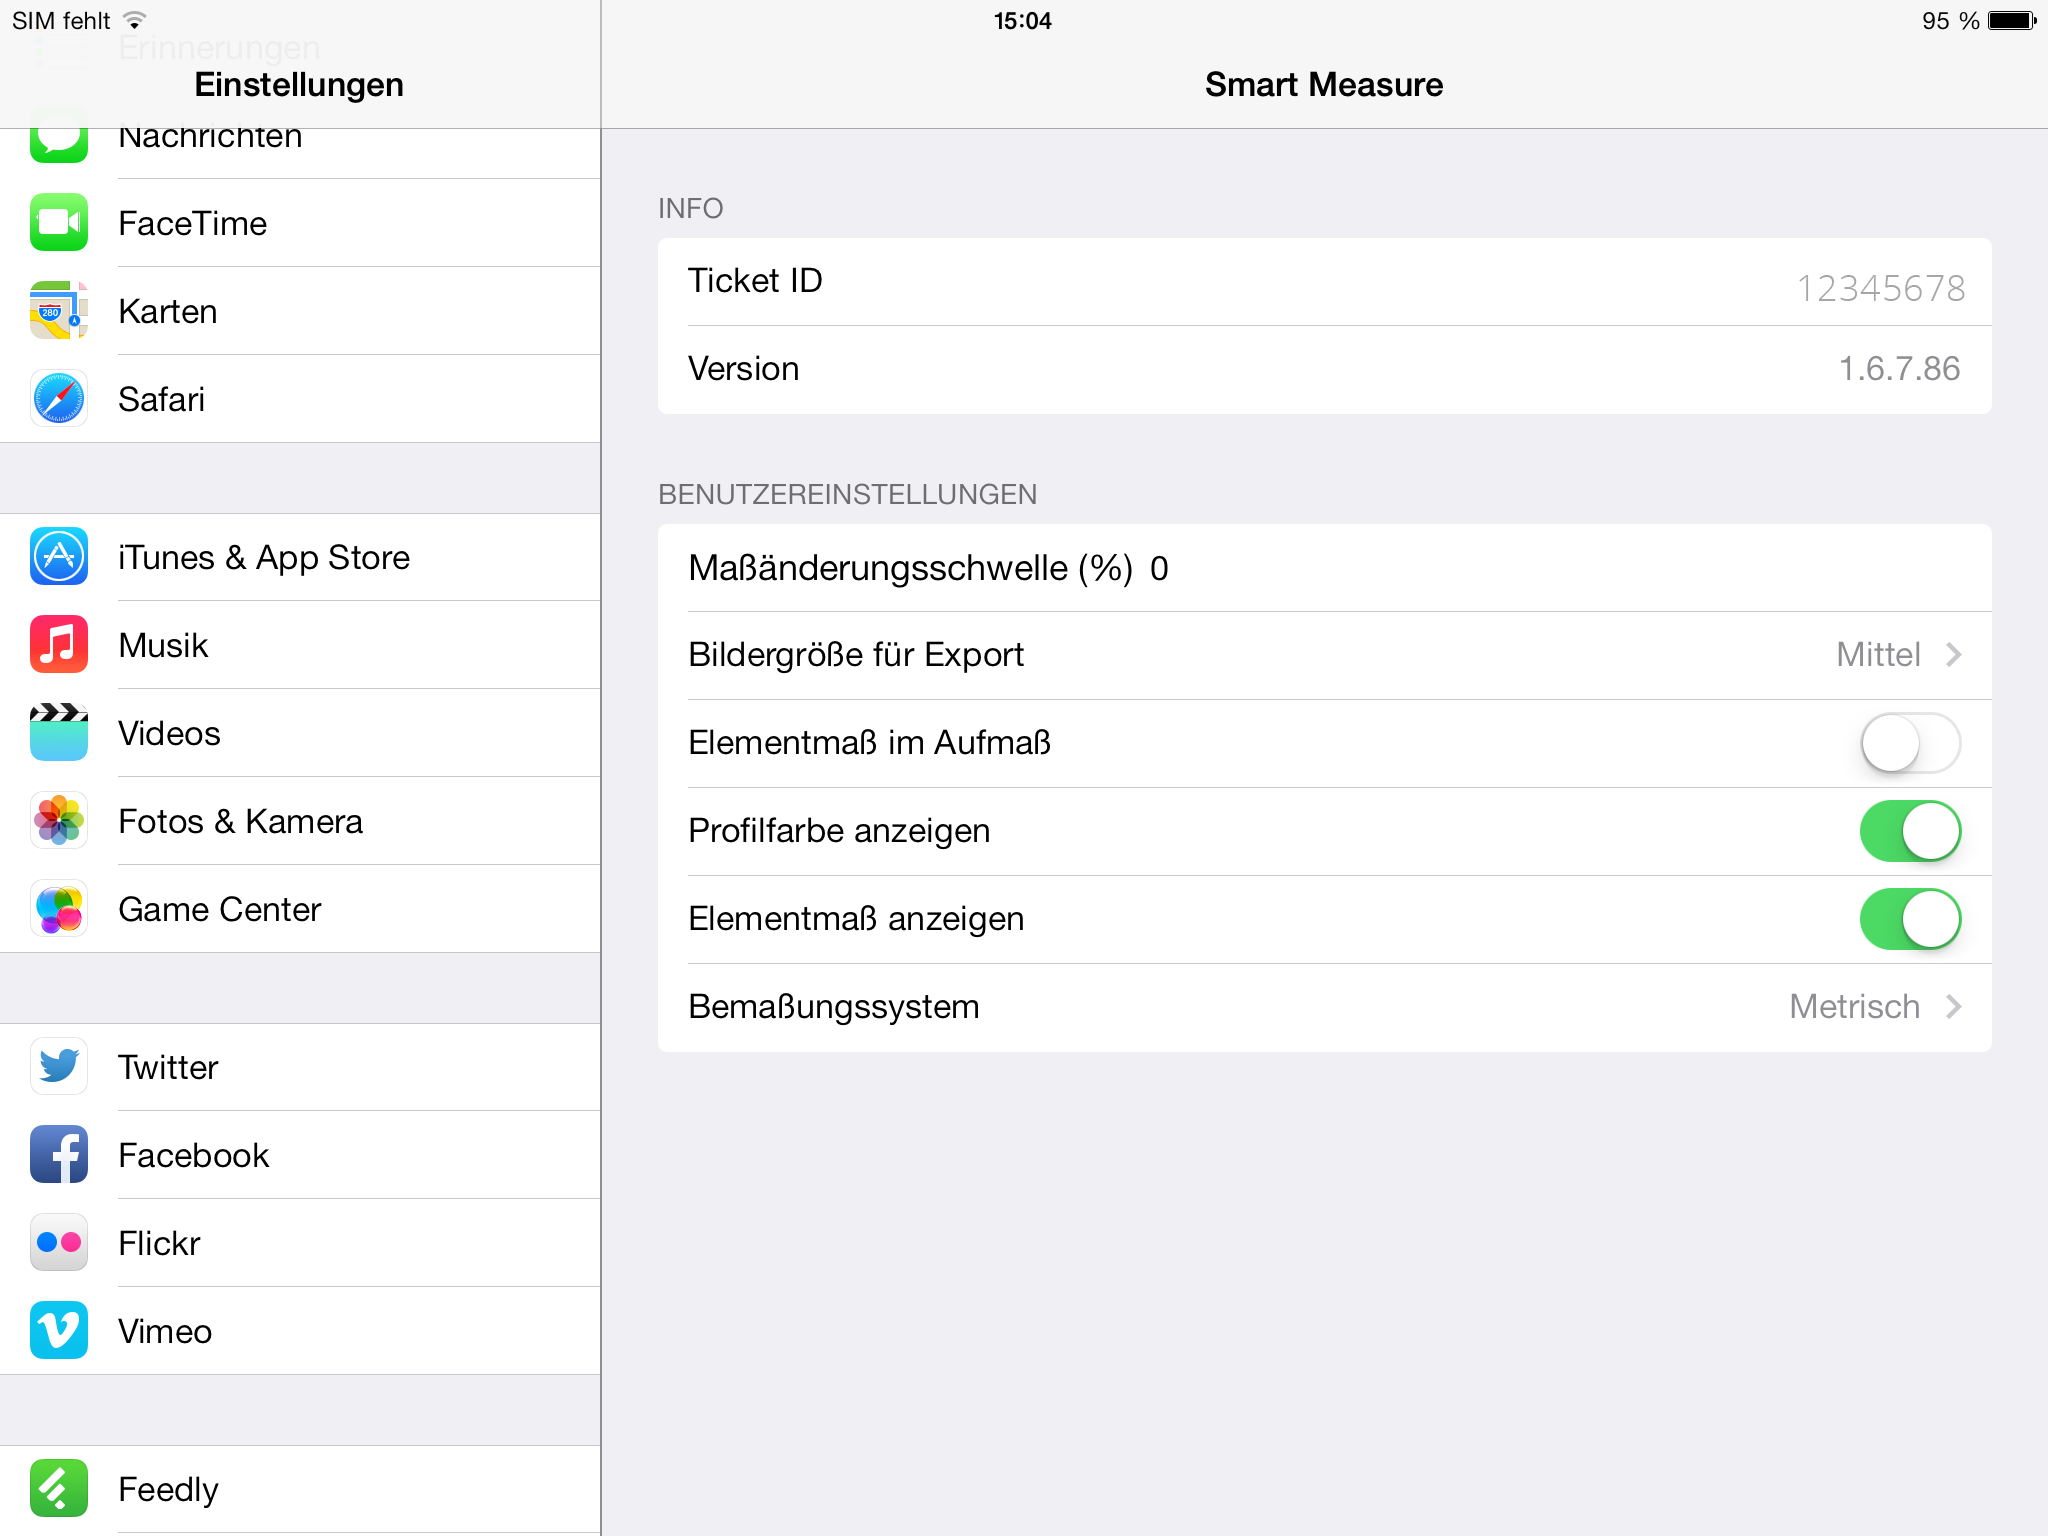
For this purpose select settings on your iPad.
Smart Measure is listed on the left side. You will find the ID in the info area on the right side.
Then you open Logikal. Select „Settings" → „Additional Settings".
Click the tab „Interfaces".

Under "Smart Measure" you enter the ID and the name of the iPad / iPhone and push „OK".
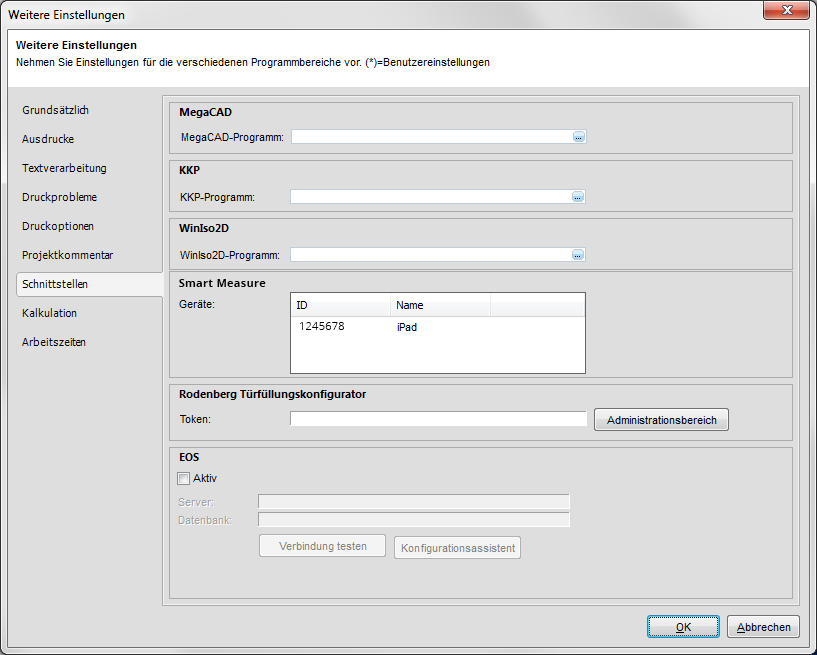
The connection between Smart Measure and Logikal is established.
3. Transfer positions to Smart Measure
Create the project and the positions in Logikal.
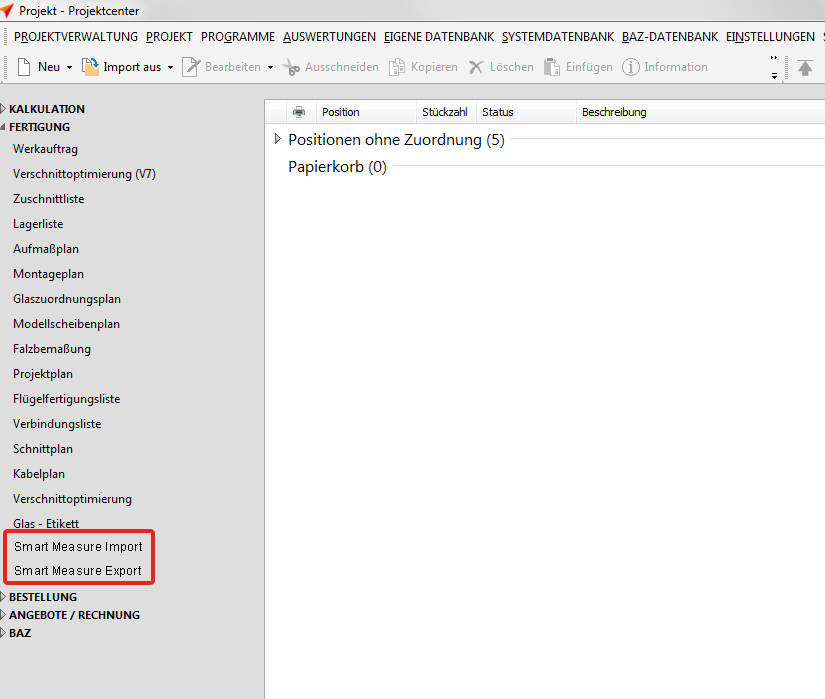
Click „Smart Measure Export" in the „Project Centre" to transfer the project to Smart Measure.
4. Edit positions in Smart Measure
Open Smart Measure on your iPad.
To import the positions from Logikal draw down the list on the left side.
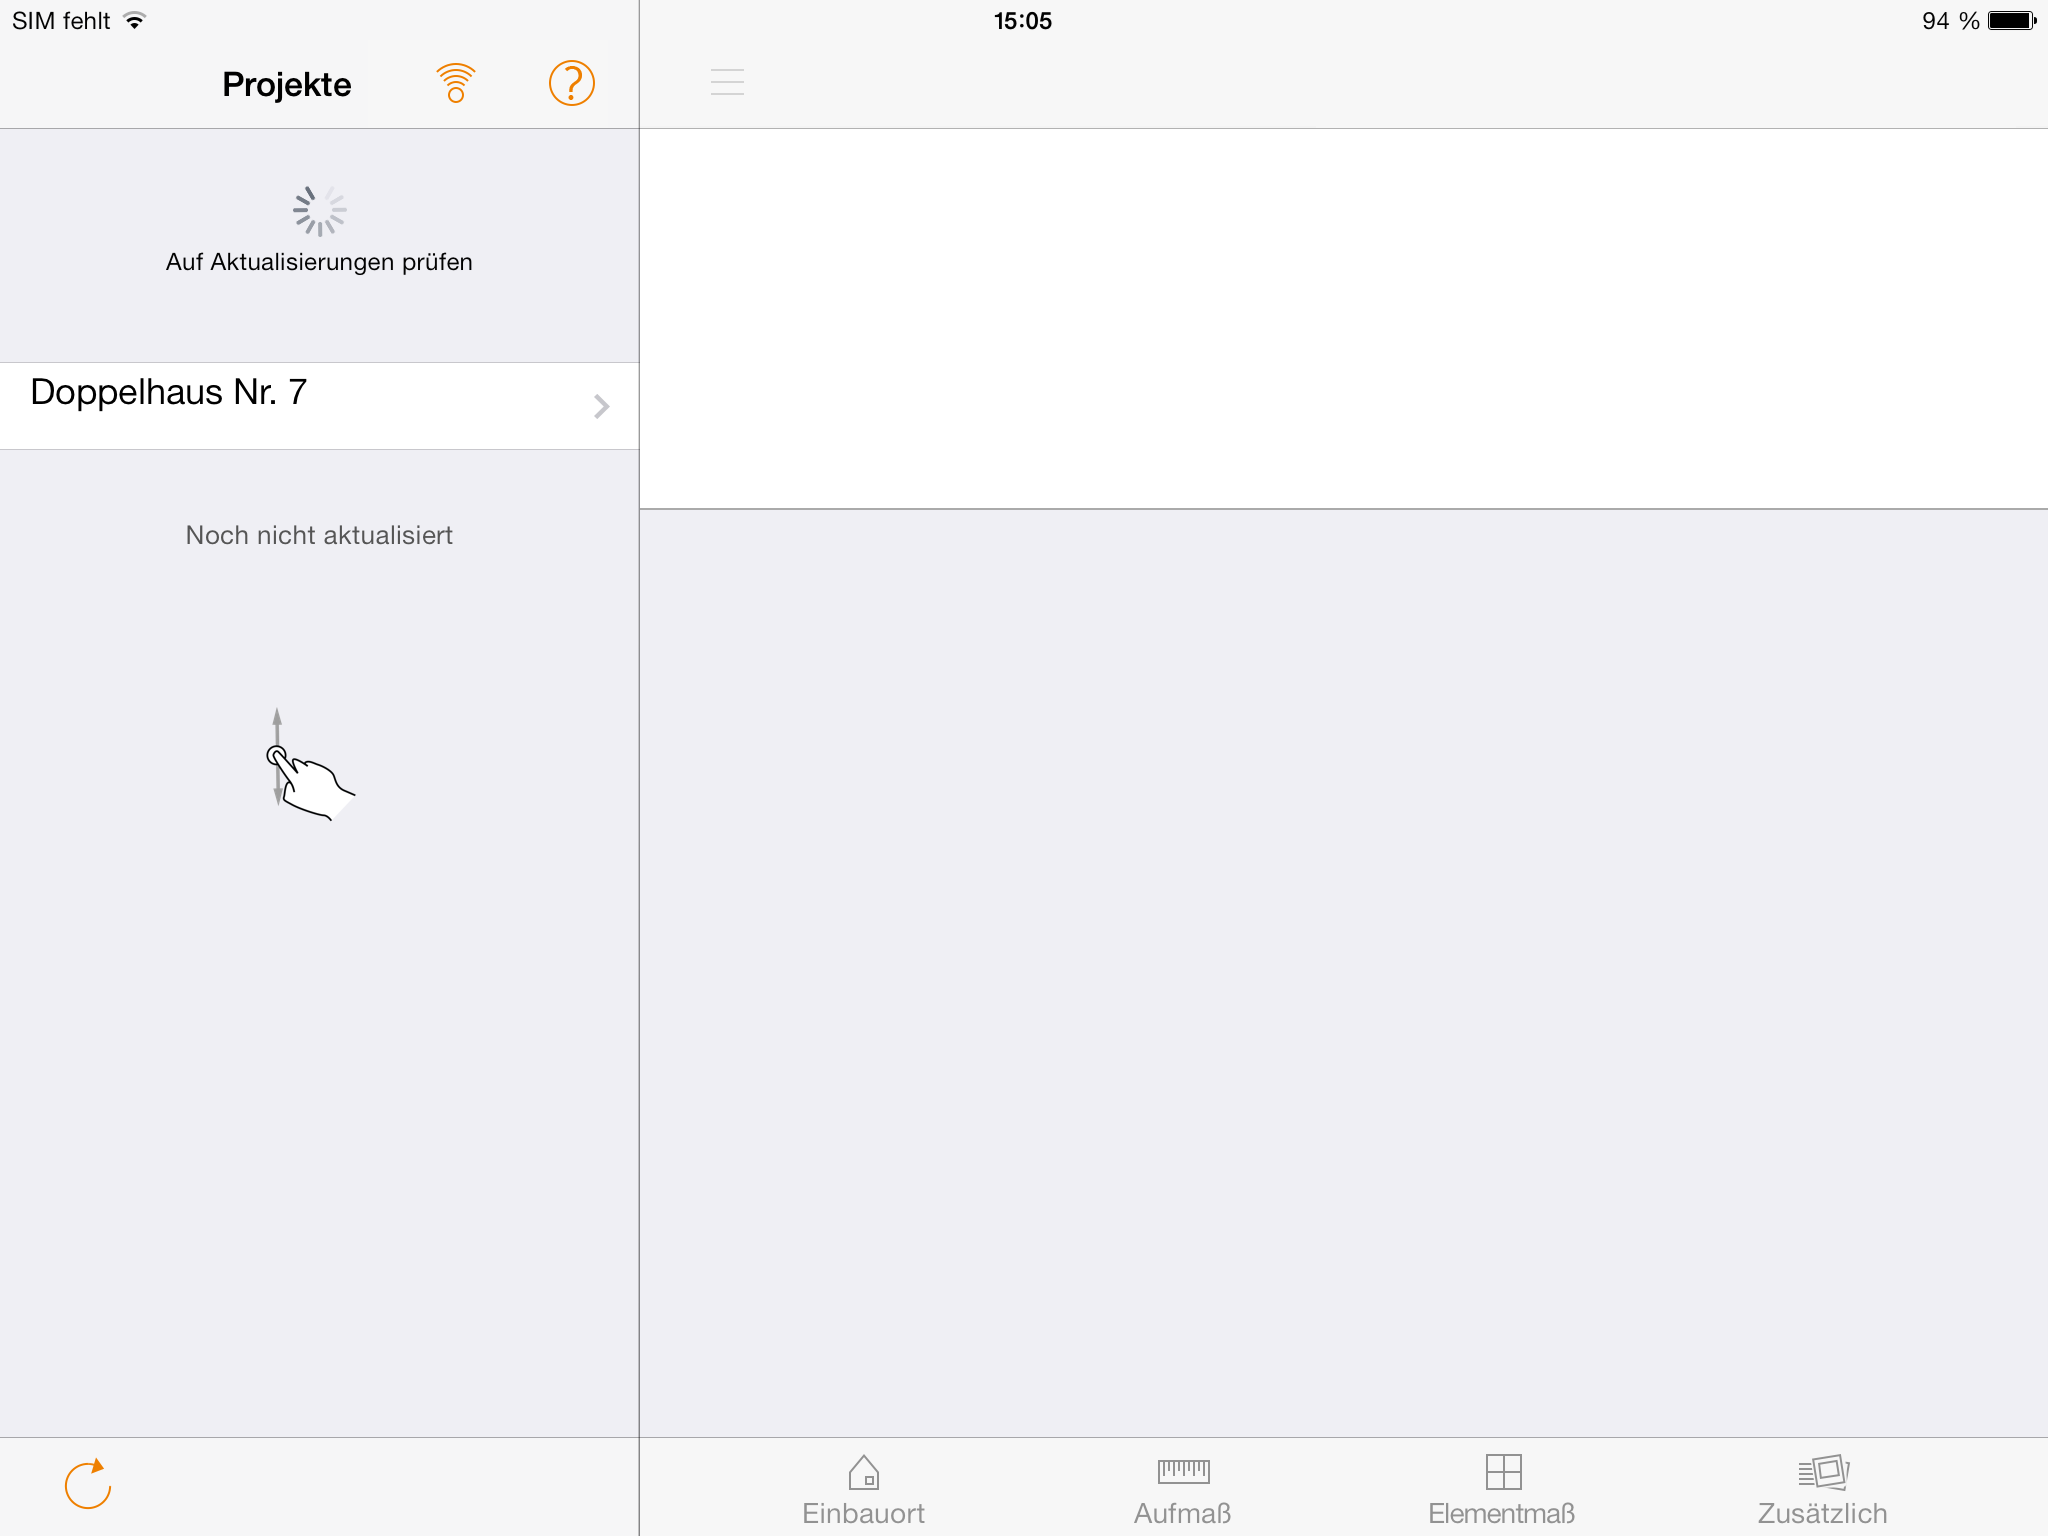
Opening a project
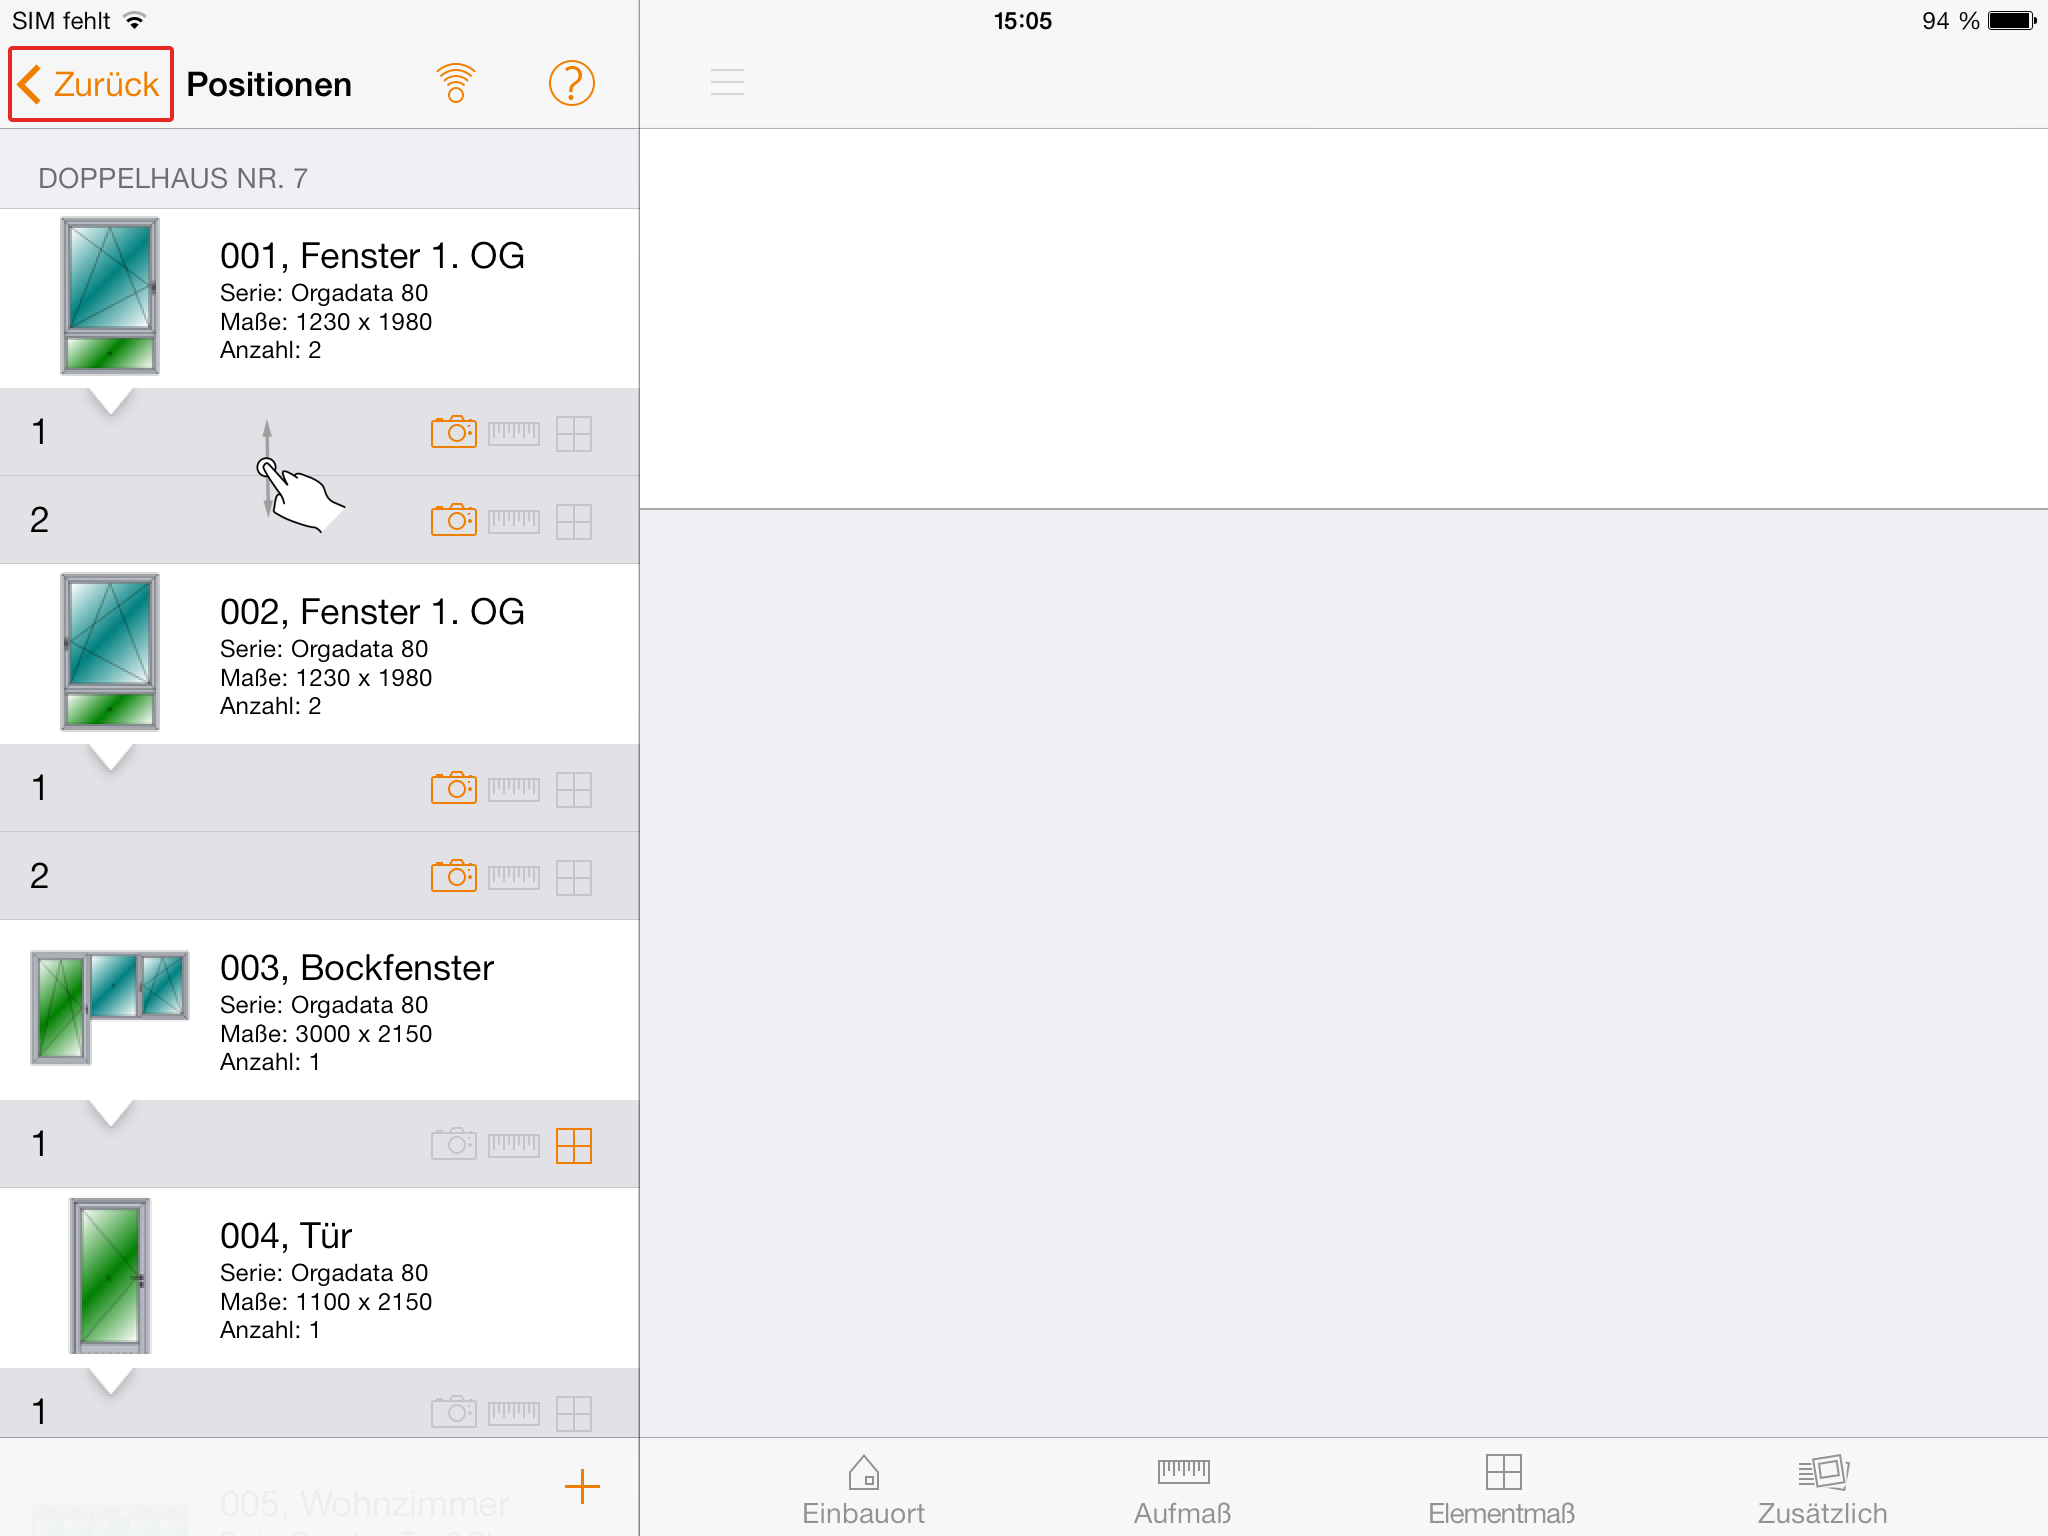
Tap your finger on the project in order to open it. The positions contained therein will be displayed.
Move the position list up and down with one finger.
You get back to the project overview with „Projects above" left in the toolbar.
Add/edit positions
Each position is marked with a number and a short description from Logikal.
The symbols to the right of the positions have the following functions:
 |
A check mark on the camera symbol shows whether a photo has been attached to the position. |
 |
A check mark on this symbol means that there have been site dimensions entered for this position. |
 |
This symbol shows a check mark if the dimensions of the design have been altered. |
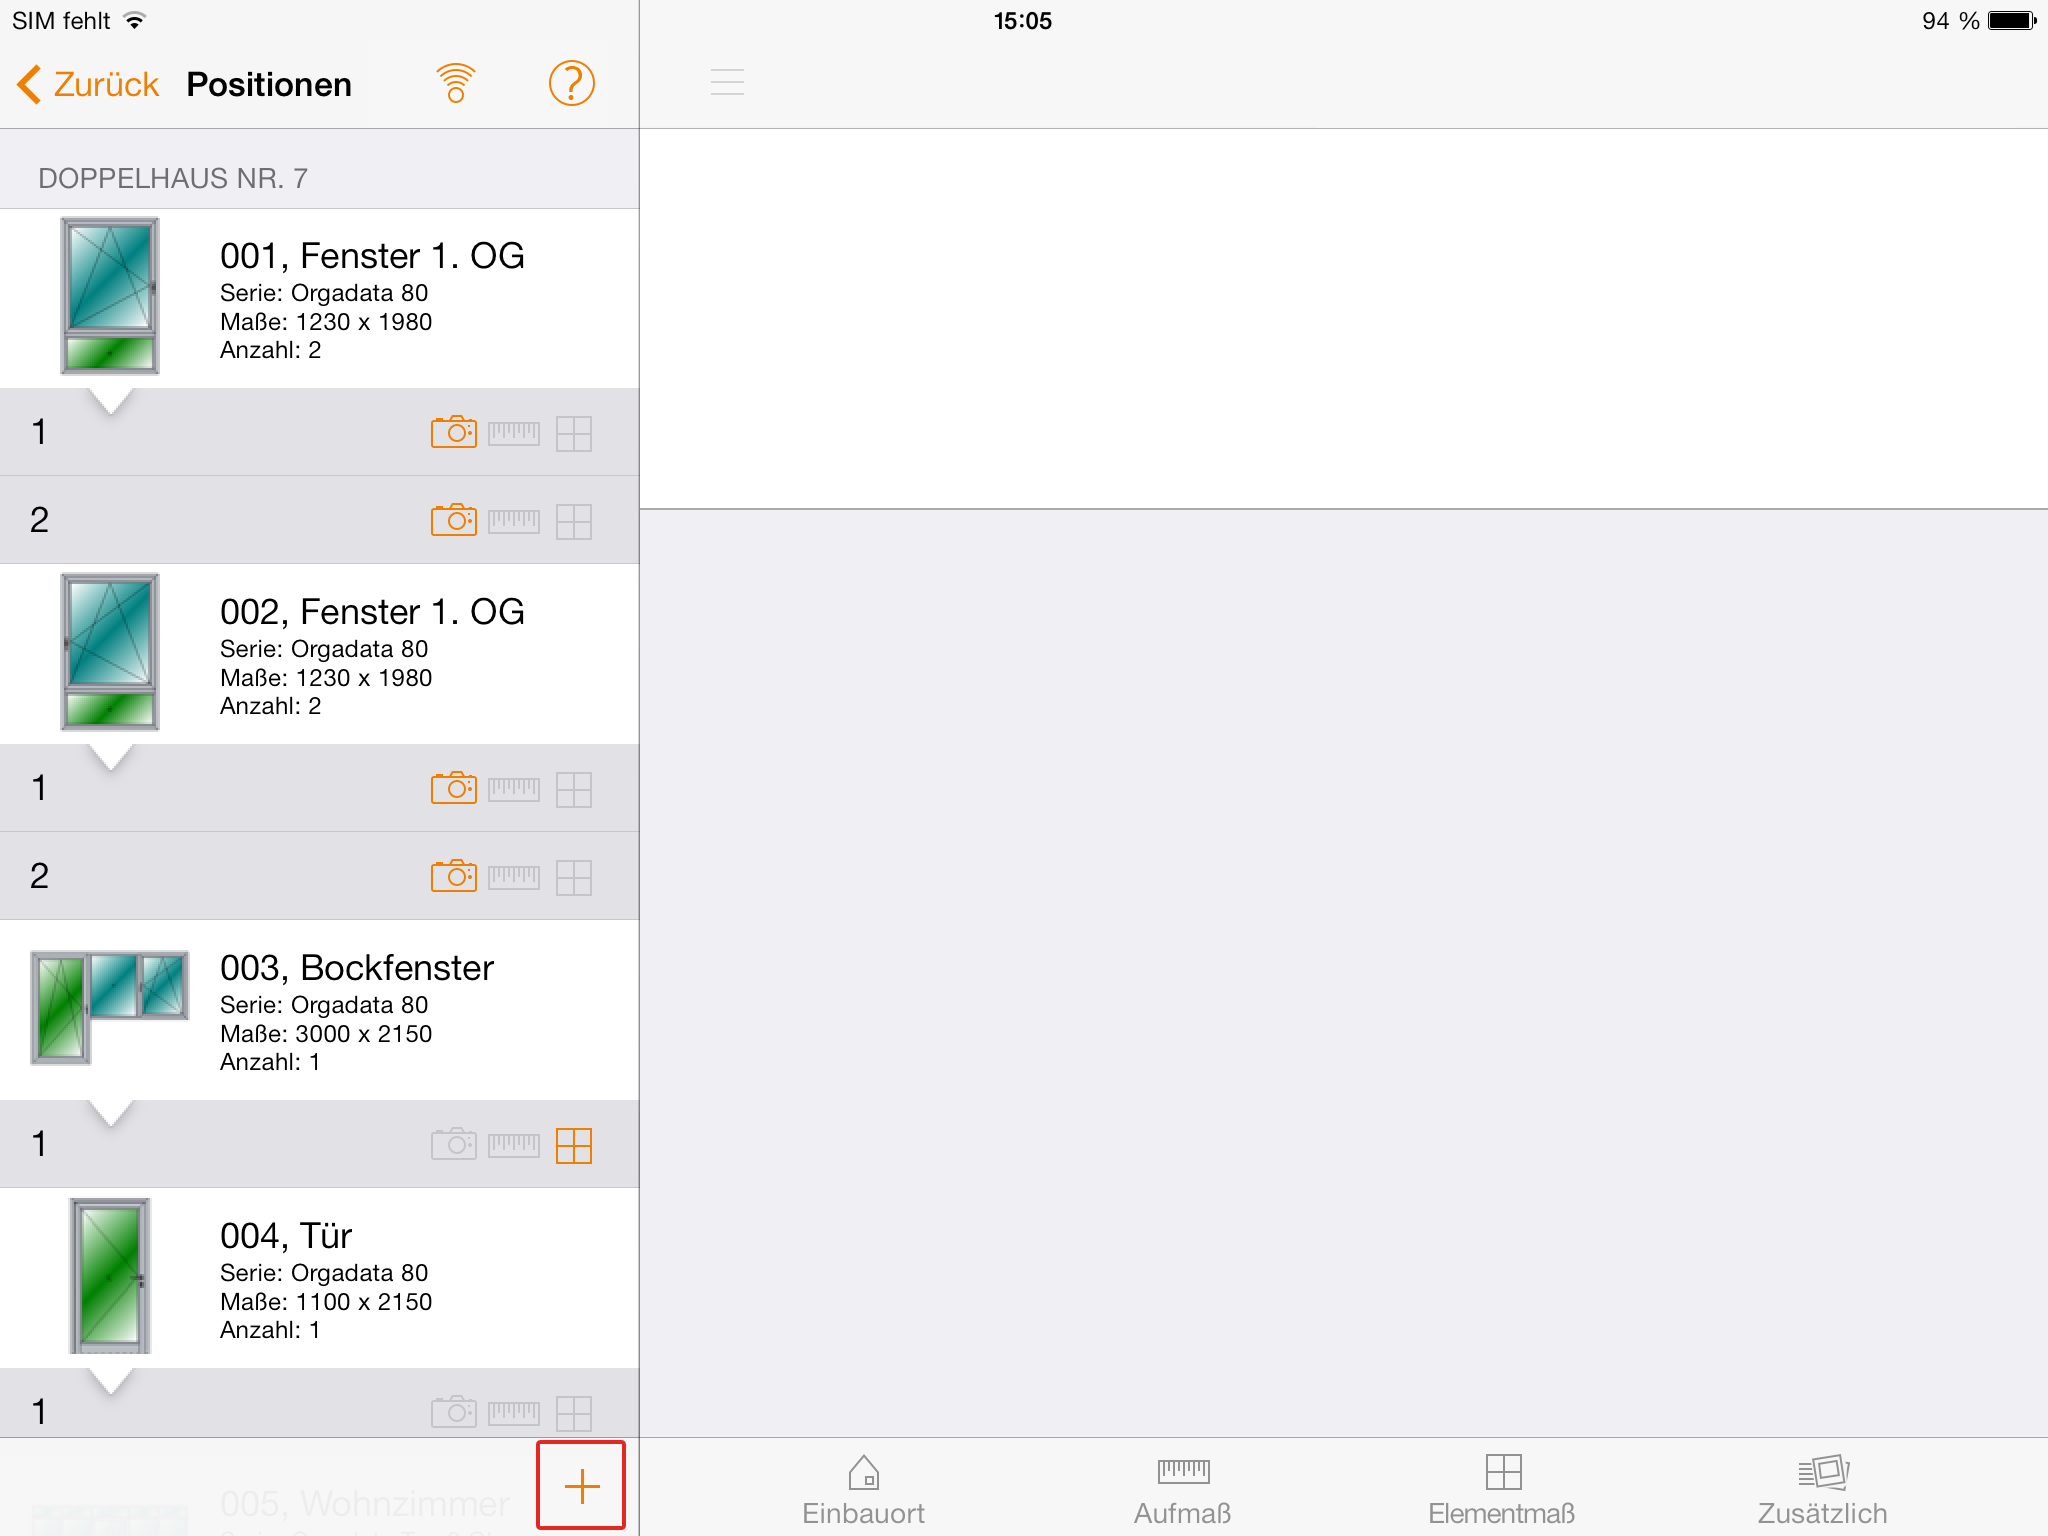
Create a new position
Tap the „Plus" symbol in the bottom corner of the position list to create a whole new position.
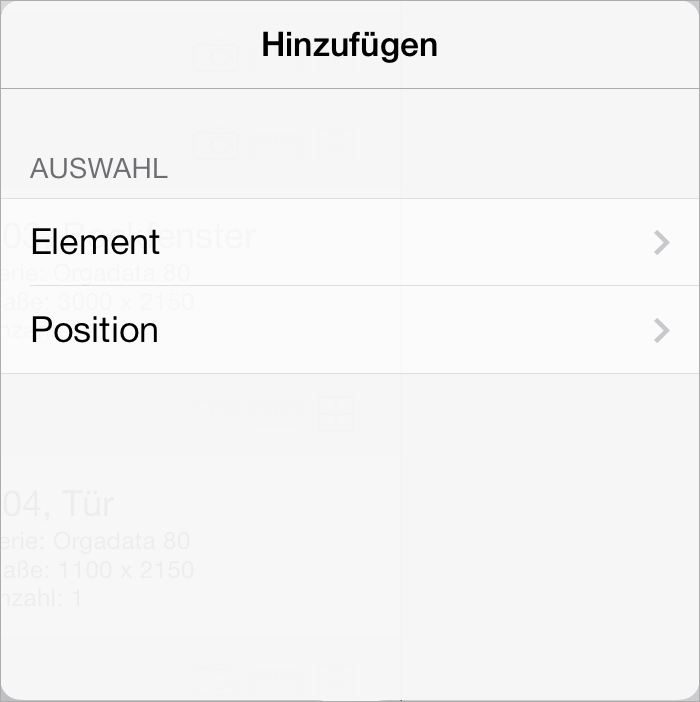
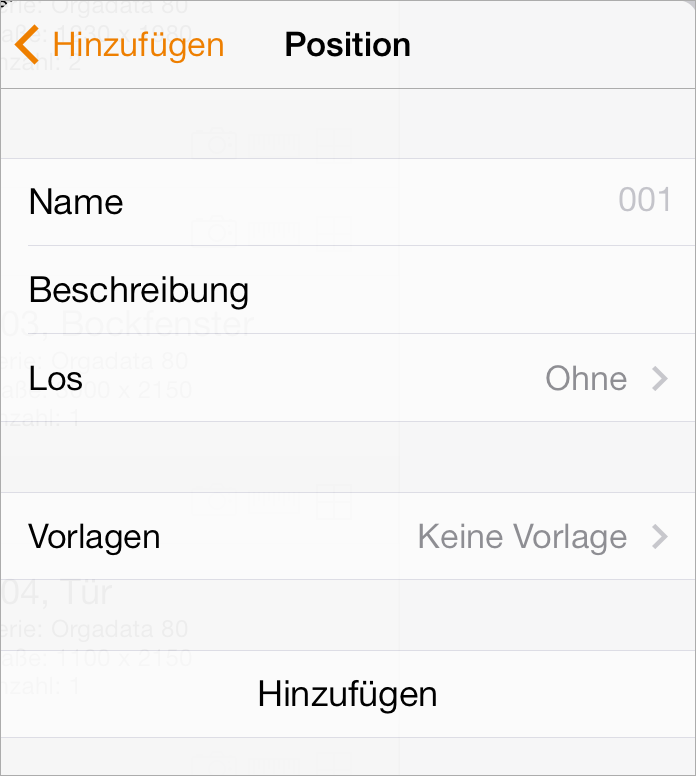
Enter a position number or name.
Tap „Finish" to save the position.
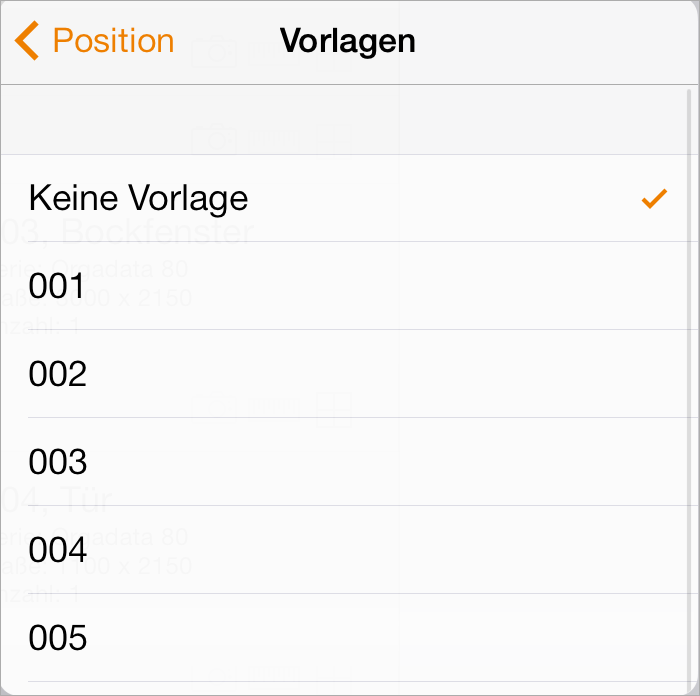
Under „Template" you can select one of the already existing positions and use this as a template.
Delete a position
You delete a position by swiping your finger from right to left. Tap „delete" to remove the position.

Display detailed information of a position
By tapping on a position a detailed view opens. Here you will find all information for a position (project, position number, description, system, interface etc.).
Tip: You can also swipe back and forth between the positions.
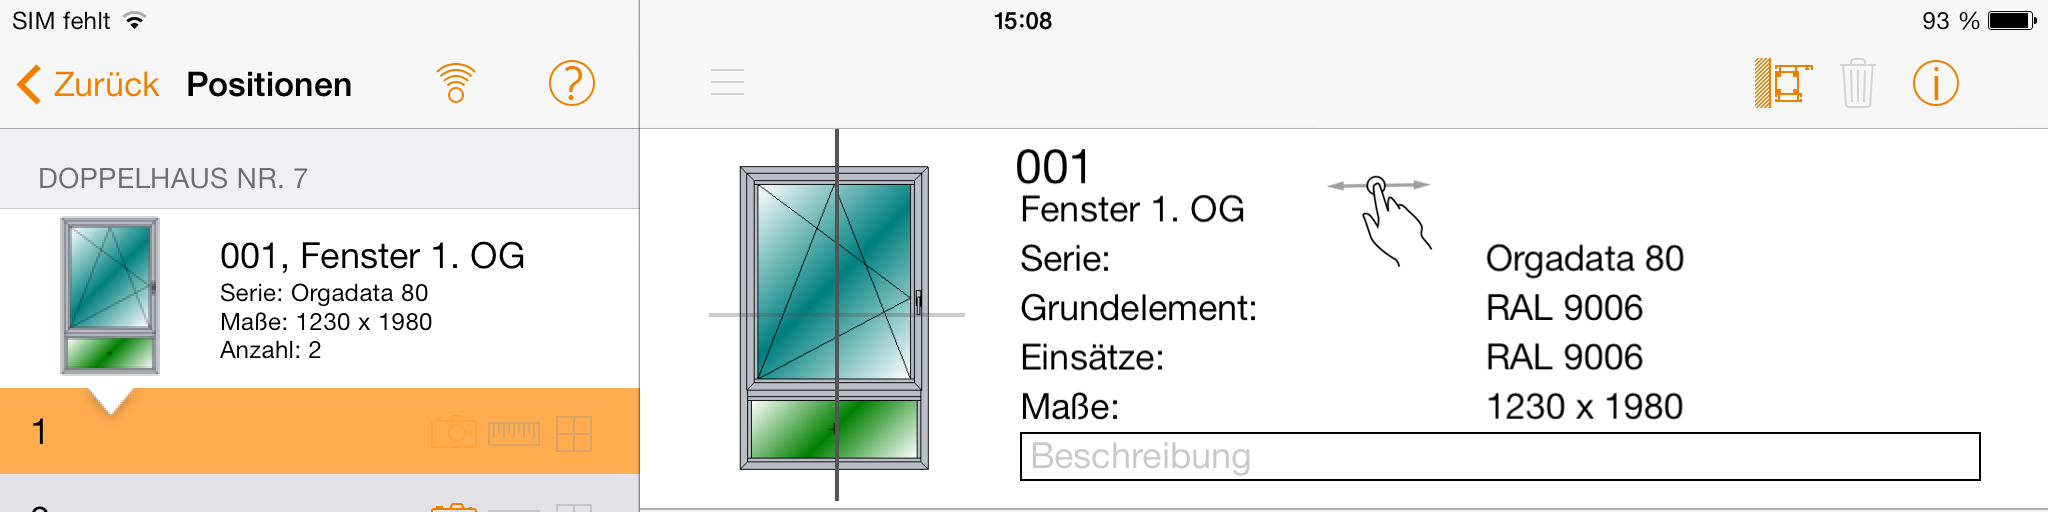
Here you can add a description.
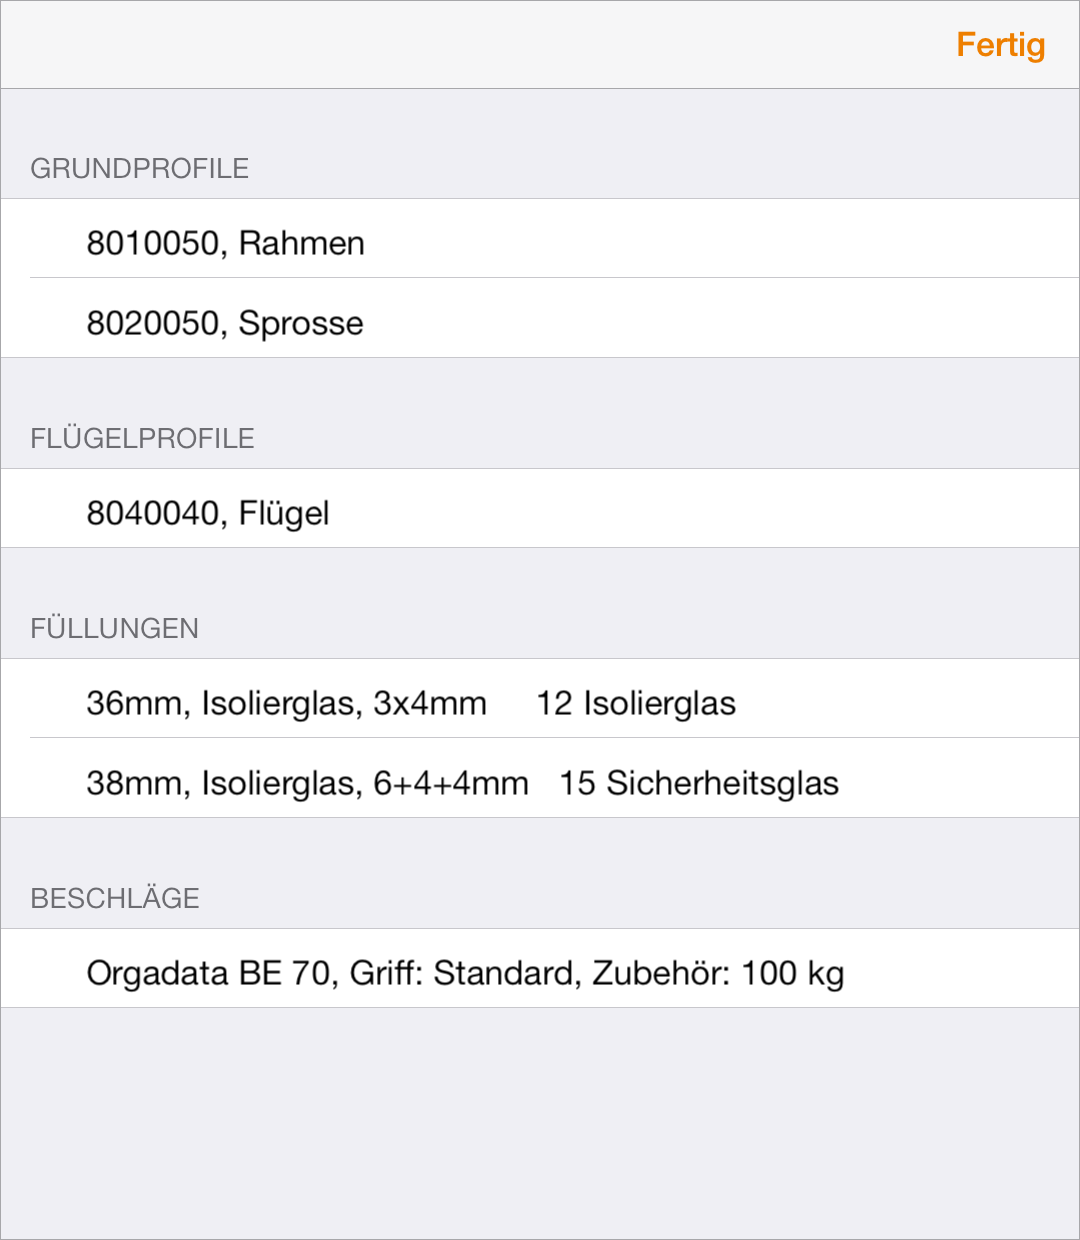
For detailed information as to the used articles of the position tap on the I-symbol in the toolbar „overview".
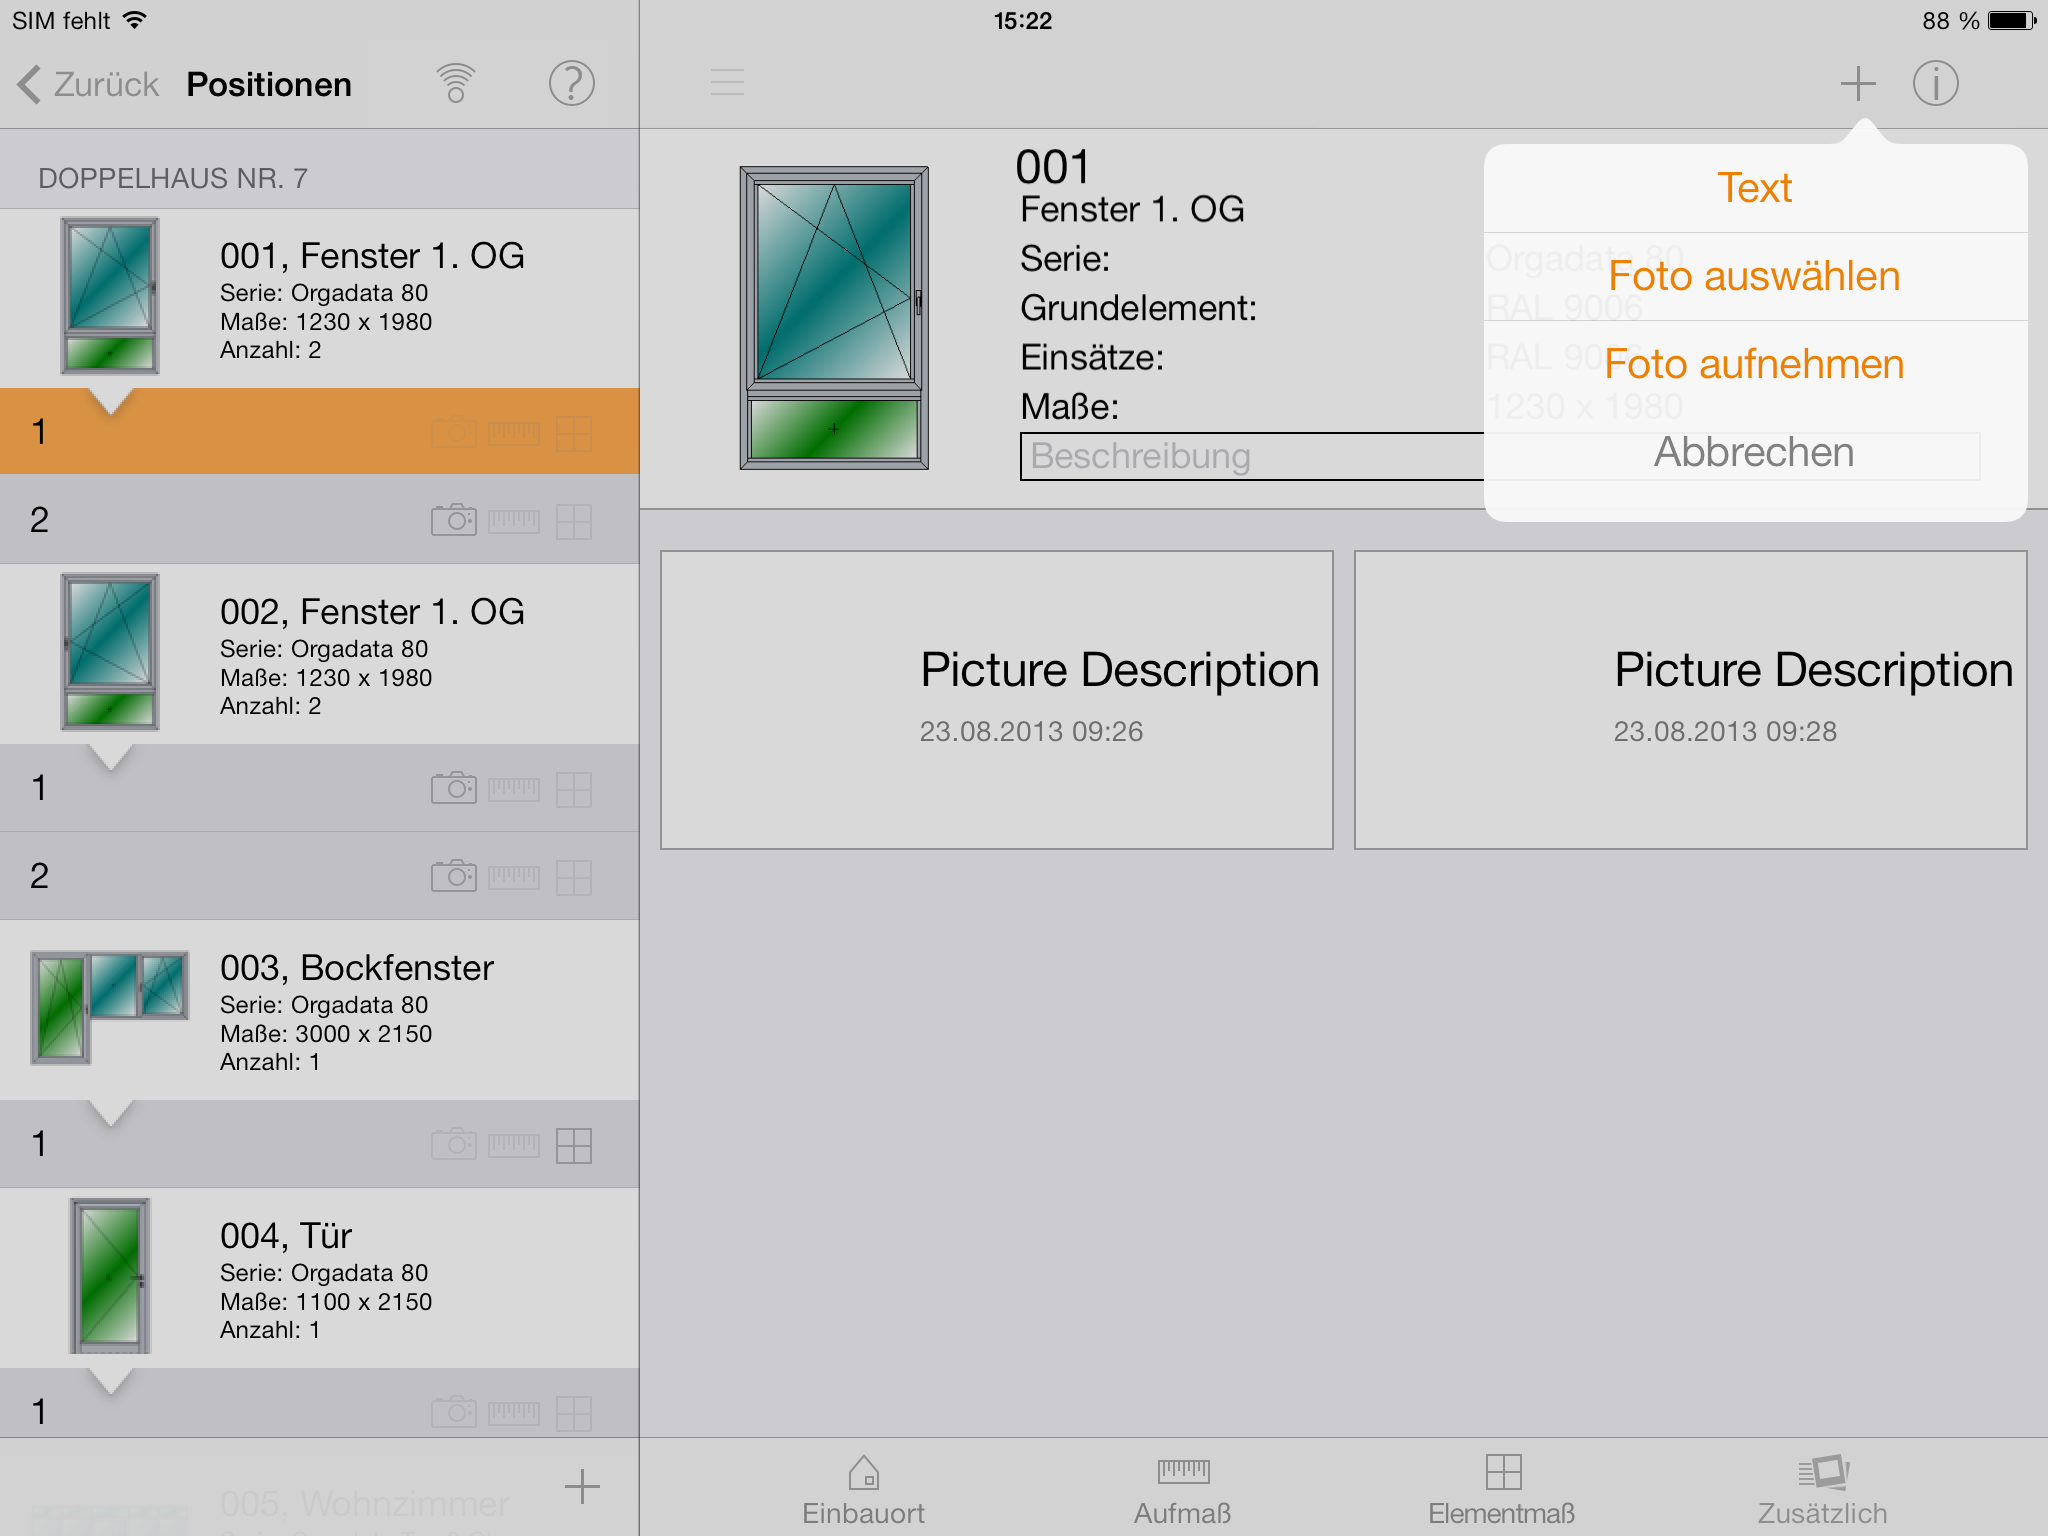
Add and edit photos
Photos can be assigned to each position. Click the camera symbol at the top of the screen.
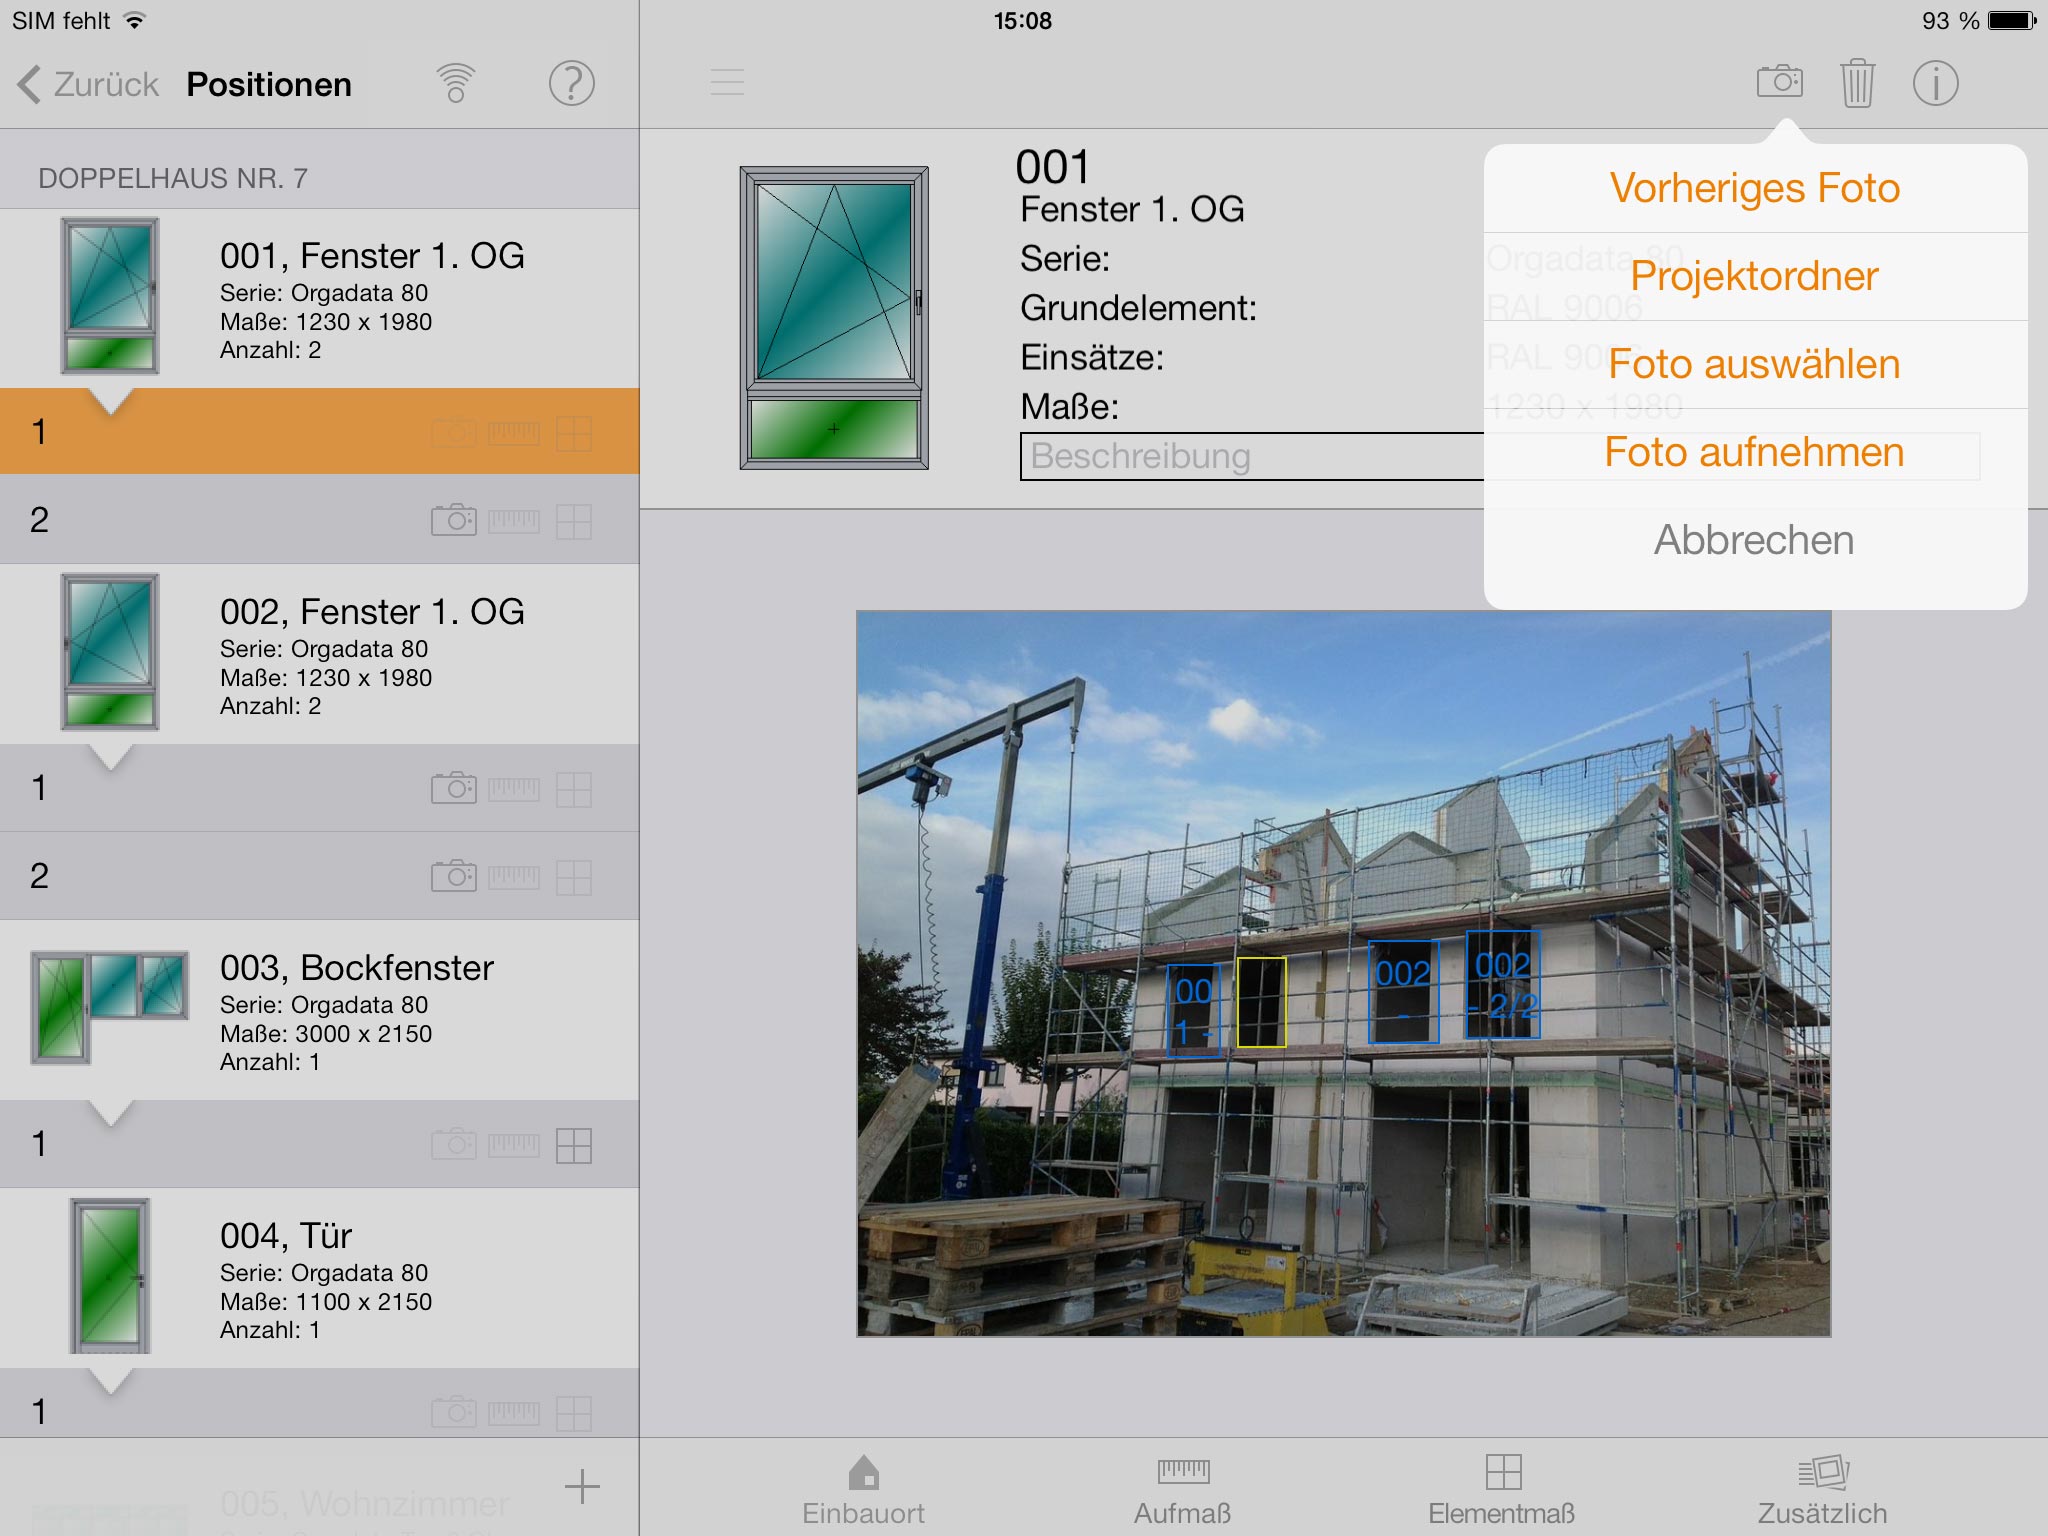
You have the following functions at your disposal:
„Project file"
Each project has its own file with photos. You can find the photos of the particular project very selectively.
„Select a photo"
Opens the file with photos that have already been taken and are located in the photo gallery of the iPad/iPhone.
„Taking a photo"
Enables you to take a photo with the camera of your iPad/iPhone.
The positions can now graphically be shown on the photo. Click the photo and the window for the positioning opens. The yellow rectangle sets the current position. The position can be drawn to any requested position with your finger.
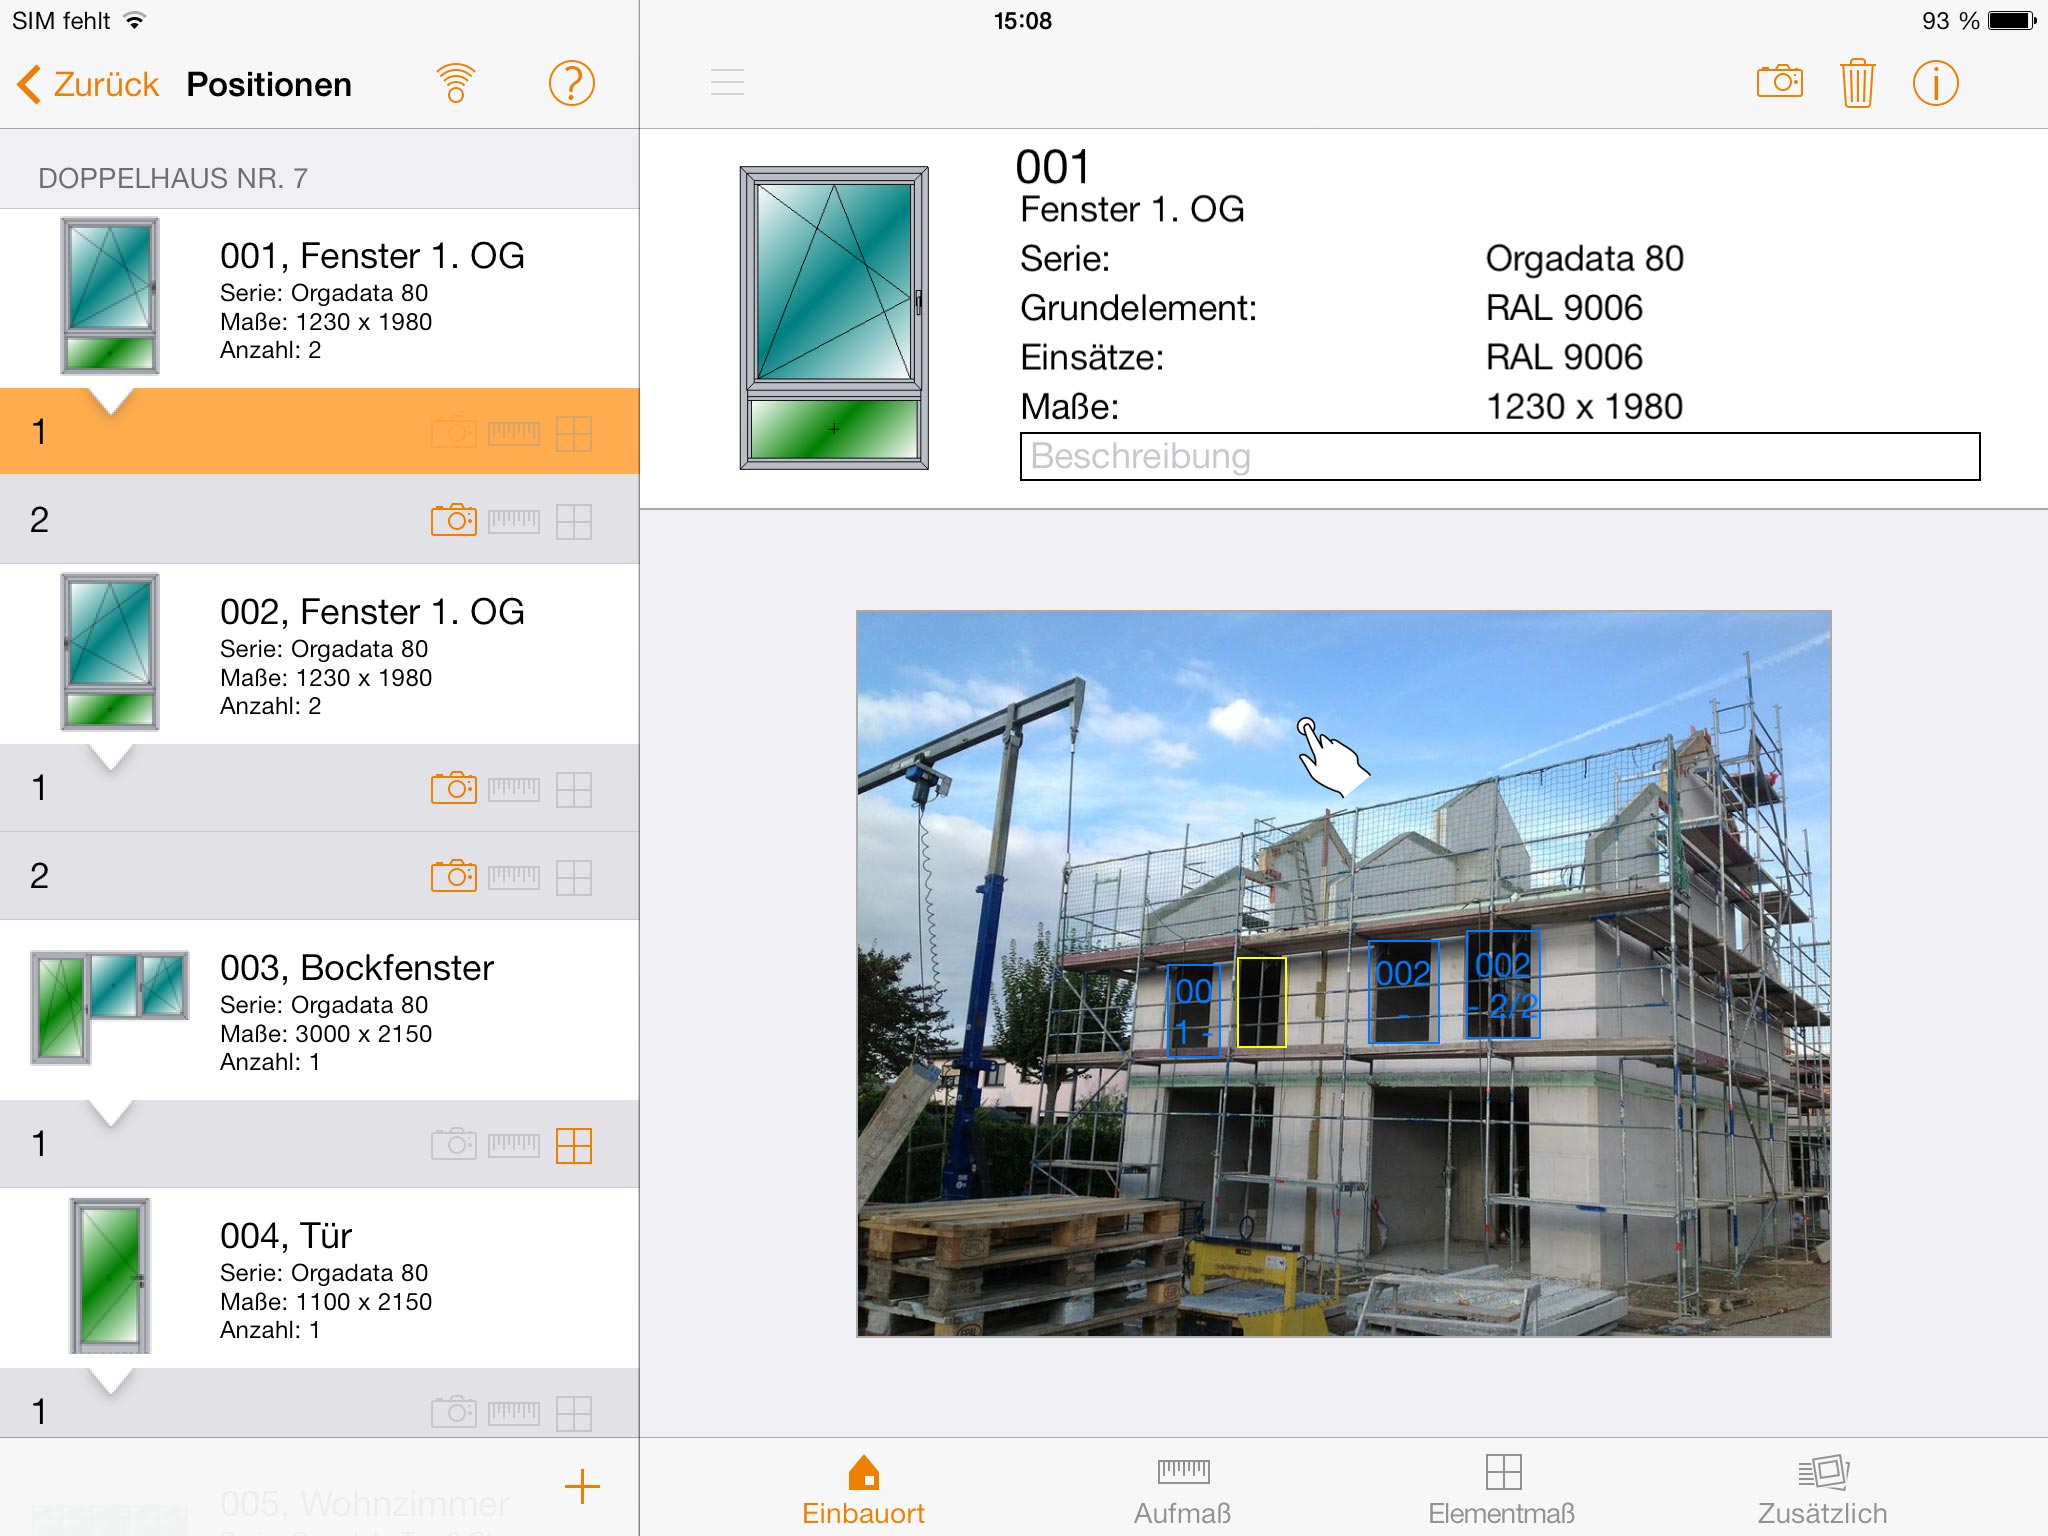
You can also enlarge the photo to conduct an even more exact positioning. In order to do this use two fingers to enlarge the area. To zoom out again use two fingers to make the area smaller.
The other positions of the project will be displayed in red with the particular position number.
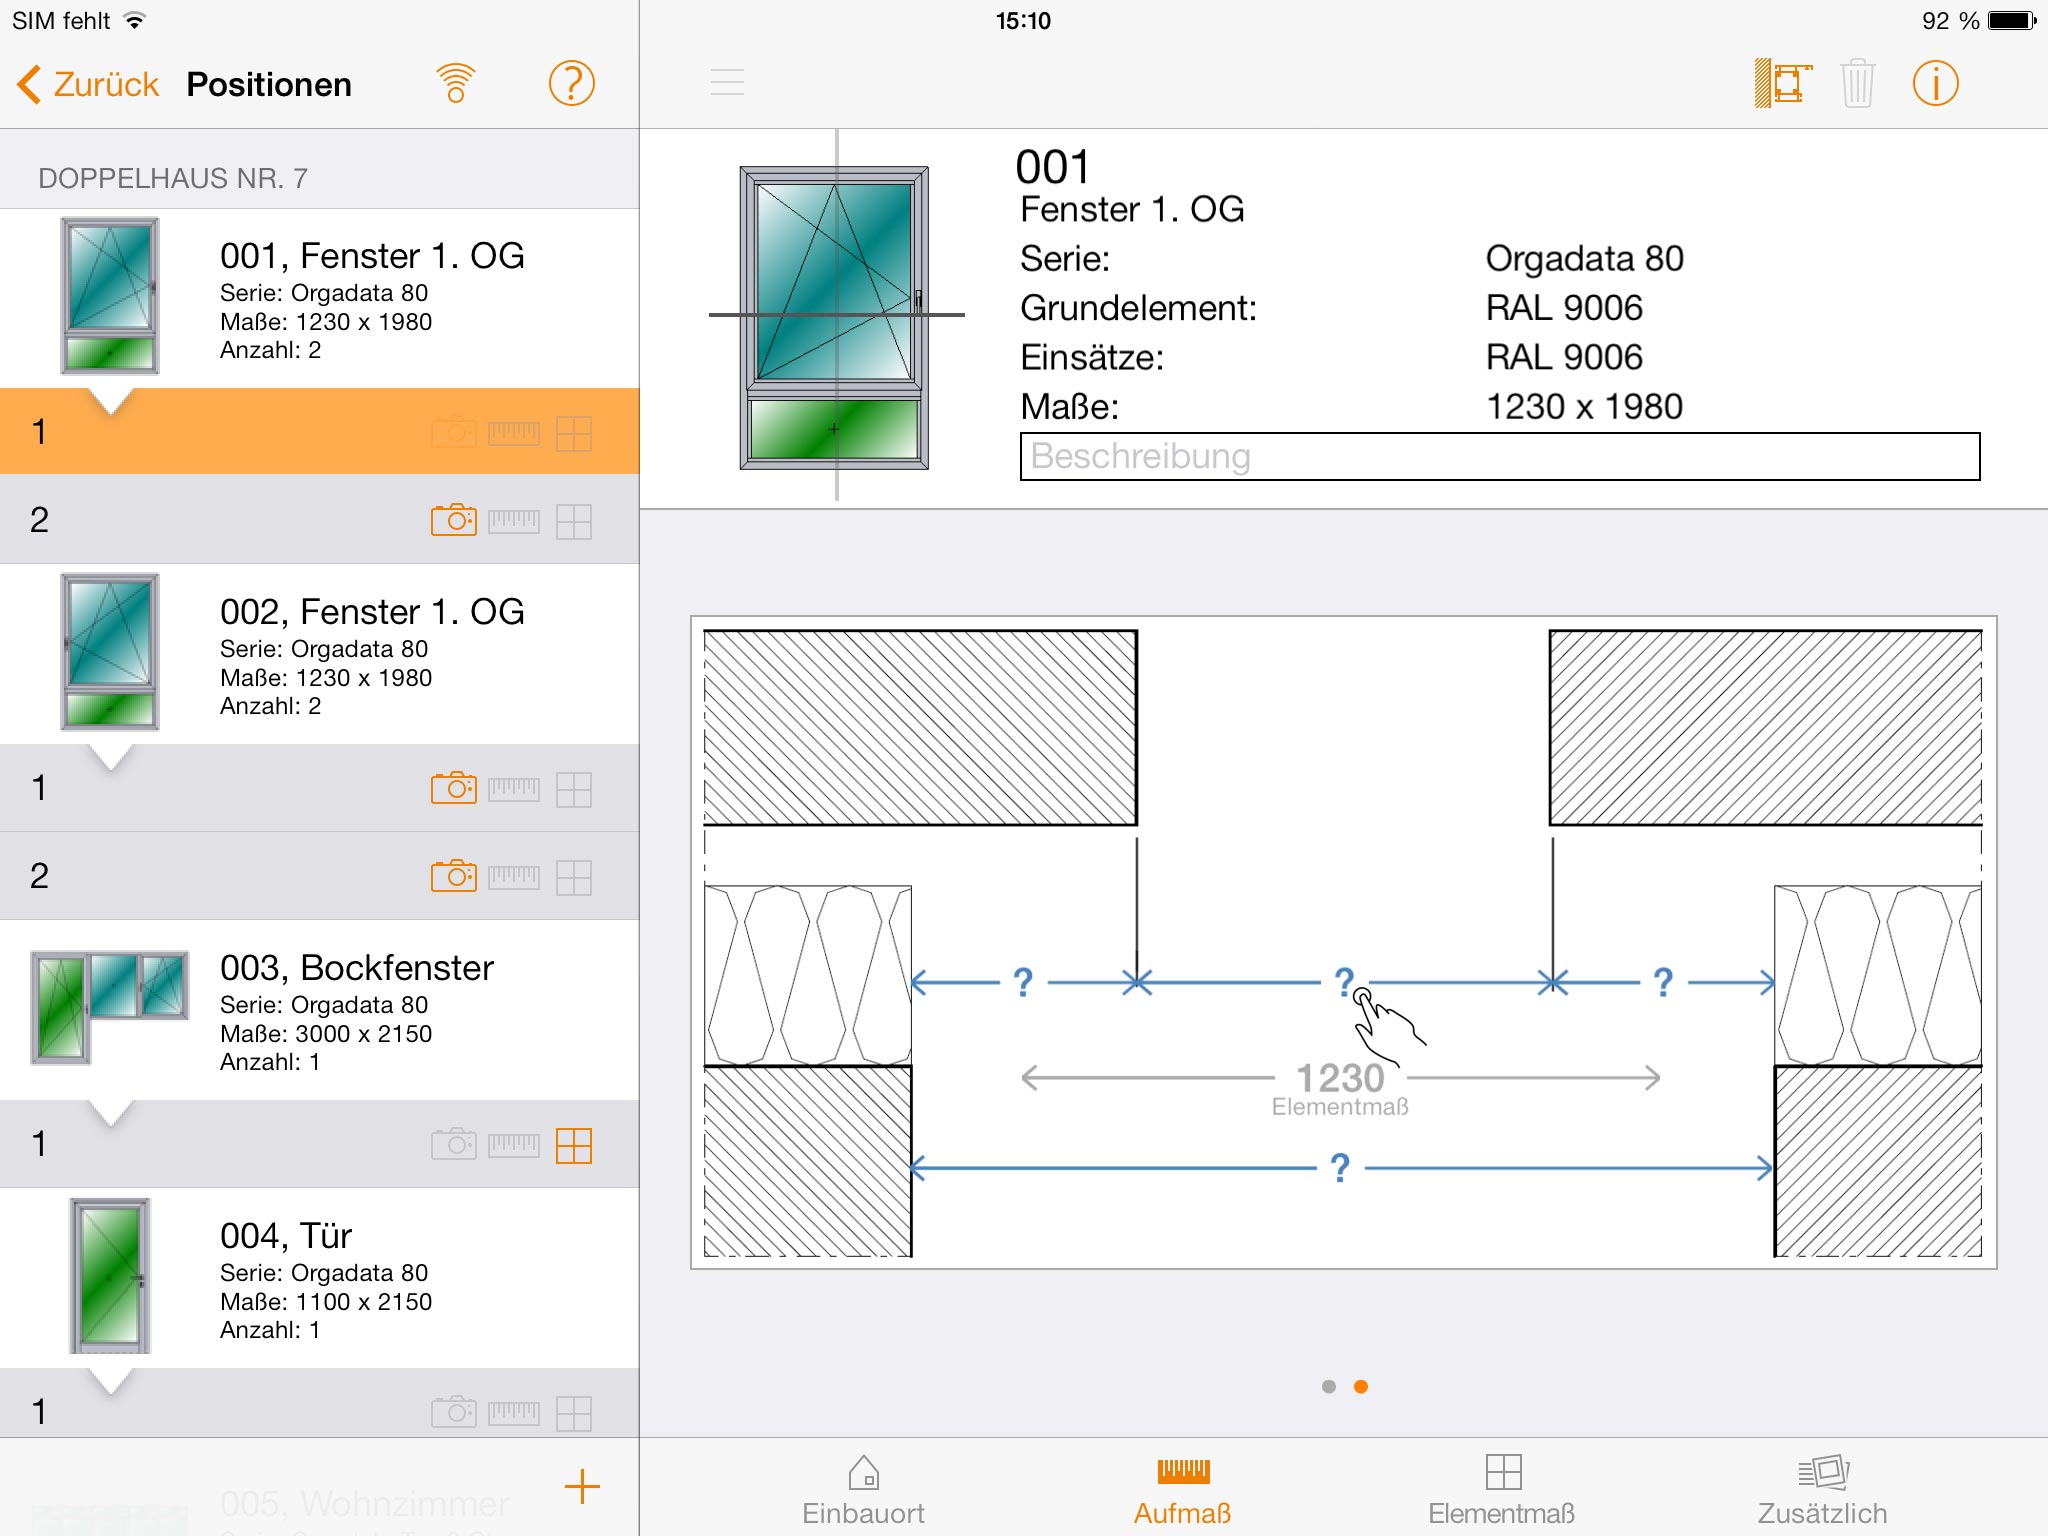
Site dimensions
In order to take the shell form dimension of the particular position switch to the the tab „Site Dimensions".
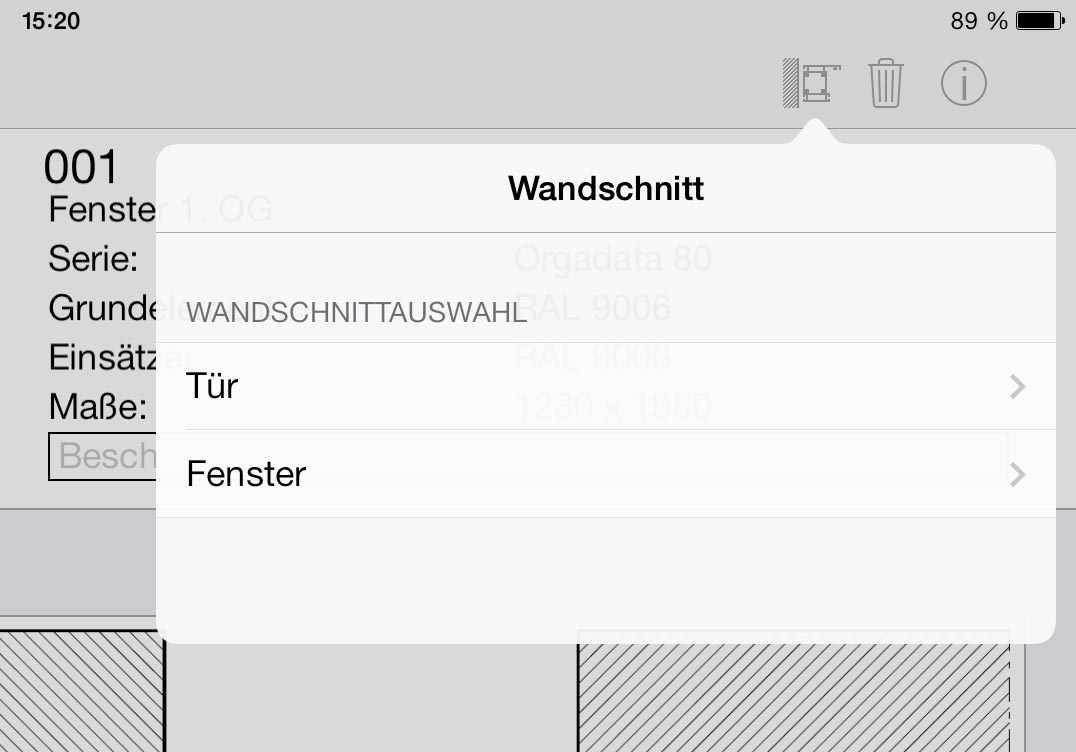
You will find several wall sections at your disposal. Click „wall sections" in the toolbar.
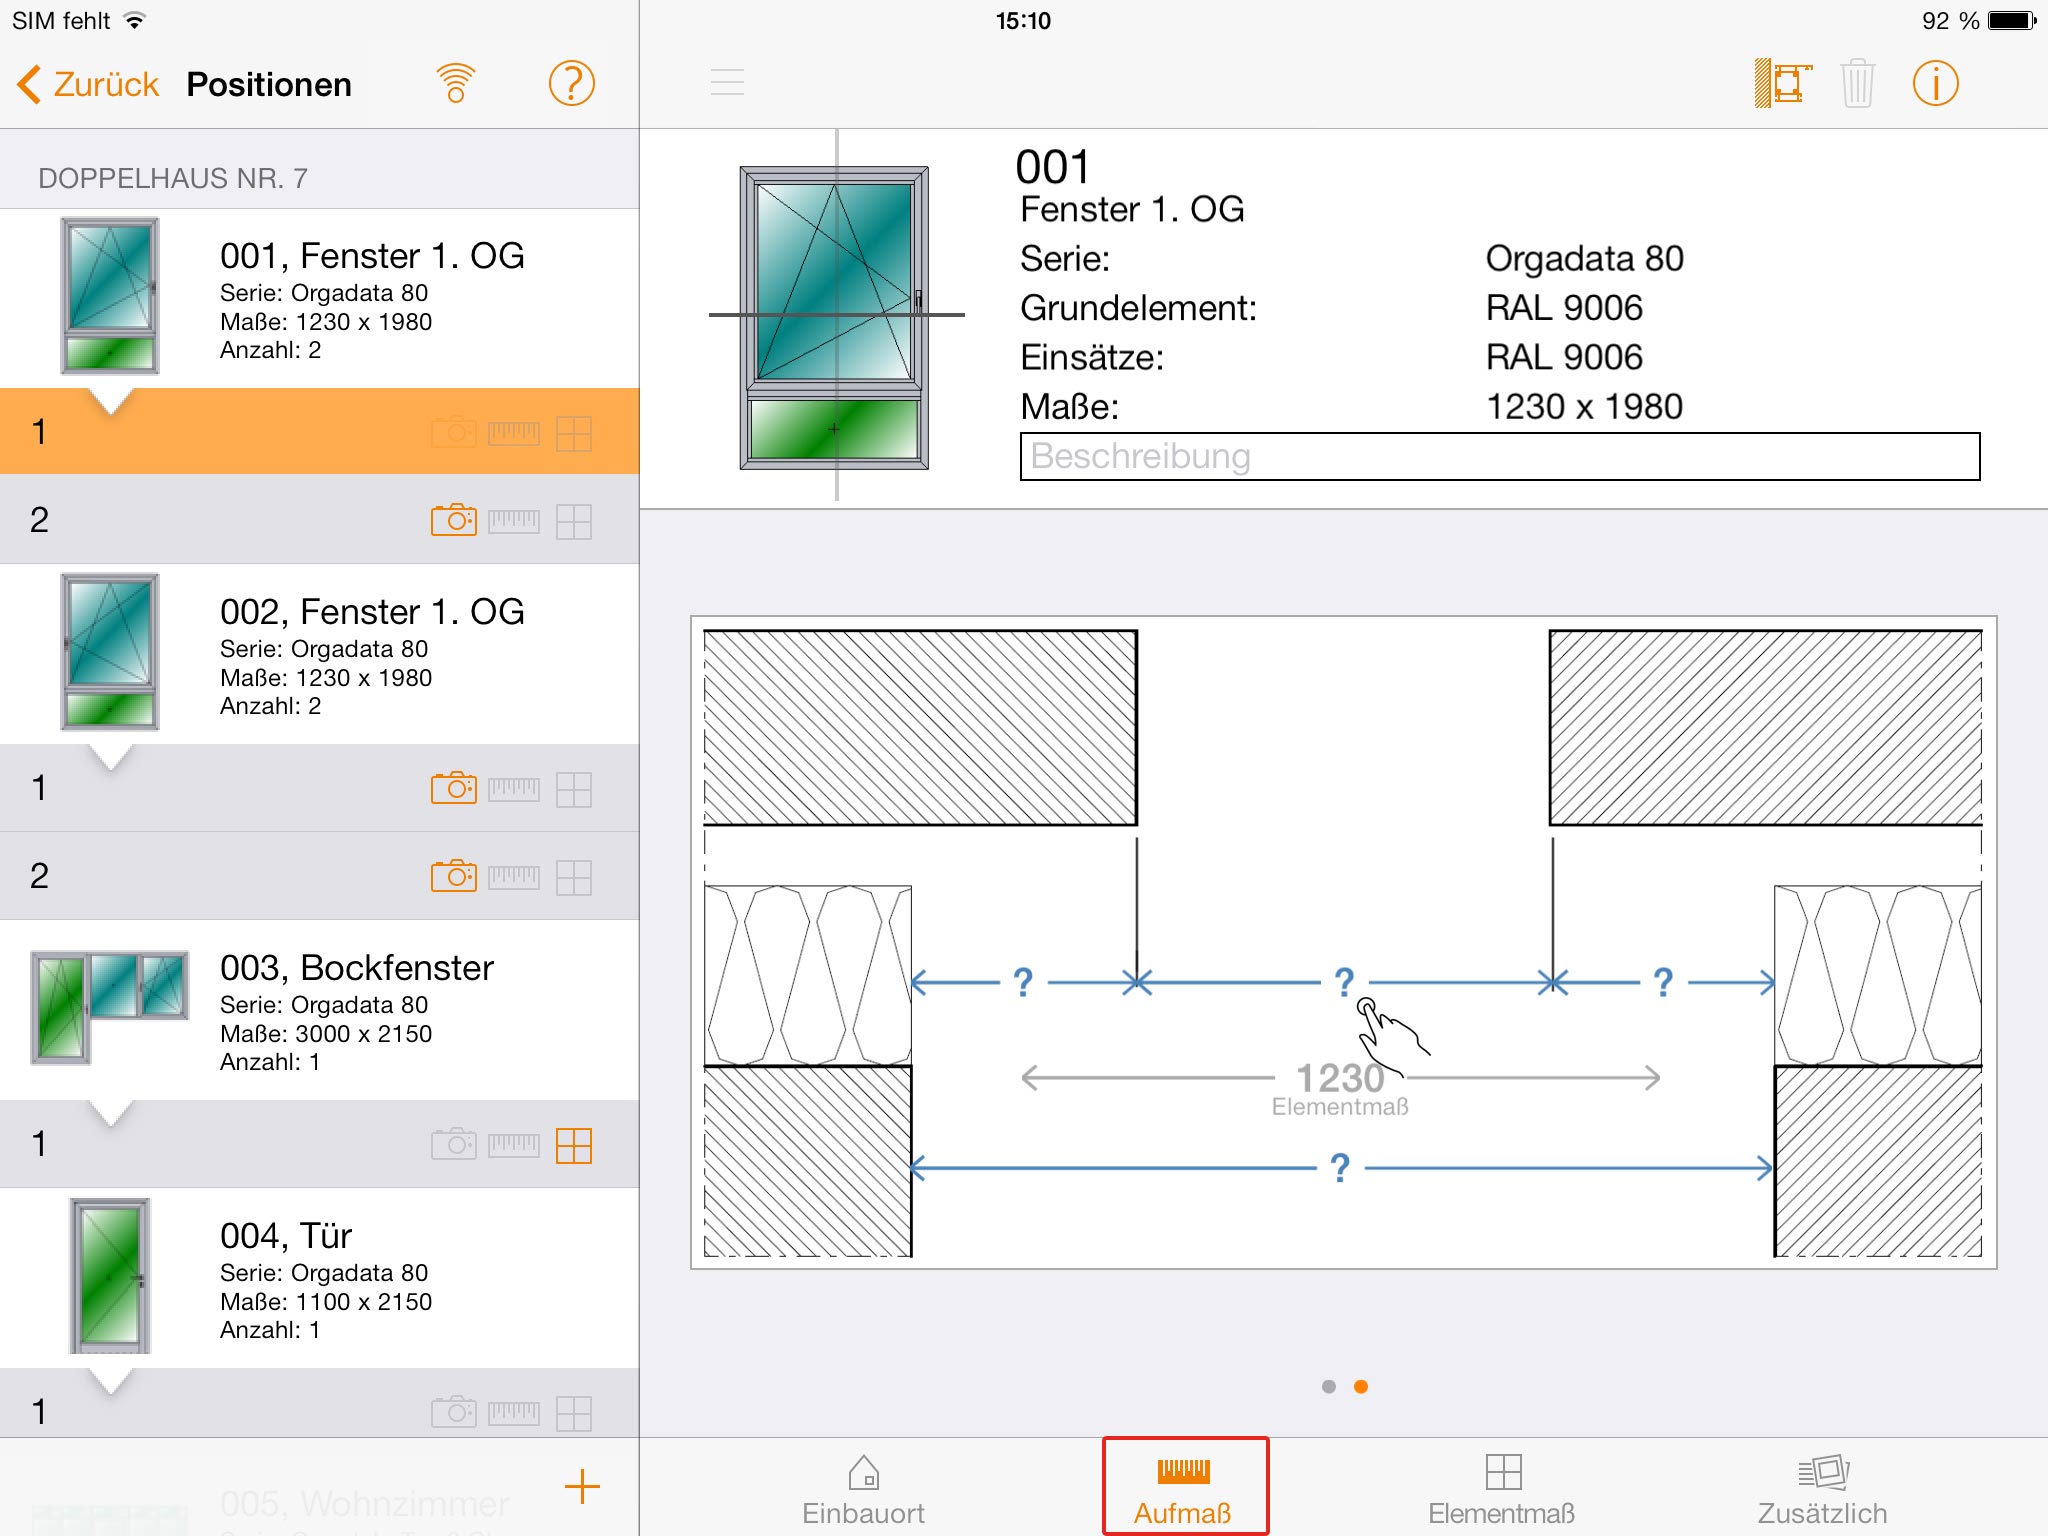
Select a wall section.
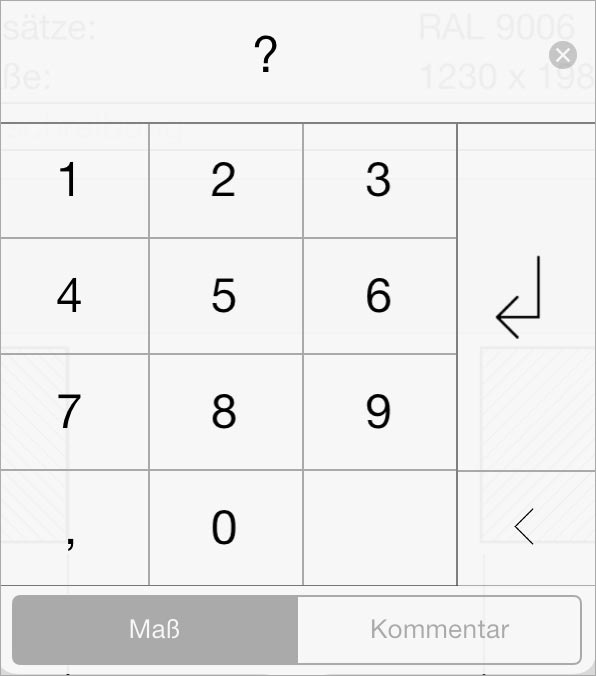
The blue dimensions are the documented shell form dimensions. The red dimensions are the element dimensions. Both can be entered. Click the relevant dimension or question mark and the number field for the entry will open. If you click Auto in the toolbar the dimension will automatically be calculated. Click „comment" in the toolbar to add a flag to the dimension.
Section lines for different site dimension situations concerning block windows will automatically be created.
Intersection lines can be tapped with a finger or shown one after the other in the lower area.
You can save the site dimension drawings in your photo album. Click „Export". Here you can print the drawing by Air Print or send it via mail.
Element dimensions
In „Element dimension" you can determine the position dimensions.
Click the according dimension or question mark and the number field for input will open.
You can also save the position drawing in your photo album. Tap "Export" in the toolbar. You can print the drawing with Air Print or send it via mail.
Additional functions
In the area „additional" you can add texts or photos.
Click the plus-symbol.
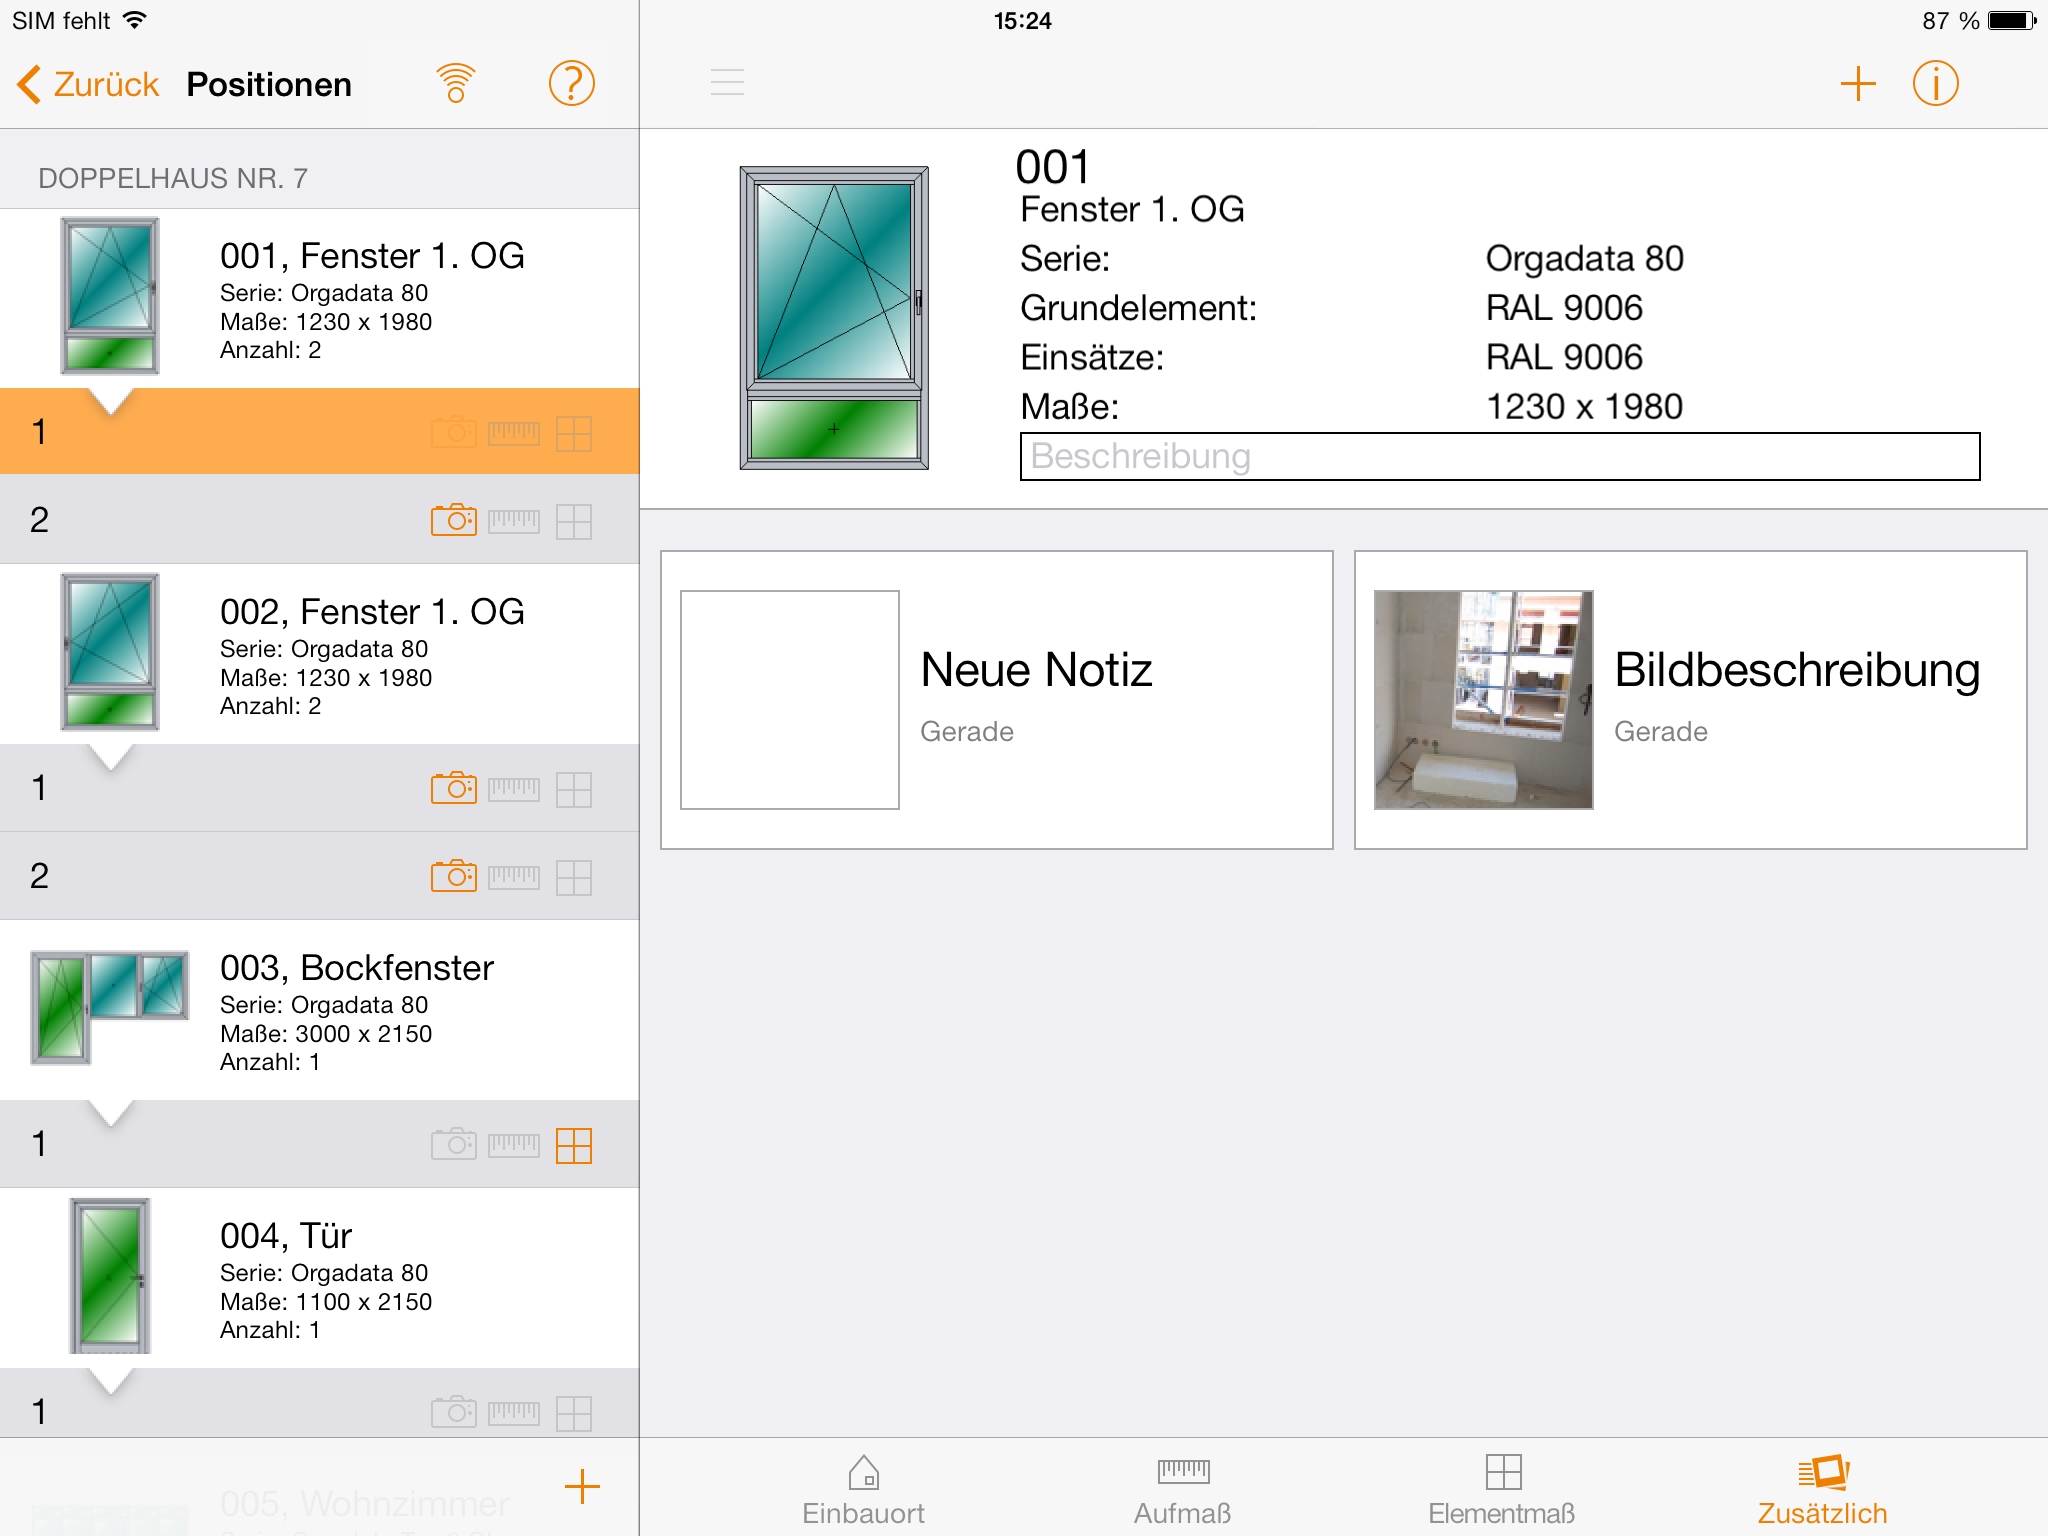
When clicking on the field „text" an editor appears which you can write texts in.
Photos can be edited and saved here as well.
Tap the photo and you can add arrows and texts in it. For this purpose two buttons are at your disposal at the lower screen.
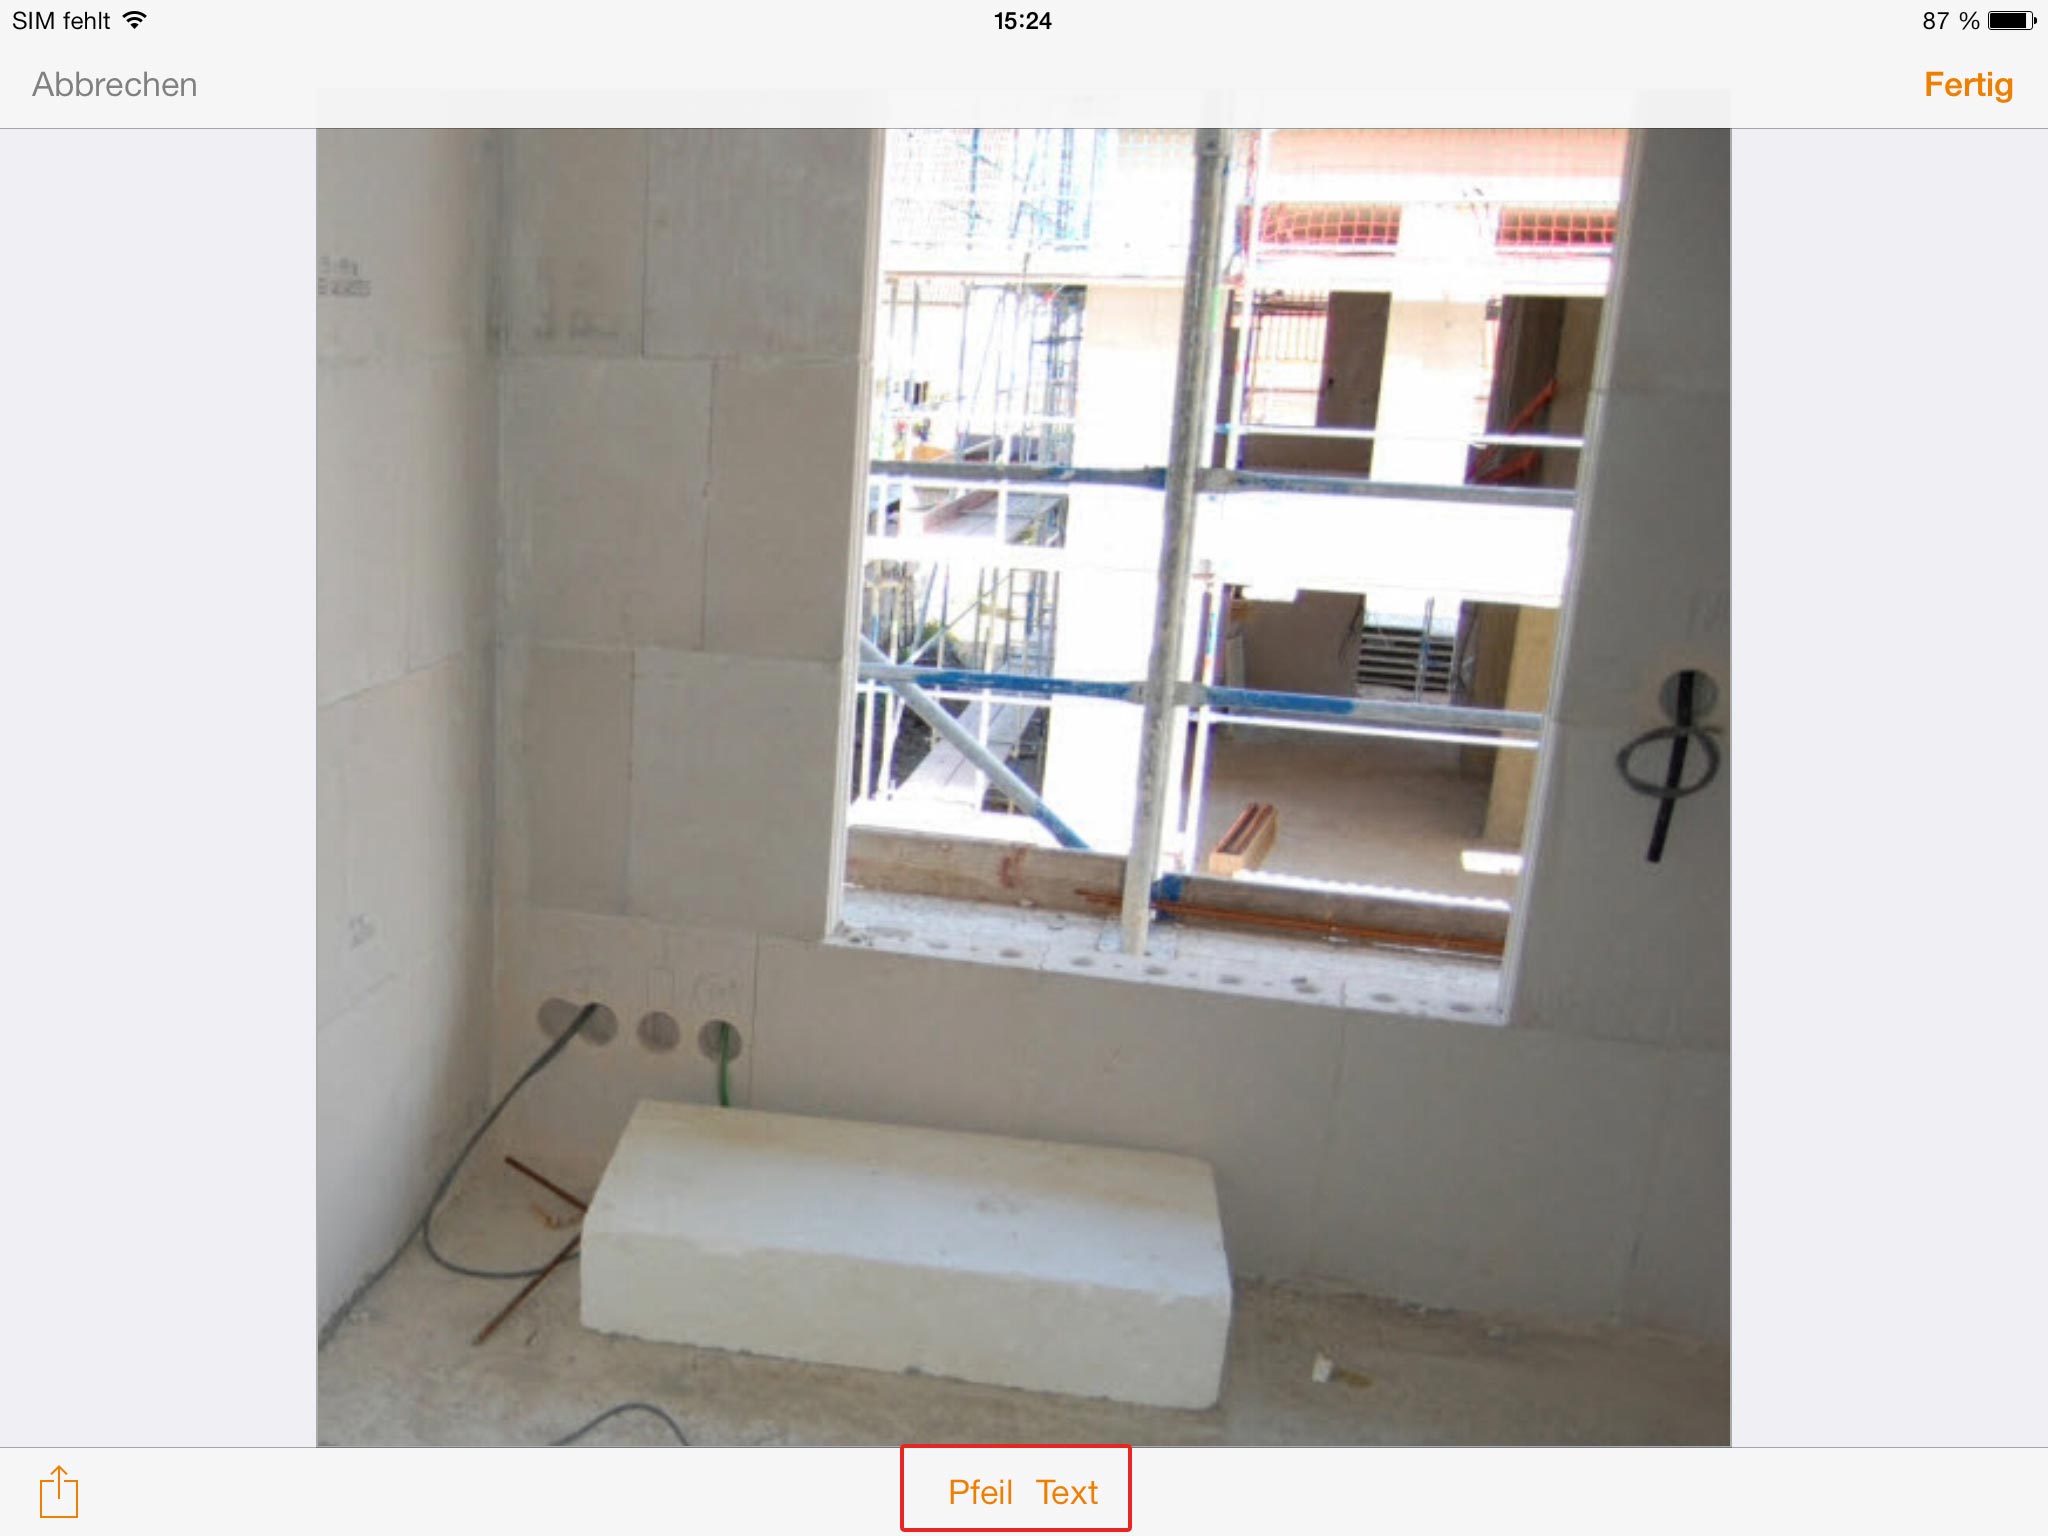
By tapping the button „arrow" a dimension arrow can be set.
Put your finger on the wanted starting point and hold it on the screen while moving into the desired direction. Across in the corner a magnifier appears showing the enlargement of the clipping area. Removing the finger ends the dimension, putting the finger back onto the arrow picks up the dimension again and you can position anew.
By tapping the question mark in the middle of the dimension a value or text can be entered. The text will be added by clicking the keyboard-symbol.

In addition you can change the colour of the dimension. The toolbar to do this is located on the lower screen.
Click „text" in the toolbar and put a text window onto the photo.

After positioning the text window the editor opens automatically for the entry of text.
The size of the window can be altered afterwards using the four handles on the text window.
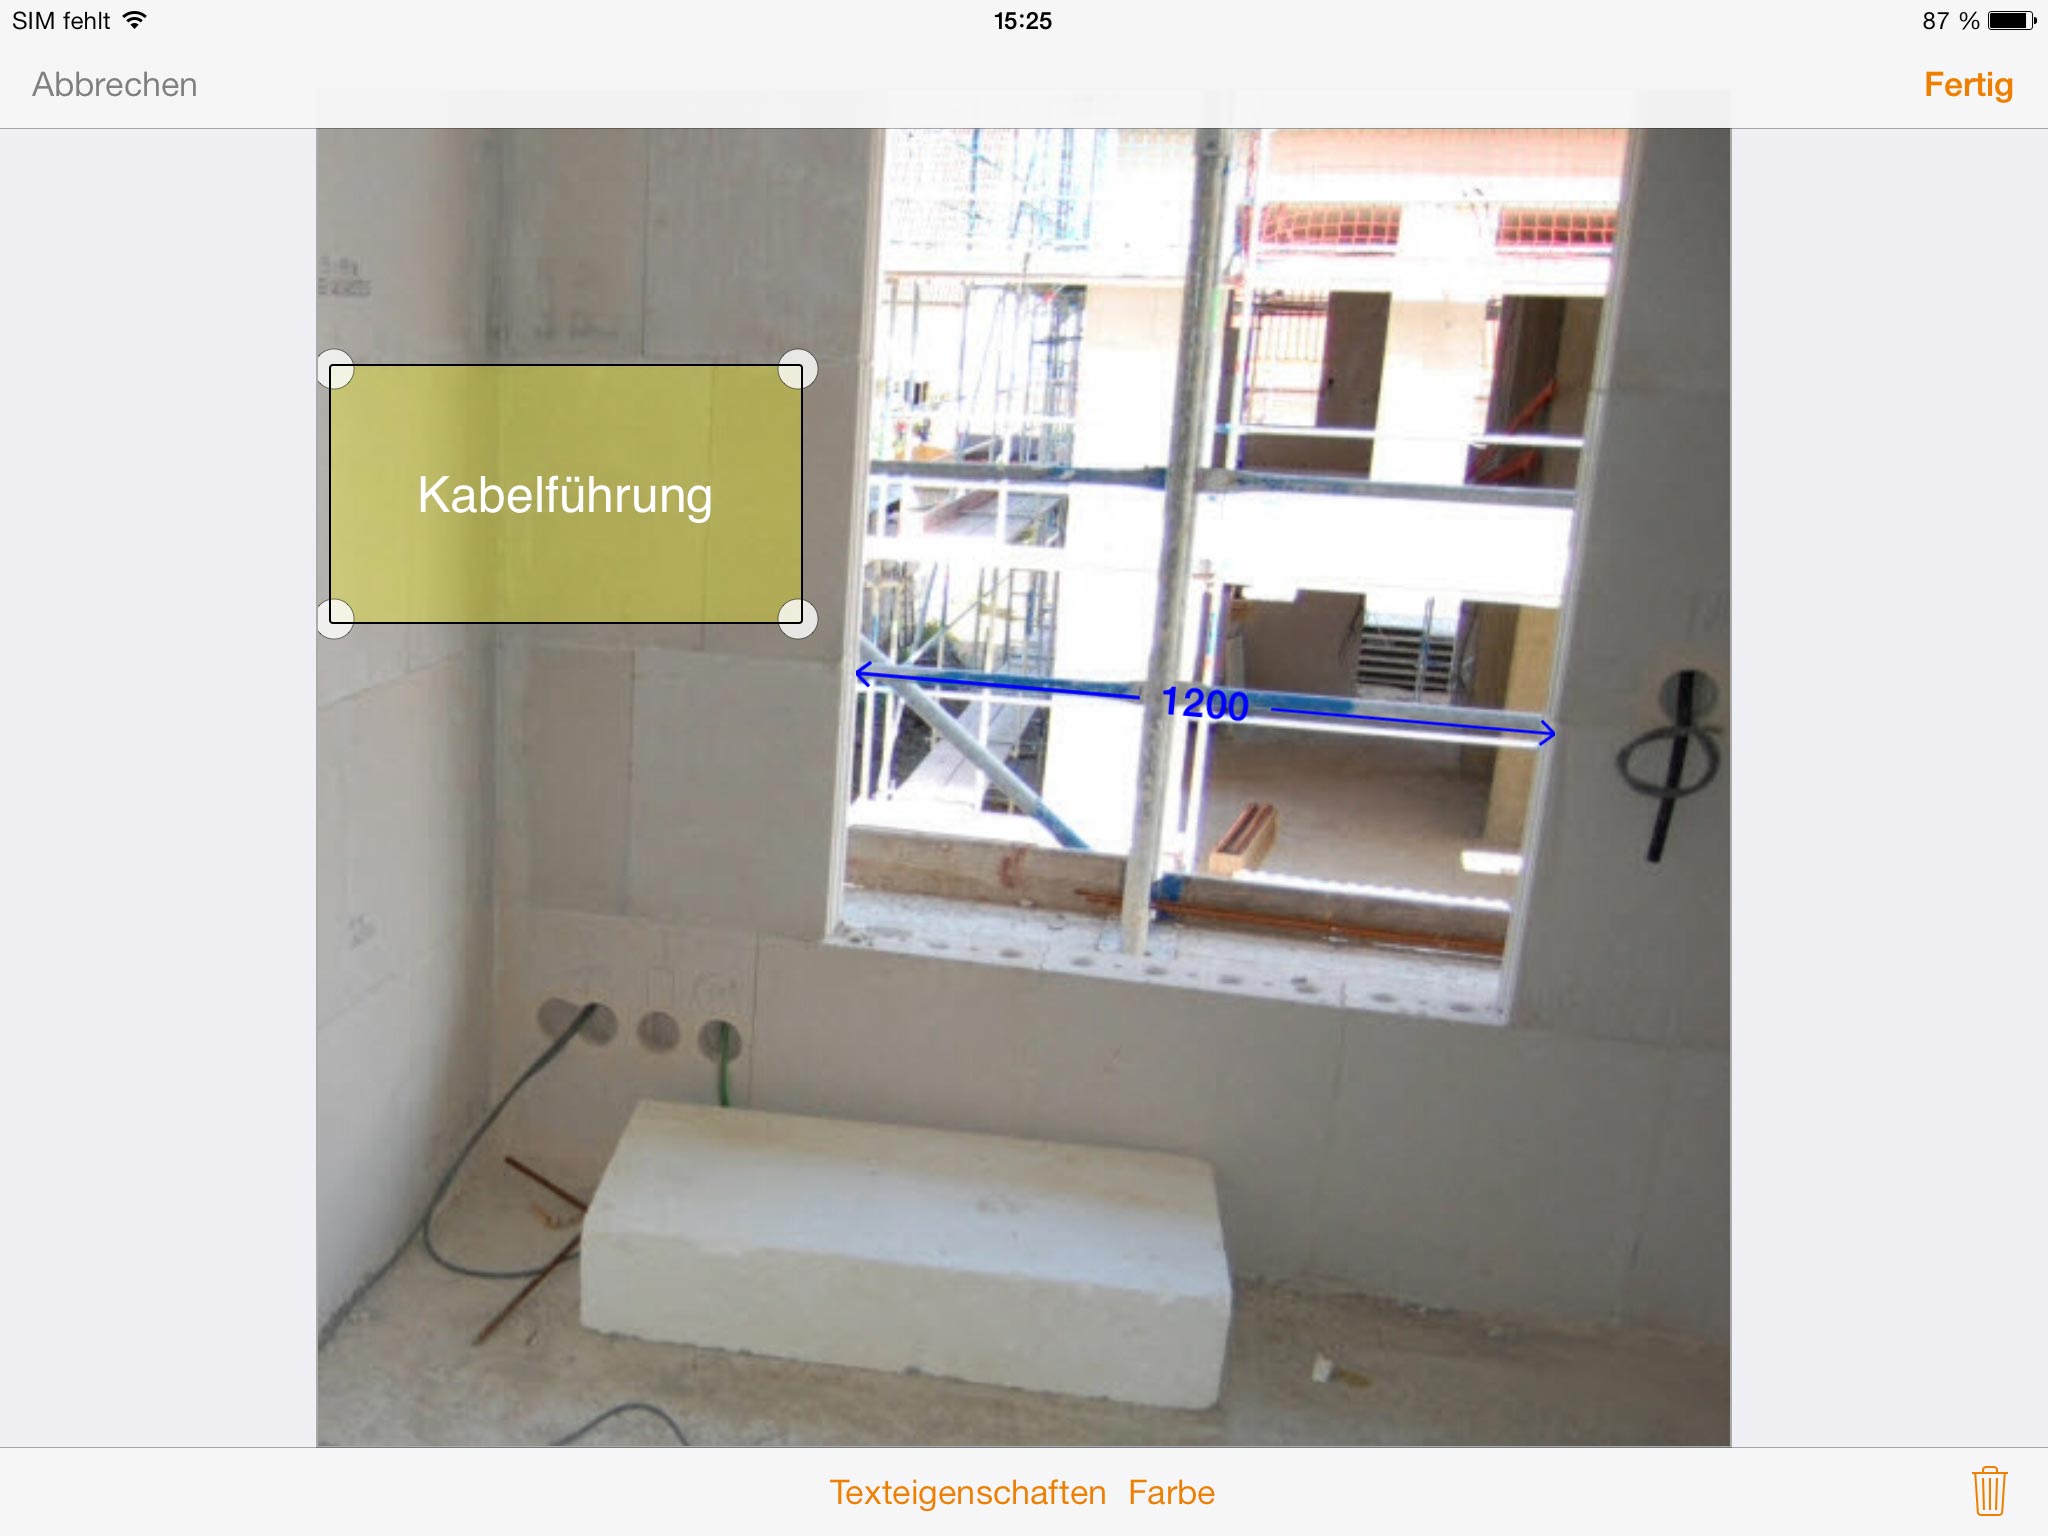
The position of the text window can be altered afterwards by applying the two finger method.
At the lower edge of the app you will find „text features" and „colours" in the toolbar. These enable you to alter the characteristics of the text window.
Click „finish" in the toolbar to add further notes or photos.
5. Transfer positions to Logikal
To transfer a project from Smart Measure to Logikal carry out the following:
Go to project overview and click the export symbol.
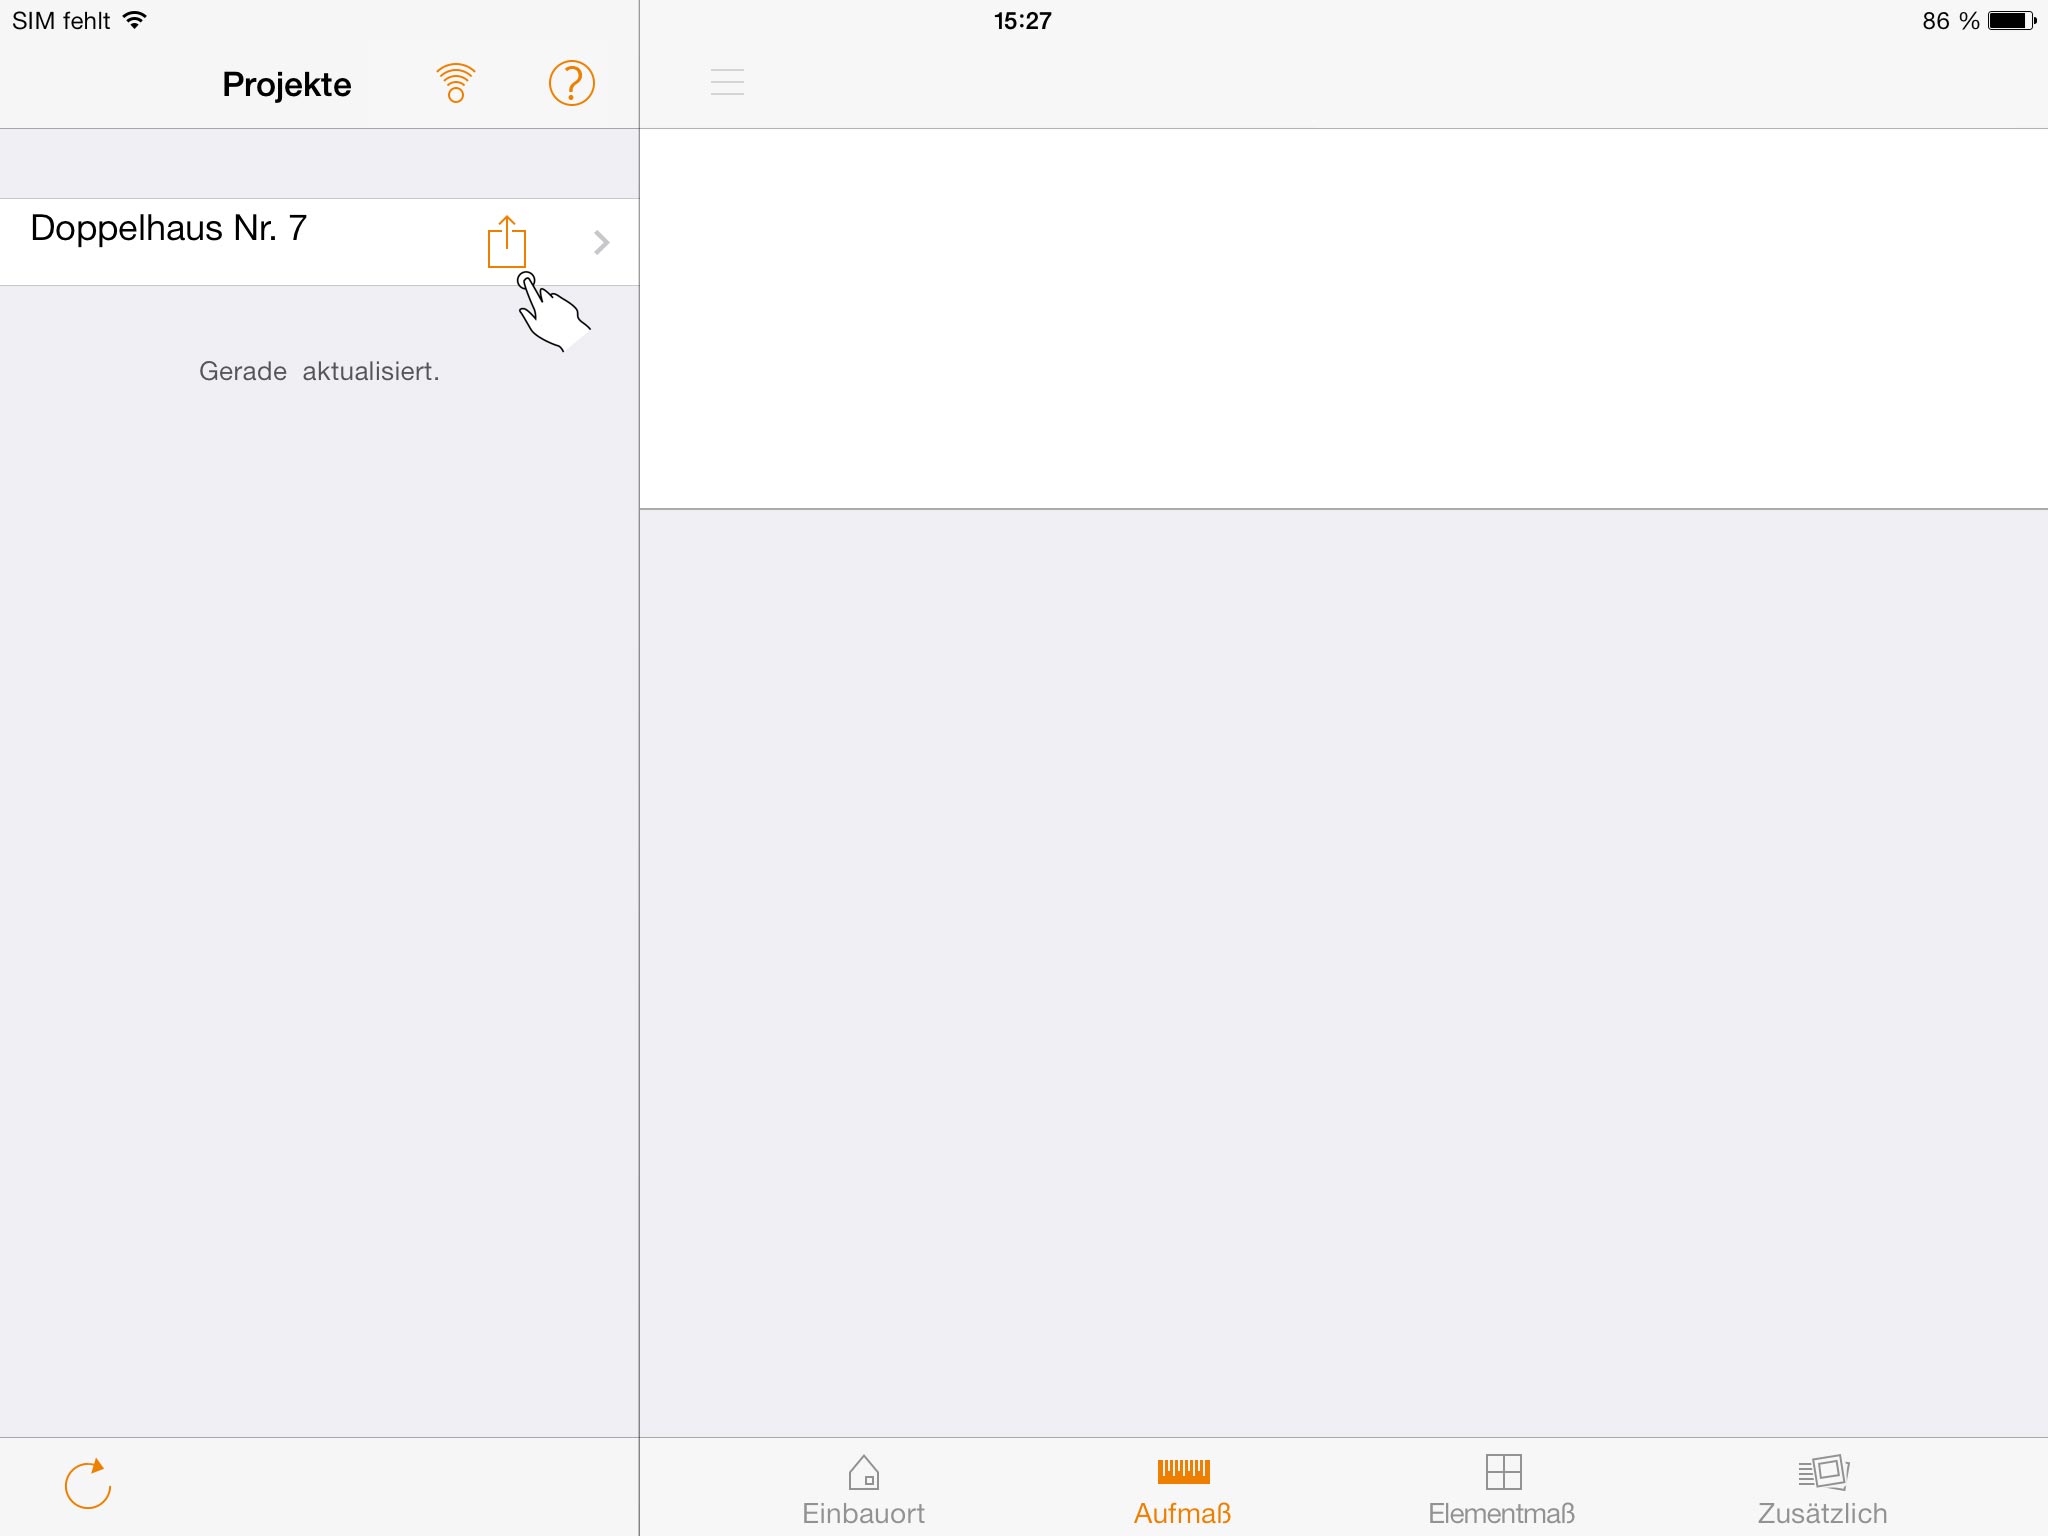
Then mark the relevant project in the list and click „export" next to the project.
Open Logikal.
Go to the project centre and click „Smart Measure Import" in the toolbar.
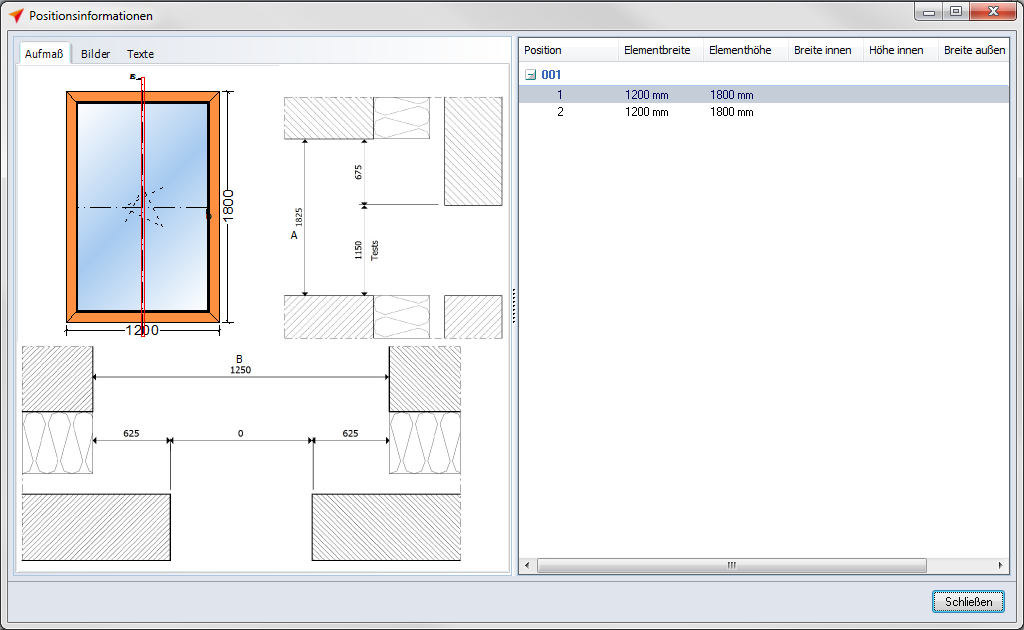
After successful import click a position with the right mouse button and select „Smart Measure Information" in the context menu.

You now have all data and photos which you embedded at your disposal.
Settings
Open the settings of your iPad. Smart Measure is listed on the right side. Click this listing to conduct settings for your app.
User settings
In case the dimensions in the app should differ significantly from the element dimension in Logikal your iPad will issue a warning. With „alter dimension threshold" you can define an area between 20 % – 90 %. Alternatively this function can be disabled by selecting the option never.
Under „photo size for export" you define how high the resolution of the photos shall be. The higher the resolution the longer it takes to upload the file to Logikal.
By activating the option „element dimension in site dimension" the dimensions of the element will be displayed in the site dimension drawing.
Under „display profile colours" you can determine whether the profile colours should be displayed in a position.
By displaying the function element dimension you can determine whether the element dimensions should be displayed in the app.
By clicking „projects" in the toolbar above you get back to the project overview.
Interfaces to measuring instruments
Smart Measure has an interface to:
- Leica Disto D510
- Leica Disro D110
- Leica Disto D810
You can embed this device in Smart Measure via blue tooth. Click the bluetooth-symbol right above in Smart Measure.
Warning!
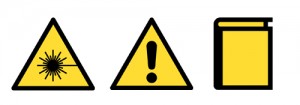
Please bear in mind that you connect your iPad/iPhone with a laser measuring device. The measuring device uses a class 2 laser. According to EN 60825-1 the available laser radiation lies only in the visible spectrum (400 nm to 700 nm) and is harmless for the eye during short-term exposure (up to 0,25 s).
Please read this manual before using the device.


 Deutsch
 English (UK)
 English (US)
 Français
 Italiano
 Polski
 Čeština