Position Display
Under „Settings" > „Project Center" > „Display" you can determine the description of the positions in the position overview. This information refers to the display mode „Details".

Position Display
Activate this option to display a drawing of the position in the position display.
Dimensions
If the position drawing is supposed to be supplemented with extension lines, activate the option dimensions.
View
Under view you can set whether the position drawing in the project center is supposed to be displayed in „Interior View" or „Exterior View". By selecting „Like Input of Elements" the view used in the input of elements will automatically be used in the project center.
Position Display Width / Height
This setting lets you determine to what scale the position drawing is displayed in the project center. The values are entered in pixel.
Position Description
Standard Position Description
Activate this option in case you wish to have detailed information reference the system, short description, surface element, and surface insertions next to the position drawing.
Position Comment Text
To show comment texts next to the position drawing, activate the option „Position Comment Text".
Created On
Activate this option to show the creation date of the position.
Last Change
Activate this option to show the date of the last change of the position.
Additional Columns
U-Value
Display of U-Value in the project center can be activated here.
Estimation Price
Activate this option to display a position's estimation price in the project center's position overview.
Quotation Text and Quotation Price
You need to quickly change the quotation text or quotation price for a position that has already been estimated? There is a quicker way, since both can be done for every position directly via the project center.
Click „Settings" > „Project Center" > „Display" in the project center's file menu and activate the option „Quotation Price".
Estimate the position / the project and create a quotation.
Afterwards the amount appears in the project center in the column „Quotation Price".
Click the amount in the column and the programme window for modifying the price opens up.
Description Configuration for Collapsed Display
If you use the collapsed display in the position overview, you can activate the data to be displayed here. You can select the system, colour, short description, position size, and position type.
Curtain Wall Display
Show Insertion Elements separately / completely
This option enables you to show the insertions of curtain walls separately. This setting will be considered on the printouts when displaying the position.

Curtain Wall for complete Insertions
If you activated the function „Show Insertions separately/completely", you can determine whether the curtain wall is supposed to be shown completely or simplified by using the option „Curtain Wall complete with Insertions".
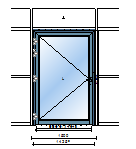
| Simplified Display
|
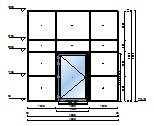
Complete Display
|
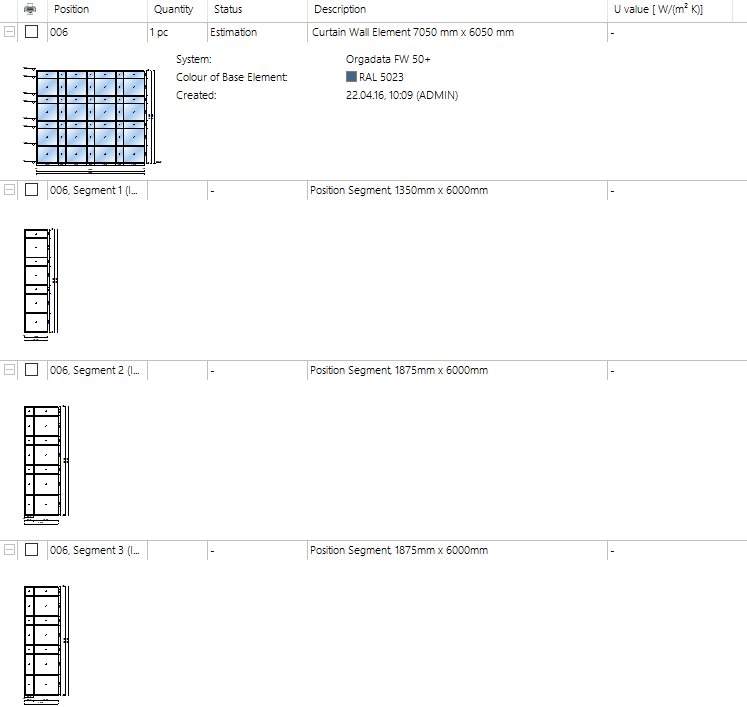
Segments
You can segment curtain walls in the input of elements.
Display Links
Here you can set if you wish to have the links for „New Position", „New Material Position", „New Text Position", „New Library Position", and „New Element Position" displayed.
With simply one click you can create a new position. The links will be shown underlined at the end of the position overview.
Additional Settings
Scroll Speed
Hereby you adjust your scroll speed in the position overview.
2-monitor solution
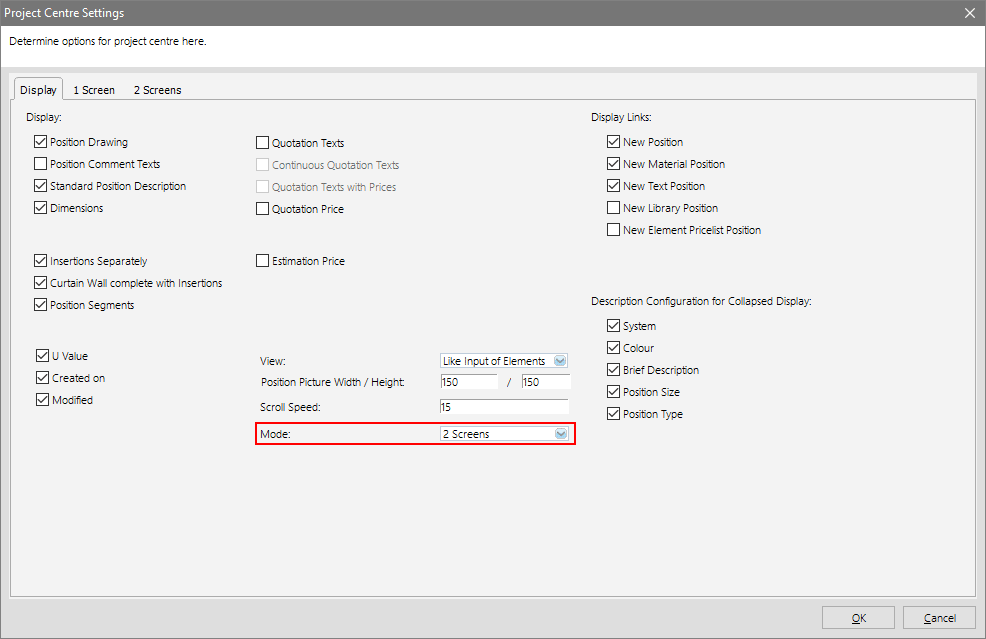
More and more users are working on a PC with 2 monitors. It is very advantageous if the windows can be moved between the monitors and always have a clear view of the most important . You can decide for yourself which information should be on which monitor.
For this, in the file menu, click on "Settings" > "Project Centre". Under the Display tab, the mode must be set on 2 Screens.
In the 2. Screens tab, you can set how the information about the positions and the projects are displayed. The options can each be dragged into an area with the mouse.

There is a key combination which can be used to move different windows between the monitors without the mouse. Use the following key combinations:
Windows-button + Shift + right cursor or
Windows button + Shift + left cursor


 English (UK)