Enter CNC machinings
Click on "CNC Database" > "CNC Machining".
Select the system in which the notch is to be used.
Click the "Add" button to create a new entry for a notch.
At "Group Type", select "End Machining".
In the following you will find an example for the inputs of a variable notch:
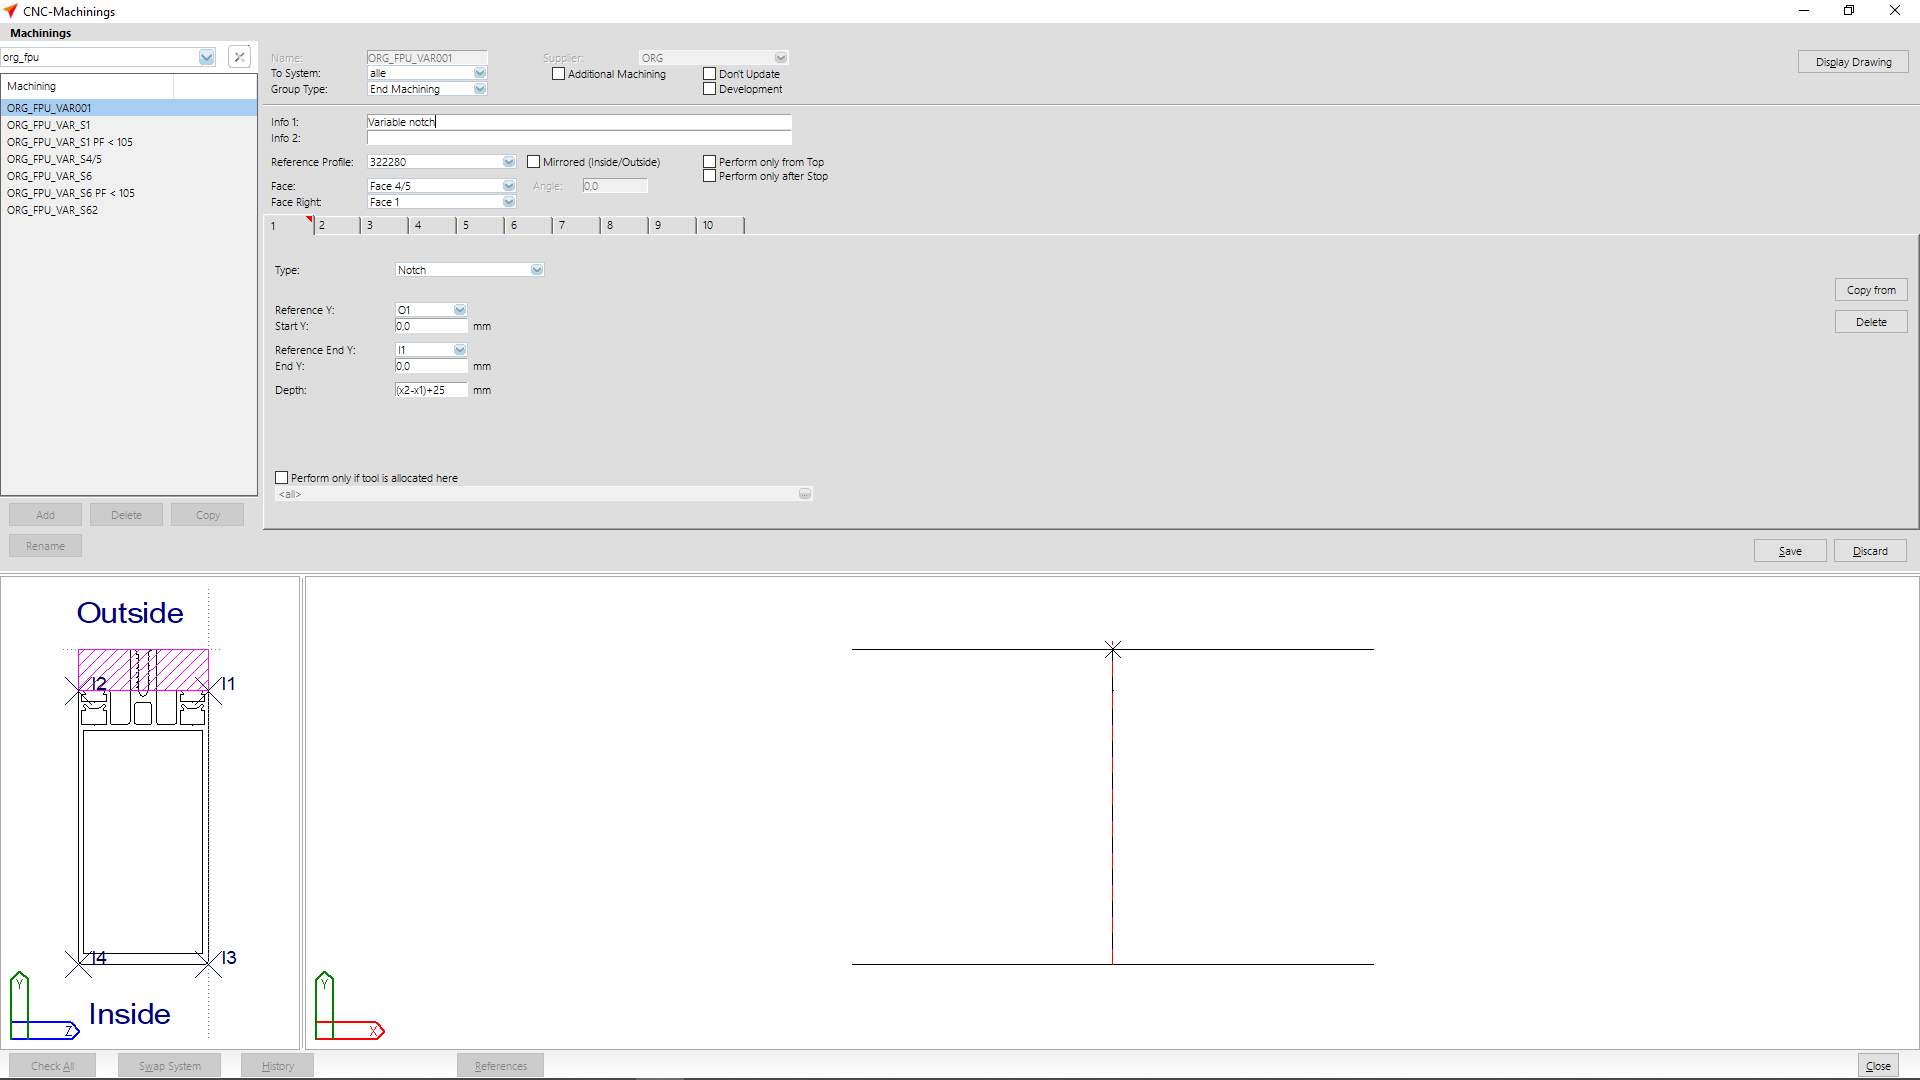
At "Reference profile" you enter the profile to which the notch is to be applied.
At "Face" select "Face 4/5".
For "Face Right", select "Face 1".
At tab "1" you enter the following data:
- Type: Notch
- Reference Y: O1
- Reference End Y: I1
- At "Depth " enter the following formula: (x2-x1)+25.
The value +25 is used to determine the machining up to the transom axis.
If the value +25 is not entered, Logikal determines the machining to the lower edge of the transom.
Click on the "Save" button to complete the machining.
Group machinings
Select at "CNC Database" > "CNC Groups".
Click the "Add" button to create a new group
Select a supplier and enter the name for the CNC group.
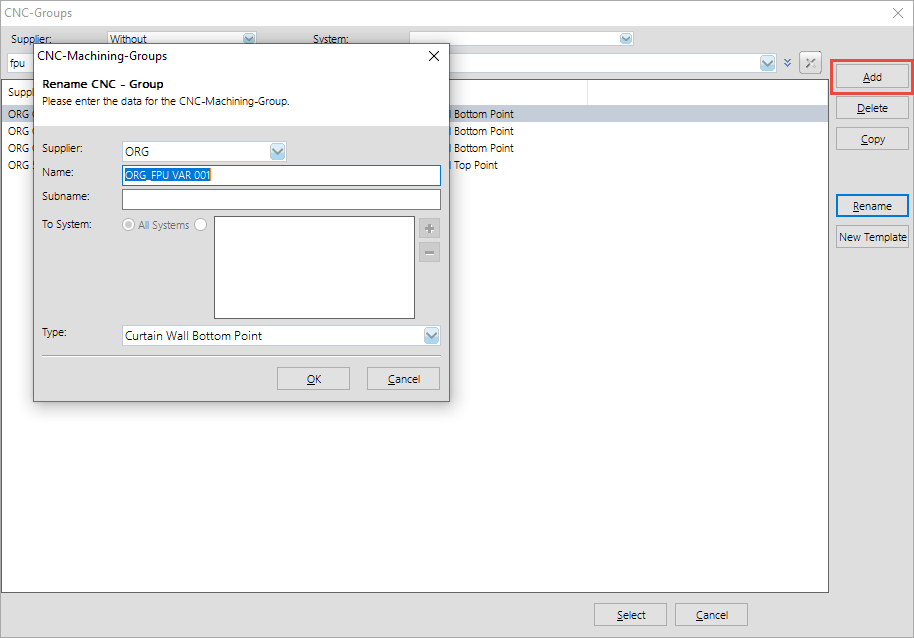
At "Type" you select "Curtain wall bottom point" (or "Curtain wall top point") and click "OK".
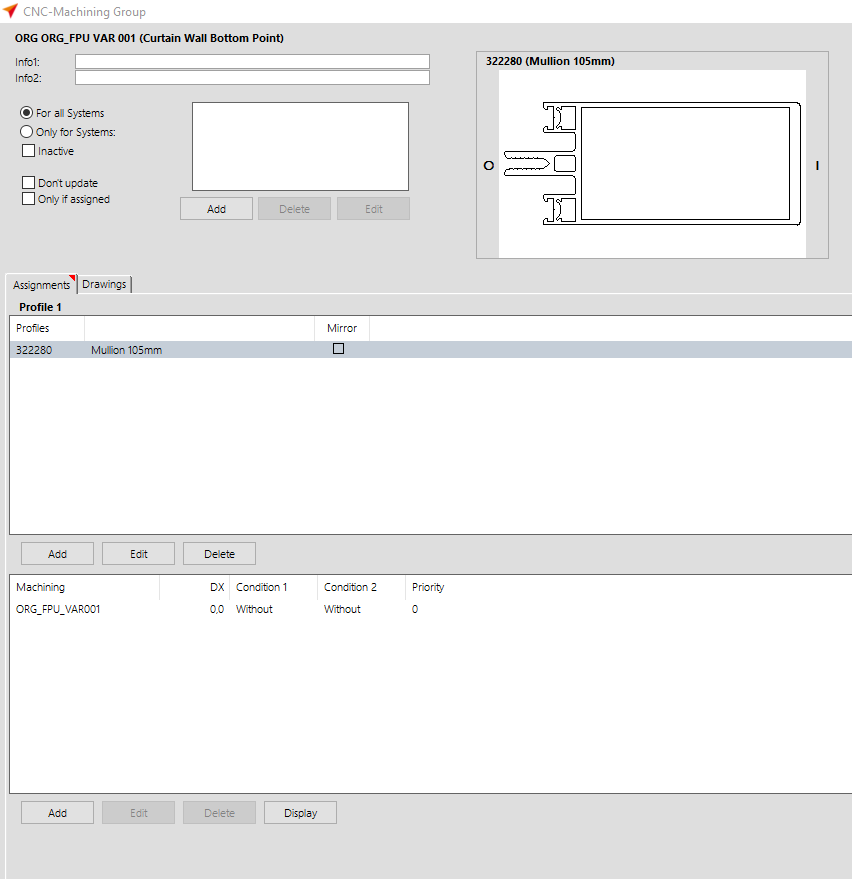
In the section "Profile 1" you enter the profile(s) on which the notch is to be applied.
To do this, click on the "Add" button and select a profile.
In the section "Machining" you enter your previously created machining.
To do this, click on the "Add" button and select the machining.
Select notch in the input of elements
Create a curtain wall element in the input of elements and switch to the "CNC-Machining" area.
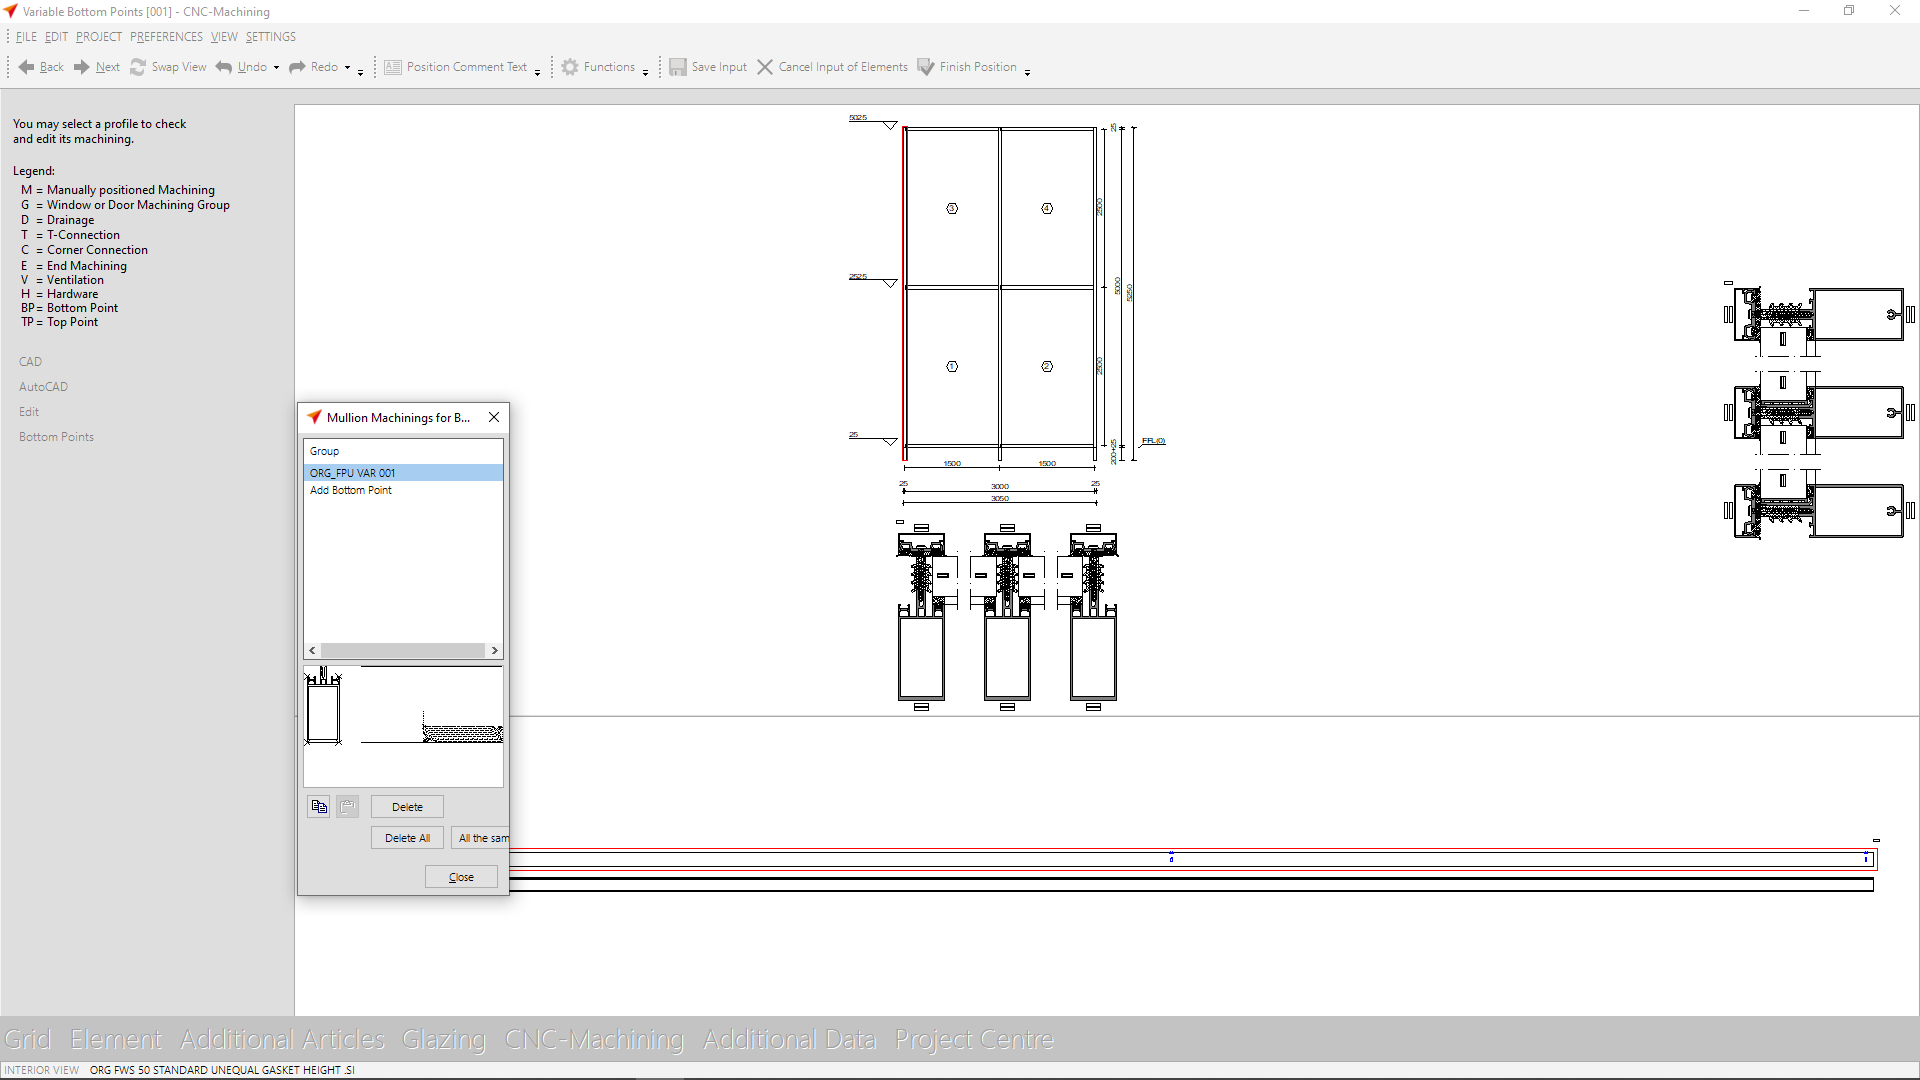
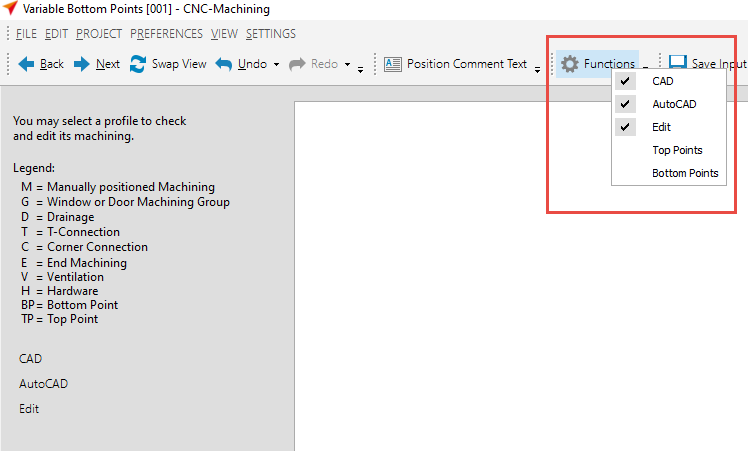
Click on "Bottom Points" on the left side.
(If the option "Bottom Points" is not available here, click on "Functions" in the toolbar and activate the "Bottom Points" function)
In the position view on the right side, select the mullion on which you want to apply a notch.
In the "Machining for bottom points" window, click "Create new bottom point" and select the group you created in previous steps.
If you want to apply the machining group to all mullions in the curtain wall, click on the button "All the same" below.
If the machining group is only to be applied to certain mullions, you can copy them as described below.
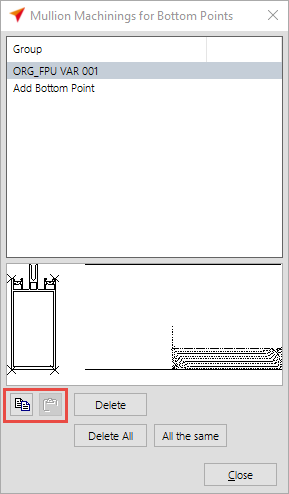
Select the mullion that contains the group and click the "Copy to clipboard" button.
After that, select the mullion where the group is to be inserted and click the "Insert" button. Please note that you cannot select several mullions at once.
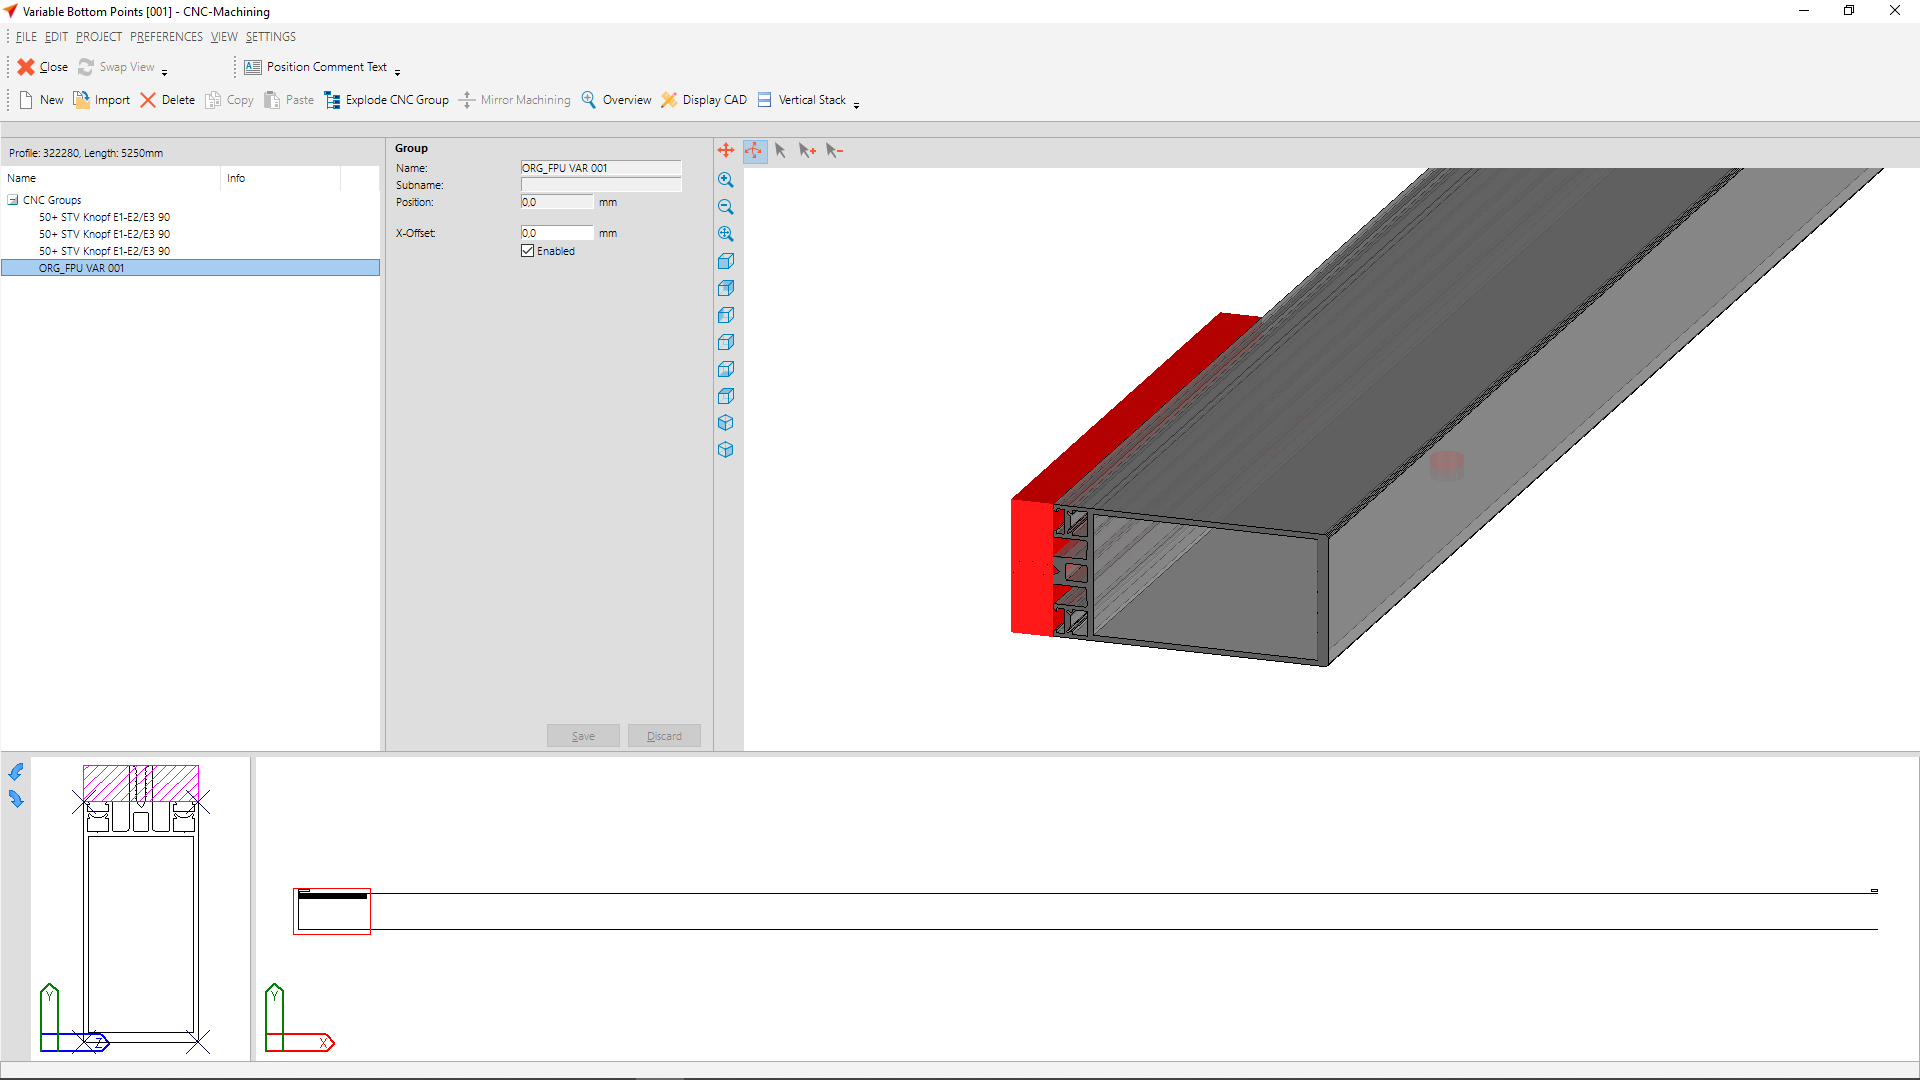
To see the result, switch to the 3D view of the mullion.


 English (UK)