Enter machinings
Click "CNC Database" > "CNC Machining" and select a system or click the "All Systems" button.
The input window for the CNC machining opens.
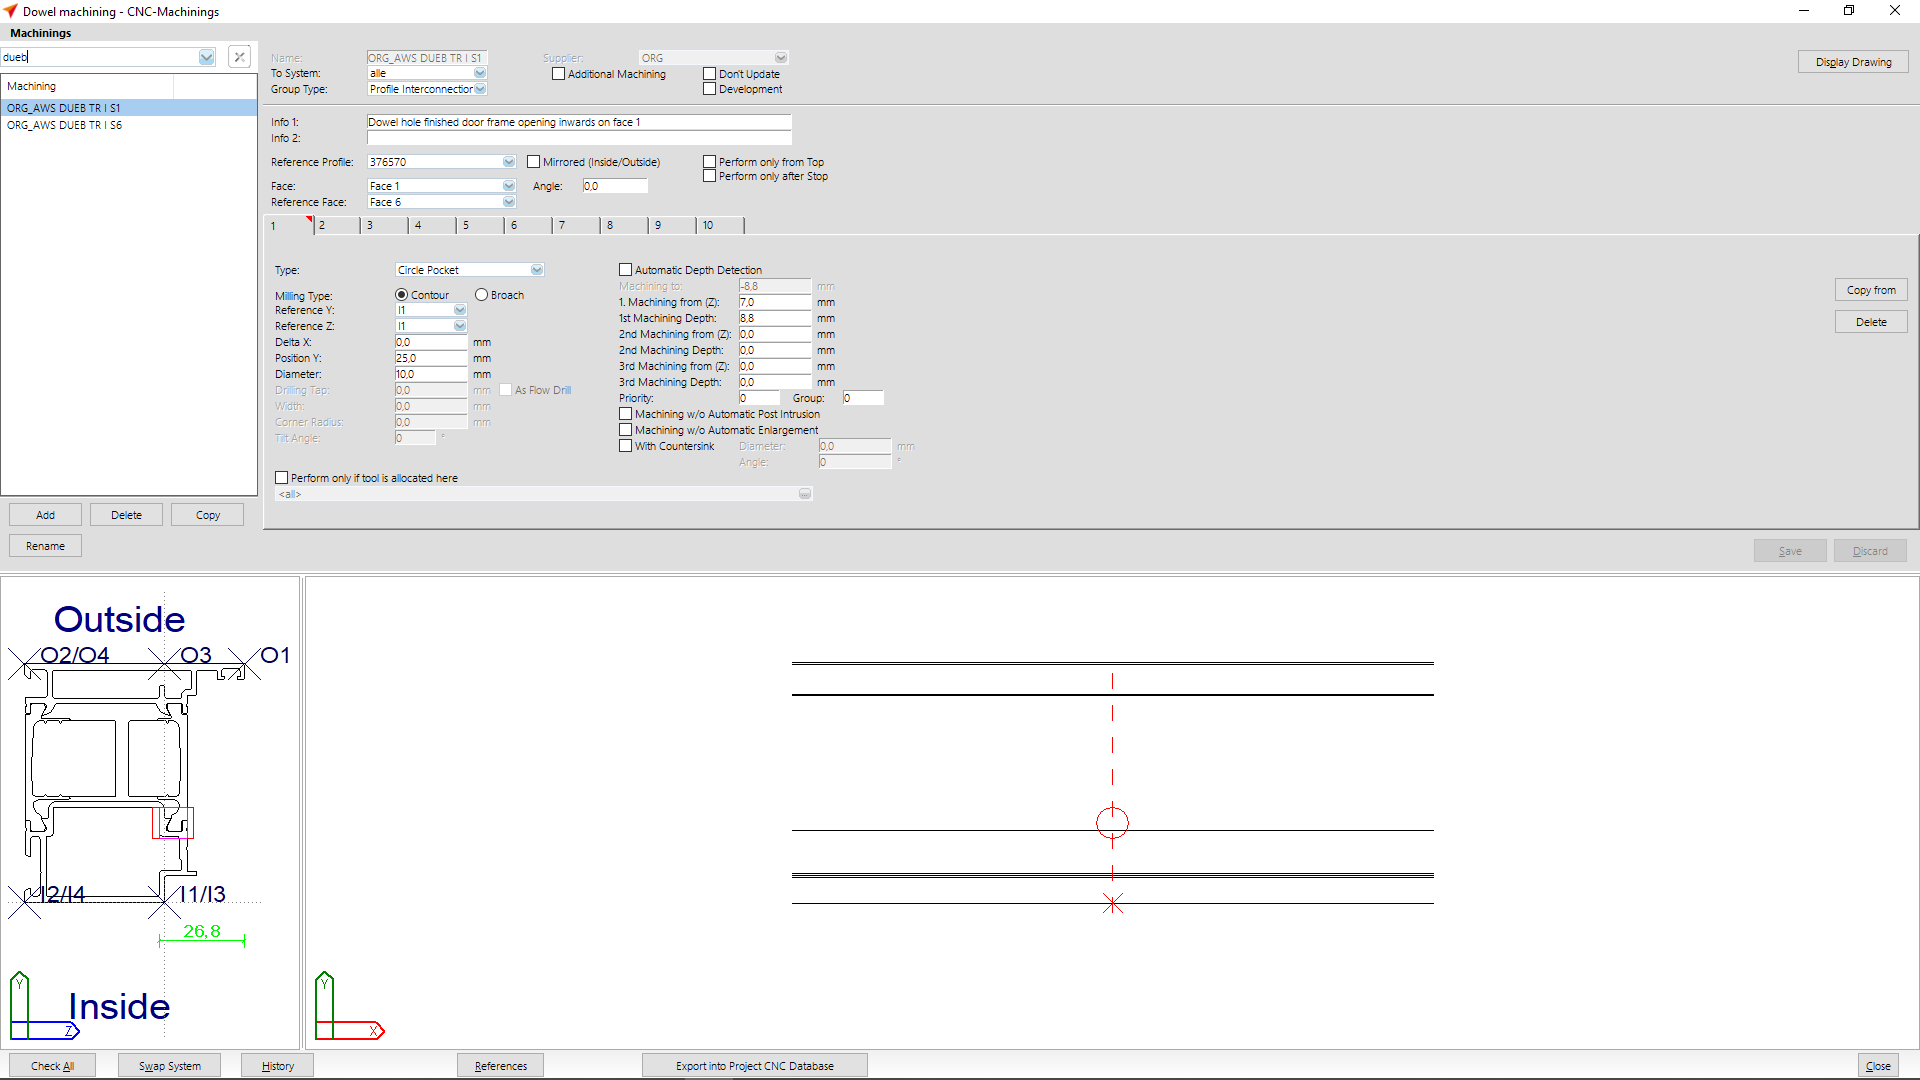
Create a machining for a anchor drilling on face 1.
At "Group type" select the option "Profile Interconnection Sequential".
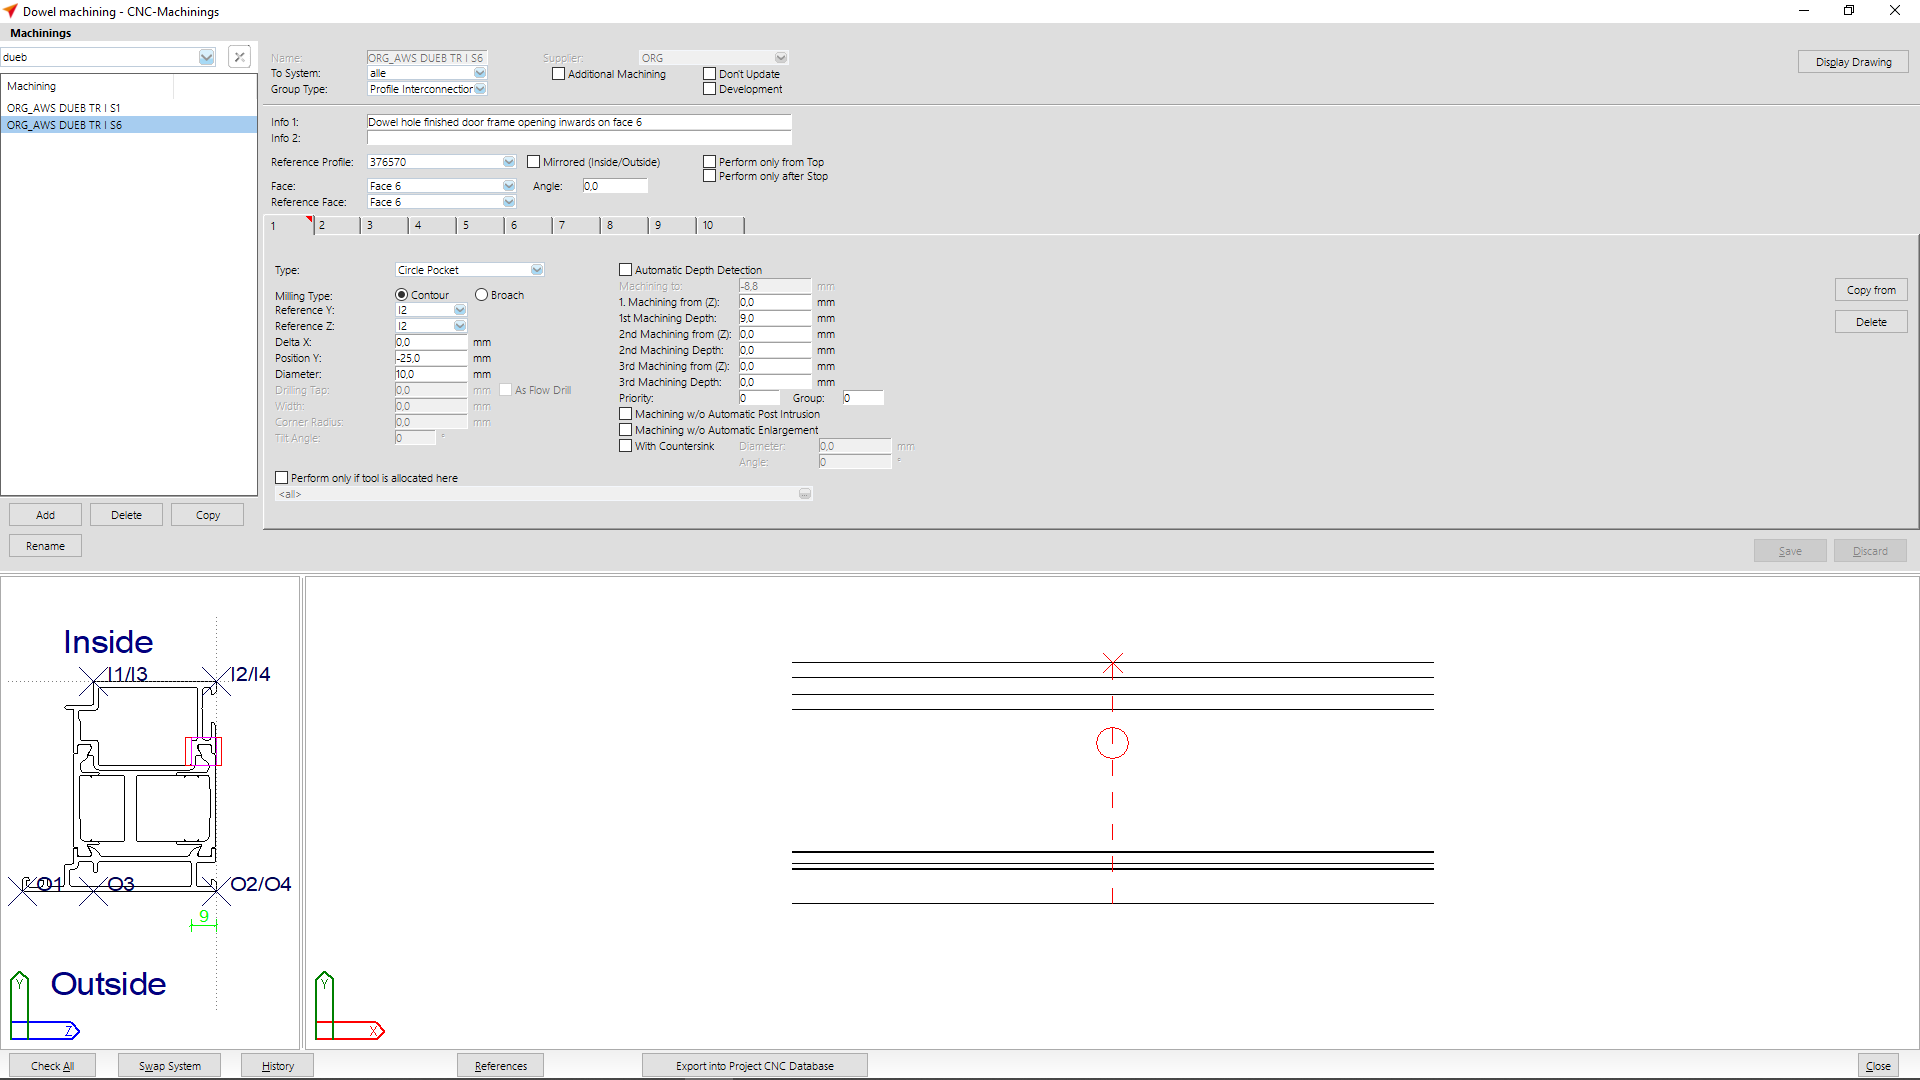
The "Reference Face" is the face that faces the leaf.
Afterwards you create a machining for a anchor drilling on face 6.
Group machinings
Select the appropriate system under "CNC Database" > "CNC Groups".

Click the "Add" button to create a new group.
Select the supplier and enter the group name for the machinings.
Determine the system in which the machining is to be used and select the option "Profile Interconnection Sequential" at Type. Then click on "OK".
Open the new group and define the distances here.
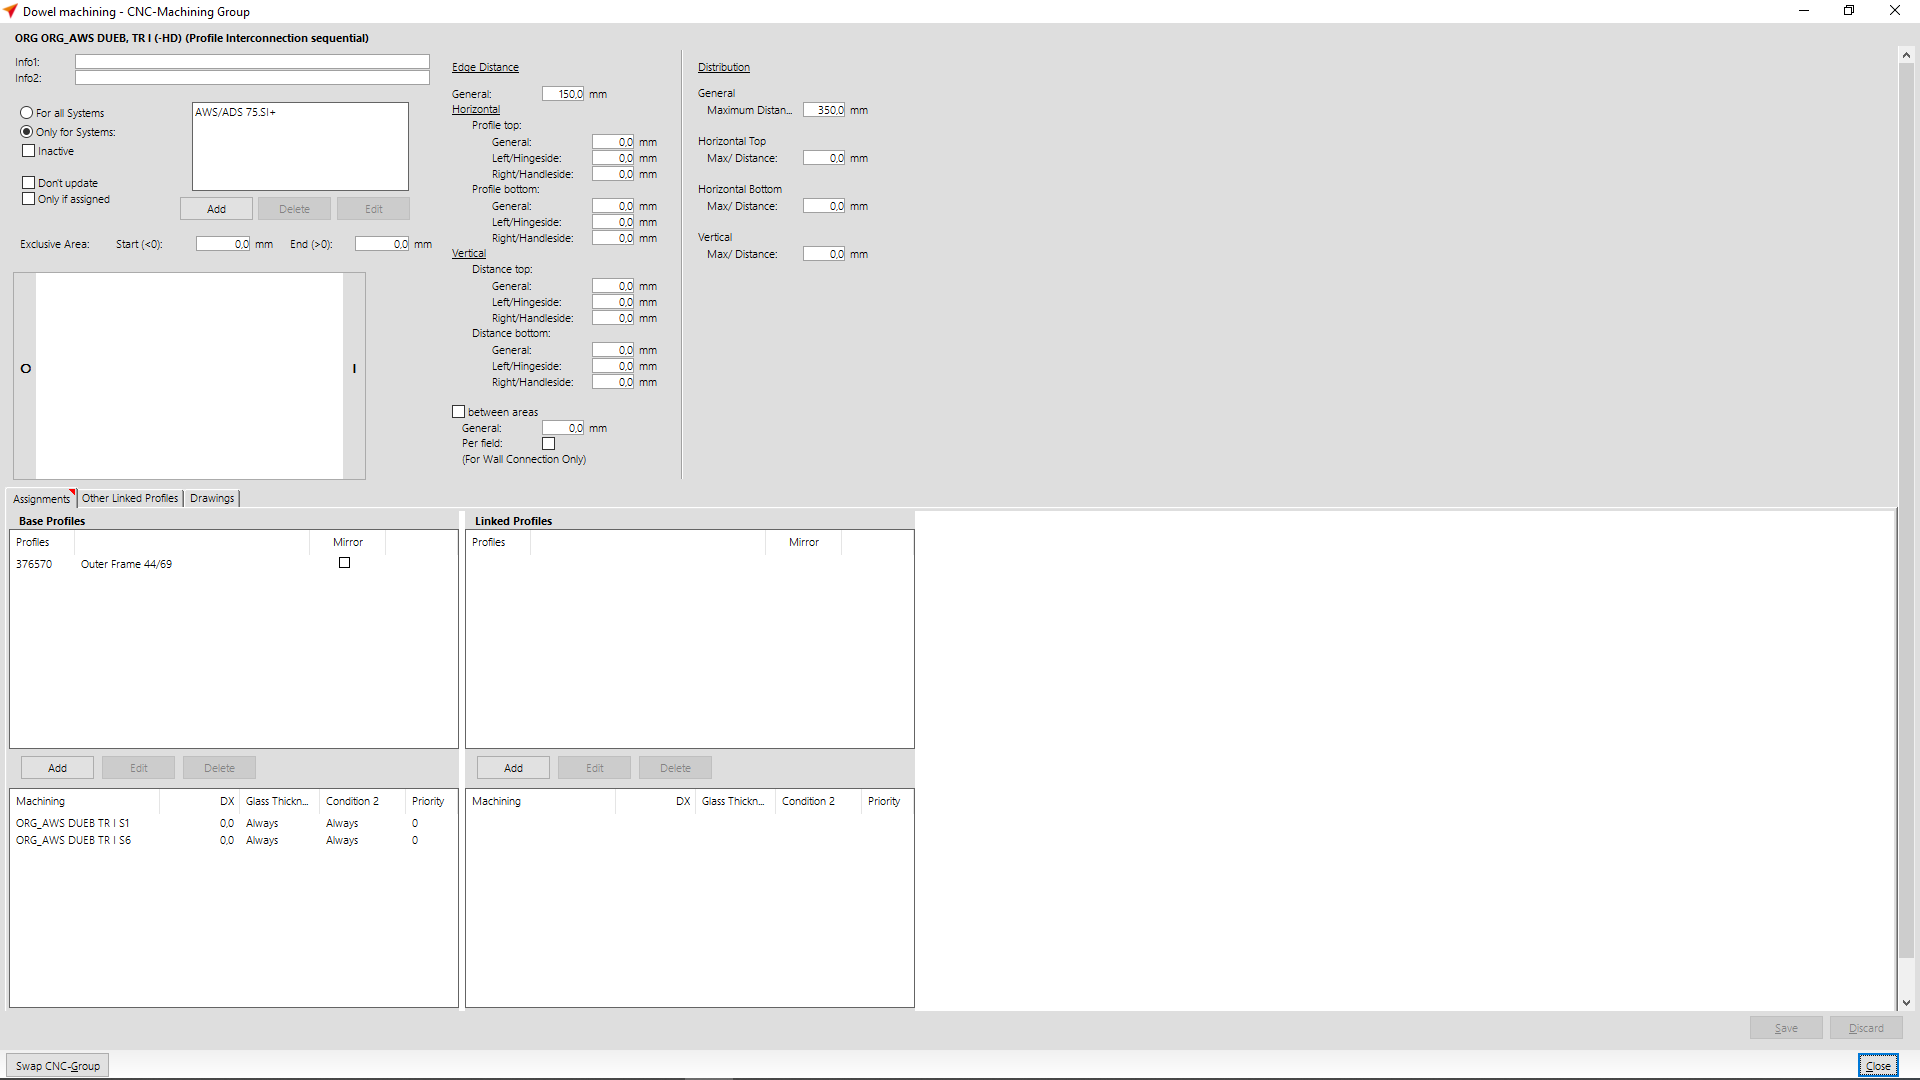
In the section "Base Profiles" you enter the profile(s).
To do this, click on the "Add" button and select a profile.
In the section "Machining" you enter your previously created machining.
To do this, click on the "Add" button and select the machining you created in the first step.
Save your settings.
Create a wall connection
Create a wall connection at "User Database" > "System Input" > "Wall Connection".

Assign the CNC group you have just created to the wall connection.
Use in input of elements
In the input of elements you can select the wall connection in the mask "Element" at "Wall Connection":

You can verify the machinings in the CNC-Machining.
The striking plate has an "exclusive area" by specifying the screw connection ("User Database" > "Door Hardware" > "Striking Plates"). In this area, only machinings for the striking plate are performed.
The anchor machining is automatically moved.


 English (UK)